Gunstock MagTube ForceTube Switch Side EN FR

RIGHT TO LEFT SWITCH SIDE
|
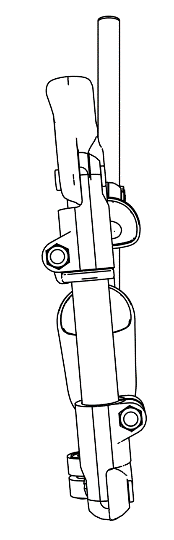
Hello, fellow gamer! If you are reading this, you laid your hands on one of our Gun Stocks. MagTube Rifle, with Classic Stock. Or ForceTube Rifle, with Haptic Recoil Stock. For both of them, you will use the same following steps to change the primary hand of your Gun Stock. The images represent a classic Stock, but this is the same for a ForceTube Haptic Stock. We invite you to join our Discord community for any question or directly contact us through our support service on our website.
Switching the side your MagTube / ForceTube Gunstock should take 20min. For video setup, you can check our YouTube Playlists. First, make sure you work in a clear area and be very careful, some parts can be lost easily. Page 2 |
Bonjour, camarade joueur ! Si tu lis ceci, c’est que tu mis la main sur l’un de nos fusils pour la Réalité Virtuelle. Fusil MagTube, avec crosse classique. Ou bien Fusil ForceTube, avec crosse haptique. Pour les deux, tu devras suive les mêmes étapes pour changer la latéralité de ton fusil. Les images représentent une crosse classique, mais c'est la même chose pour une crosse haptique ForceTube. Nous t’invitons à rejoindre notre communauté Discord pour toute question ou à nous contacter directement via notre service d'assistance sur notre site web.
Changer le sens de ton fusil MagTube / ForceTube devrait prendre 20min. Pour l'installation en vidéo, tu peux consulter nos playlists sur YouTube. Avant tout, assure-toi de travailler dans une zone dégagée et sois très prudent, certaines pièces peuvent se perdre facilement. Page 4 |


Feel the game!
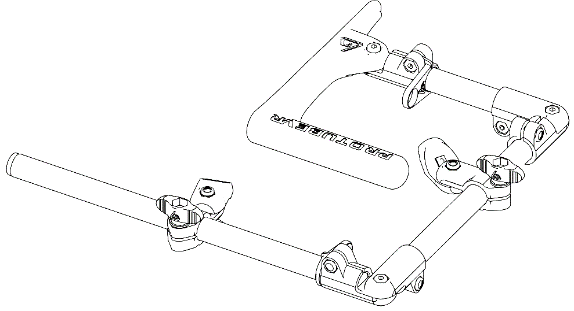
Step 1: Right to Left-handed / rEAR SIDE
For steps 1 & 2, if you want to switch from left-handed to right-handed, you just need to change the way of the magnetic supports are mounted.
You will need the provided tools (Allen key) to complete this step.
|
|
|
|
|
|
Unscrew the connection on the medium tube closest to the longer tube. |
Remove the screw and bolt (keep them safely as not to lose them). |
Remove the longer tube with the connections. |
|
|
|
|
|
|
|
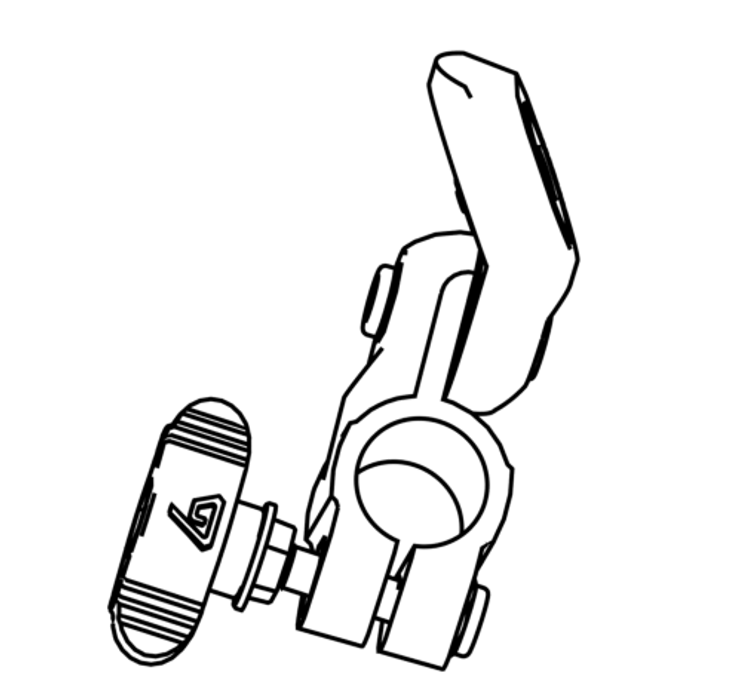
By untightening the butterfly screw, slide the magnetic bracket attachment out. |
Flip the magnetic bracket attachement. |
Put it back on the other way like shown. And tighten the butterfly screw to hold it in place (not too much, you may need to adjust it later). |
|
|
|
|
|
|
|
Put the connection back on the tube. |
The screw and bolt as well. |
Tighten the screw but not too much, you will need to adjust the gunstock once you’re done. |
|


Step 2: Right to Left-handed / Front Side
|
|
|
|
|
By untightening the lower butterfly screw, slide the magnetic bracket attachment out. |
Flip the magnetic bracket attachement. |
Put it back on the other way like shown. And tighten the butterfly screw to hold it in place (not too much, you may need to adjust it later). |


|
|
      |
      |
|
Bend all the connections at an angle of 90° so that the MagTube Rifle almost forms a square. |
Adjust the medium tube with the top of the stock and tighten a bit more the screw. |
Adjust the long tube with the rear of the butt and tighten a bit more the screw. |

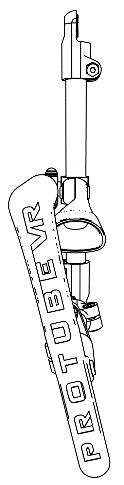
You can magnetically attach the MagCups to the black magnetic supports.
Make sure the logo on the cups are facing the front of the Rifle.
|
|
Congratulations! Your MagTube rifle is now on the other side! As a reminder, if you just got it, your MagTube/ForceTube will highly improve your freedom, reaction time, aiming and efficiency after some training. It may take some time to get used to. Thank you for choosing the best Virtual Reality stock rifle solution. But don’t take our word for it, try it. And most importantly, enjoy your games! |

Étape 1 : Droitier vers gaucher / Partie arrière
Pour les étapes 1 & 2, si tu veux passer de gaucher à droitier, il te suffit de changer le sens des supports magnétiques.
Tu auras besoin des outils fournis (clé Allen).
|
|
|
|
|
|
Dévisse le raccord T moyen (celle qui est la plus proche du grand tube). |
Enlève la vis et l’écrou (range les en sécurité afin de ne pas les perdre). |
Enlève le grand tube avec les connections. |
|
|
|
|
|
|
|
Désserre la vis papillon et enlève le support magnétique en le faisant glisser. |
Inverse le sens du support magnétique. |
Puis remets le sur le tube et resserre la vis papillon (pas trop, tu auras probablement besoin de réajuster le support magnétique plus tard). |
|
|
|
|
|
|
|
Remets le grand tube sur le moyen tube. |
Ainsi que la vis et l’écrou. |
Visse les, mais ne les sers pas trop, un ajustement sera nécessaire. |
|


Étape 2 : Droitier vers gaucher / Partie avant
|
|
|
|
|
Désserre la vis papillon et enlève le support magnétique en le faisant glisser. |
Inverse le sens du support magnétique |
Puis remets le sur le tube et resserre la vis papillon (pas trop, tu auras probablement besoin de réajuster le support magnétique plus tard). |


|
|
      |
      |
|
Plie tous les raccords en angle de 90° pour que le MagTube forme presque à un carré. |
Règle le tube moyen avec le dessus de la crosse et visse plus fermement la vis. |
Règle le tube long avec la partie avant de la crosse et visse plus fermement la vis. |
Maintenant, tu peux fixer tes coupelles magnétiques aux supports magnétiques.
Assure-toi que les logos sur les coupelles font face à l’avant du fusil.
|
|
Félicitation ! Ton Fusil VR est maintenant opérationnel ! Pour rappel : si tu débutes avec ton MagTube/ForceTube, tu amélioreras grandement ta liberté, ton temps de réaction, ta visée et ton efficacité après un certain entraînement, le temps que tu t’y habitues. Merci d'avoir choisi la meilleure solution de fusil pour Réalité Virtuelle. Mais ne nous fais pas confiance sur parole, essaie-le. Et surtout, profite de tes jeux ! |

No Comments