ProSaber Mounting EN FR

ProSaber
|
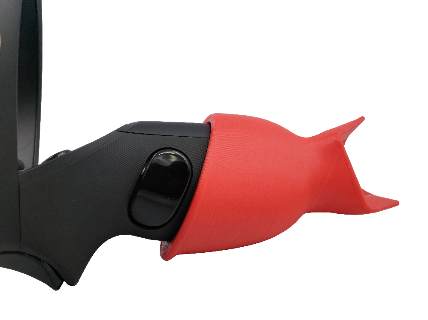
Hello, fellow gamer! If you are reading this, you laid your hand on one of our ProSabers. With it, you will be able to play in Darth Maul mode in Beat Saber and similar games. We invite you to join our Discord community for any question or directly contact us through our support service on our website.
Mounting your ProSaber should take 10 minutes. First, make sure you work in a clear area and be very careful. Some parts can get lost easily. Thank you for choosing the best Virtual Reality saber. But don’t take our word for it, try it. And most importantly, enjoy your games! |
Bonjour, camarade joueur ! Si tu lis ceci, tu as mis la main sur un de nos ProSaber. Avec lui, tu pourras jouer en mode Dark Maul dans BeatSaber et d'autres jeux similaires. Nous t’invitons à rejoindre notre Discord pour toute question ou à nous contacter directement via notre service d'assistance sur notre site web.
Le montage devrait prendre 10 minutes. Tout d'abord, assure-toi de travailler dans une zone dégagée et sois très prudent. Certaines pièces peuvent se perdre facilement. Merci d'avoir choisi le meilleur sabre pour Réalité Virtuelle. Mais ne nous crois pas sur parole, essaie-le. Et surtout, profites de tes jeux ! Feel the game! |


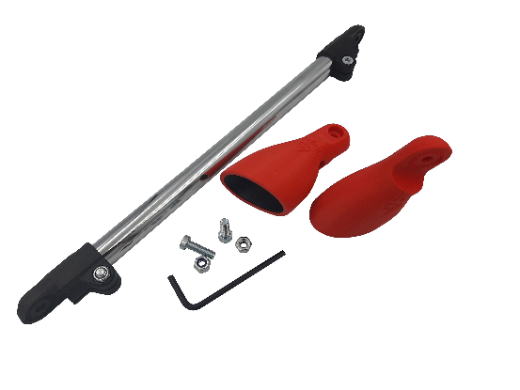
Parts list
ProSaber Bag
|
|
|
|
|||||
|
x2 |
x2 |
x1 |
|||||
|
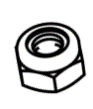
Nut |
20mm screw |
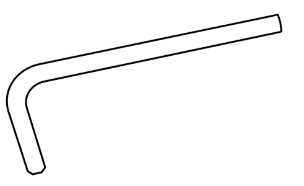
Hex Key 0,4cm |

Rest of the box
|
|
|
|
||||||||
|
x2 |
X1 |
X2 |
||||||||
|
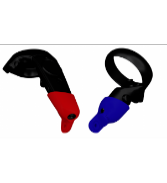
Left & Right ClassiCup |
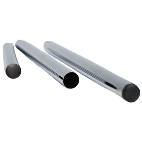
Tube 300mm |
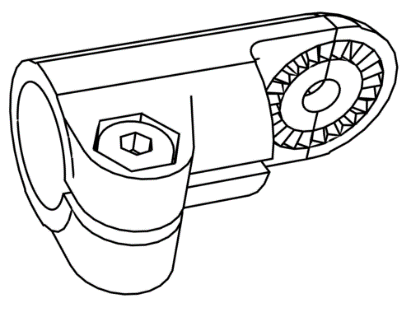
Connection with internal notches |
||||||||
|
Mounting |
English |
Français |
||||||||
|
|
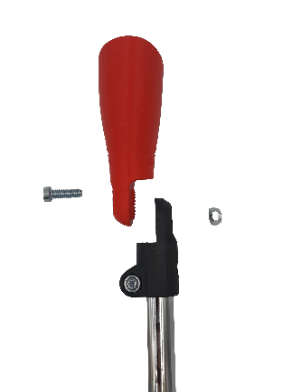
1 – First, make sure you have everything you need to mount your ProSaber. |
1 – Tout d’abord, assure-toi que tu as tous les éléments pour monter ton ProSaber. |
||||||||
|
|
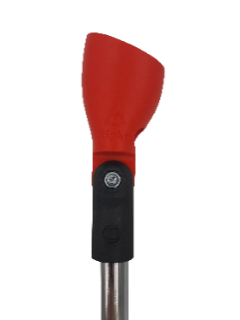
2a – The screw needs to go on the cup and the nut on the internal notched connection. |
2a – La vis doit aller dans la coupelle et l’écrou dans le raccord cranté intérieur. |
||||||||
|
|
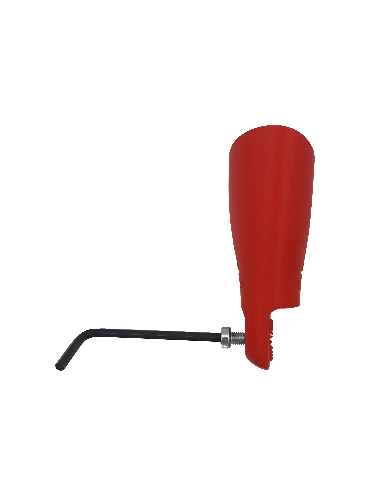
2b – If you are having trouble inserting the screw on the cup, you can use the Hex key to screw it in. |
2b – Si tu as du mal à faire entrer la vis dans la coupelle, tu peux utiliser la clef Allen pour la visser dedans. |
||||||||
|
|
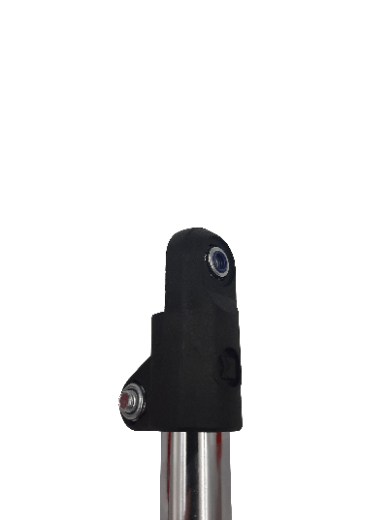
2c – The nut needs to go on the internal notched connection. |
2c – L’écrou doit aller dans le raccord cranté intérieur. |
||||||||
|
|
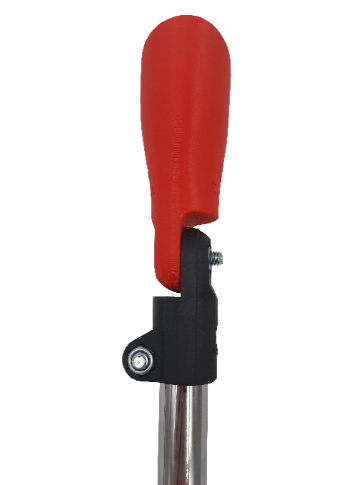
3 – Before tightening the screw, make sure it is aligned with the tube (example for Quest 2). It is preferable to put the controller in the cup to better realize this. |
3 – Avant de serrer la vis, assure-toi que la coupelle est bien alignée avec le tube (exemple pour Quest2). Il est préférable de mettre le contrôleur dans la coupelle pour mieux se rendre compte. |
||||||||
|
|
4 – Tighten the screw using the provided Hex key. |
4 – Serre la vis en utilisant la clef Allen. |
||||||||
|
|
5 – Make sure to tighten it strongly so the cup won’t move at all. |
5 – Assure toi de la serrer suffisamment pour que la coupelle ne bouge plus du tout. |
||||||||
|
|
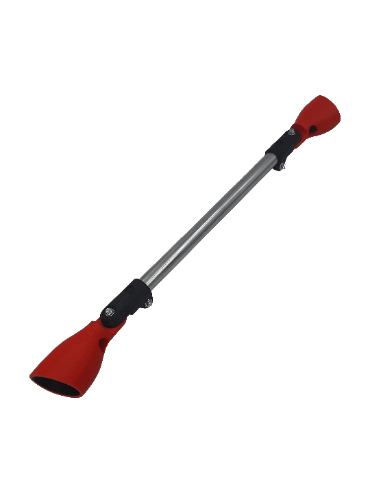
Do this with the other cup. You now have a fully functioning ProSaber! |
Fais cela avec l’autre coupelle. Tu as maintenant un ProSaber fonctionnel ! |
||||||||
|
|
6 – Finally, insert the controllers in the cups, make sure to push them enough so they stay in. Enjoy this Darth Maul mod Saber. |
6 – Pour finir, insère les contrôleurs dans les coupelles et assure-toi de les enfoncer suffisamment pour qu’ils n’en sortent pas facilement. Tu peux maintenant apprécier de jouer avec le Sabre de Dark Maul. |
||||||||

|
controllers Security |
ENGLISH |
FRANÇAIS |
|
|
|
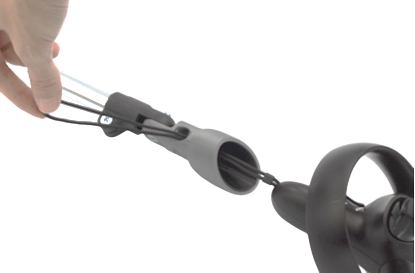
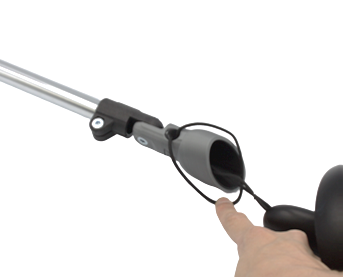
Pass the controller’s wrist strap into the cup’s hole |
Passe la dragonne dans le trou de la coupelle. |
|
|
|
Pass the controller into the wrist strap |
Passe le contrôleur dans la dragonne. |
|
|
|
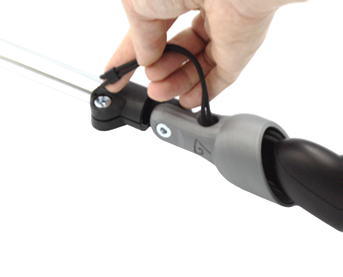
Pass the wrist strap under the cup |
Fais passer la dragonne sous la coupelle. |
|
|
|
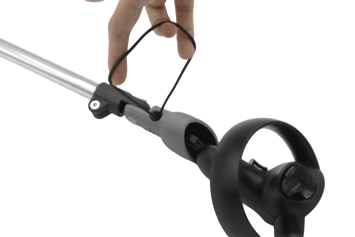
Use the slider to tighten it on the ProSaber. |
Utilise le glisseur pour le serrer sur le ProSabre. |
|
|
|
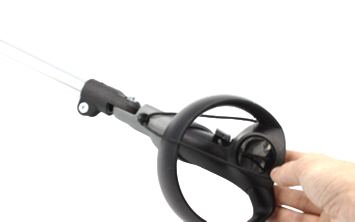
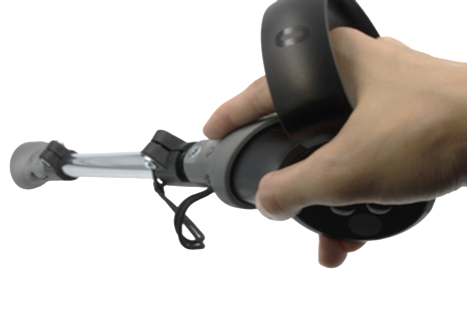
Push the controller into the cup. The more you push, the more it stays in the cup. Be careful not to push too much, it might damage the controller and/or the cups |
|
No Comments