
MagTube Upgrade EN Test

UPGRADE PROTUBE TO MAGTUBE
Hello, fellow gamer!
If you are reading this, you are willing to upgrade your ProTube to the magnetic version, the MagTube. And increase your comfort while playing. We will help you to do it!
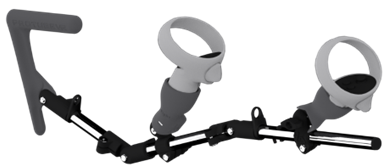
The MagTube allows you to detach the controllers (and its MagCups)magnetic cups) from the frame without having to take the controllers off the cups.
Wetherefore inviteincreasing youyour tocomfort joinwhile our Discord community for any questions or directly contact us through our support service on our website.playing.

Upgrading your ProTube to a MagTube should take 10 minutes.
For video setup, you can check our YouTube Playlist.
First, makeMake sure you work in a clear area and be very careful. Some parts can geteasily lostbe easily.lost.
Thank you for choosing the best Virtual Reality stock rifle solution. But do not trust us by word, try it. And most importantly, enjoy your games!
PARTS LIST
________________________________________________________________________________________________________________________________________________
| Upgrade Parts | Tools bag | ||||
 |
 |
 |
 |
||
| x2 | x1 | x1 | x1 | x1 | |
| Pair of controller holders (cups) | Notched retainer | Smooth Bracket | Hex Key 4mm | Hex Key 2,5mm | |
Step 1: Dismantle the fixed cups
________________________________________________________________________________________________________________________________________________
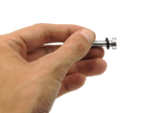
You need to remove the fix cups on your ProTube using the provided larger Allen key.
Make sure to keep all screws and bolts.
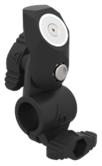
STEP 2: The rear magnetic cup
________________________________________________________________________________________________________________________________________________
     |
||
|
What you need for the rear MagCup (medium tube):
|
||
....................................................................................................................................................................................................................................................................................
 |
 |
| Put the O-ring on the 20mm screw. | Pass the screw and O-ring through the notched magnetic support. |
 |
 |
| Join
|
Add the nut and tighten, the magnetic support must be able to move though. |
Step 1: dismantle the fixed cupscup
________________________________________________________________________________________________________________________________________________
You
 |
||
|
What you need for the
|
||
....................................................................................................................................................................................................................................................................................
|
|
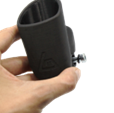
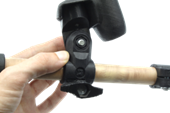
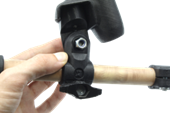
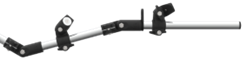
| Remove the old smooth 3D printed T-connection from the front longer tube. Replace it with the new magnetic bracket. The magnet must face the other way to the rear magnetic bracket (ex: to the left if you are right-handed). |


....................................................................................................................................................................................................................................................................................________________________________________________________________________________________________________________________________________________
 |
|
You can now install your new magnetic controller holders (
|