Gunstock MagTube ForceTube Setup EN FR

Gun Stock Setup Instruction
|
Hello, fellow gamer! If you are reading this, you laid your hands on one of our Gun Stocks. MagTube Rifle, with Classic Stock. Or ForceTube Rifle, with Haptic Recoil Stock. For both of them, you will use the same following steps to build your Gun Stock. The images represent a classic Stock, but this is the same for a ForceTube Haptic Stock. We invite you to join our Discord community for any question or directly contact us through our support service on our website.
Mounting your MagTube / ForceTube Gun Stock should take 1h30m. For video setup, you can check our YouTube Playlists. First, make sure you work in a clear area and be very careful, some parts can get lost easily. Thank you for choosing the best Virtual Reality stock rifle solution. But don’t take our words for it, try it. And most importantly, enjoy your games! |
Bonjour, camarade joueur ! Si tu lis ceci, c’est que tu as mis la main sur l’un de nos fusils pour la Réalité Virtuelle. Fusil MagTube, avec crosse classique. ou Fusil ForceTube, avec crosse haptique. Pour les deux, tu suivras les mêmes étapes pour construire ton fusil. Les images représentent une crosse classique, mais c'est la même chose pour une crosse haptique ForceTube. Nous t’invitons à rejoindre notre communauté Discord pour toute question ou à nous contacter directement via notre service d'assistance sur notre site web.
Le montage de ton fusil MagTube / ForceTube devrait prendre 1h30. Pour l'installation en vidéo, tu peux consulter nos playlists sur YouTube. Avant tout, assure-toi de travailler dans une zone dégagée et sois très prudent, certaines pièces peuvent se perdre facilement. Merci d'avoir choisi la meilleure solution de fusil pour Réalité Virtuelle. Mais ne nous fais pas confiance sur parole, essaie-le. Et surtout, profite de tes jeux ! |


Feel the game!
Bag n°1
|
|
|
|
|
|
|
|
|
x1 |
x1 |
x2 |
x1 |
x2 |
x1 |
x1 |
|
Ring |
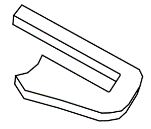
Wedge |
Connection with internal notches |
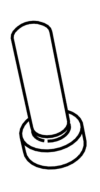
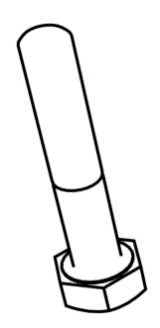
20mm screw |
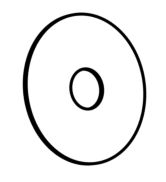
O'ring |
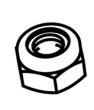
Nut |
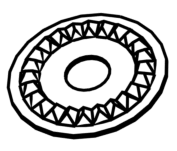
Notched washer |


Bag n°2
|
|
|
|
|
|
|
|
|
|
x2 |
x1 |
x1 |
x1 |
x1 |
x1 |
x4 |
x2 |
|
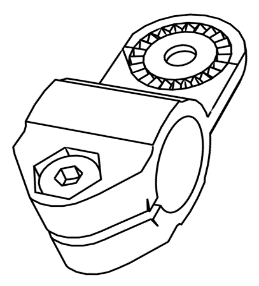
Connection with external notches |
T-noched connection |
Hex screw |
Butterfly |
Hex washer |
20mm screw |
O'ring |
Nut |


Bag n°3
|
|
|
|
|
|
|
|
|
|
|
|
x1 |
x1 |
x1 |
x1 |
x2 |
x2 |
x2 |
x2 |
x1 |
x2 |
|
Ring |
Wedge |
Connection with internal notches |
T-noched connection |
Hex screw |
Butterfly |
O'ring |
Nut |
Rubber washer |
Hex washer |


Bag n°4
|
|
|
|
x1 |
x1 |
|
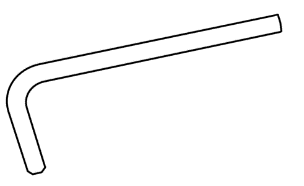
Hex Key 0,4cm |
Hex Key 0,25cm |

MagTube - Rest of the box
|
|
|
|
|
|
|
|
|
|
x1 |
x1 |
x1 |
x1 |
x2 |
x2 |
x1 |
x1 |
|
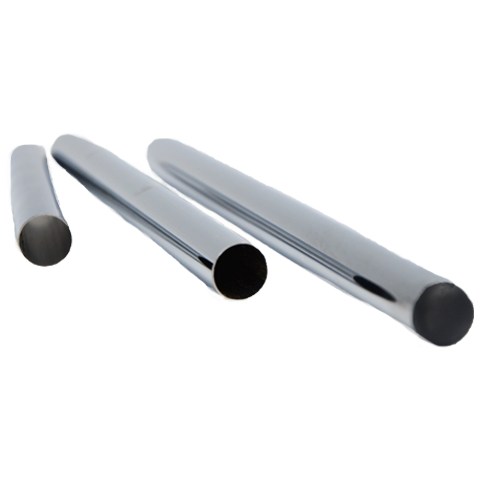
Tube 130mm |
Tube 200mm |
Tube 250mm |
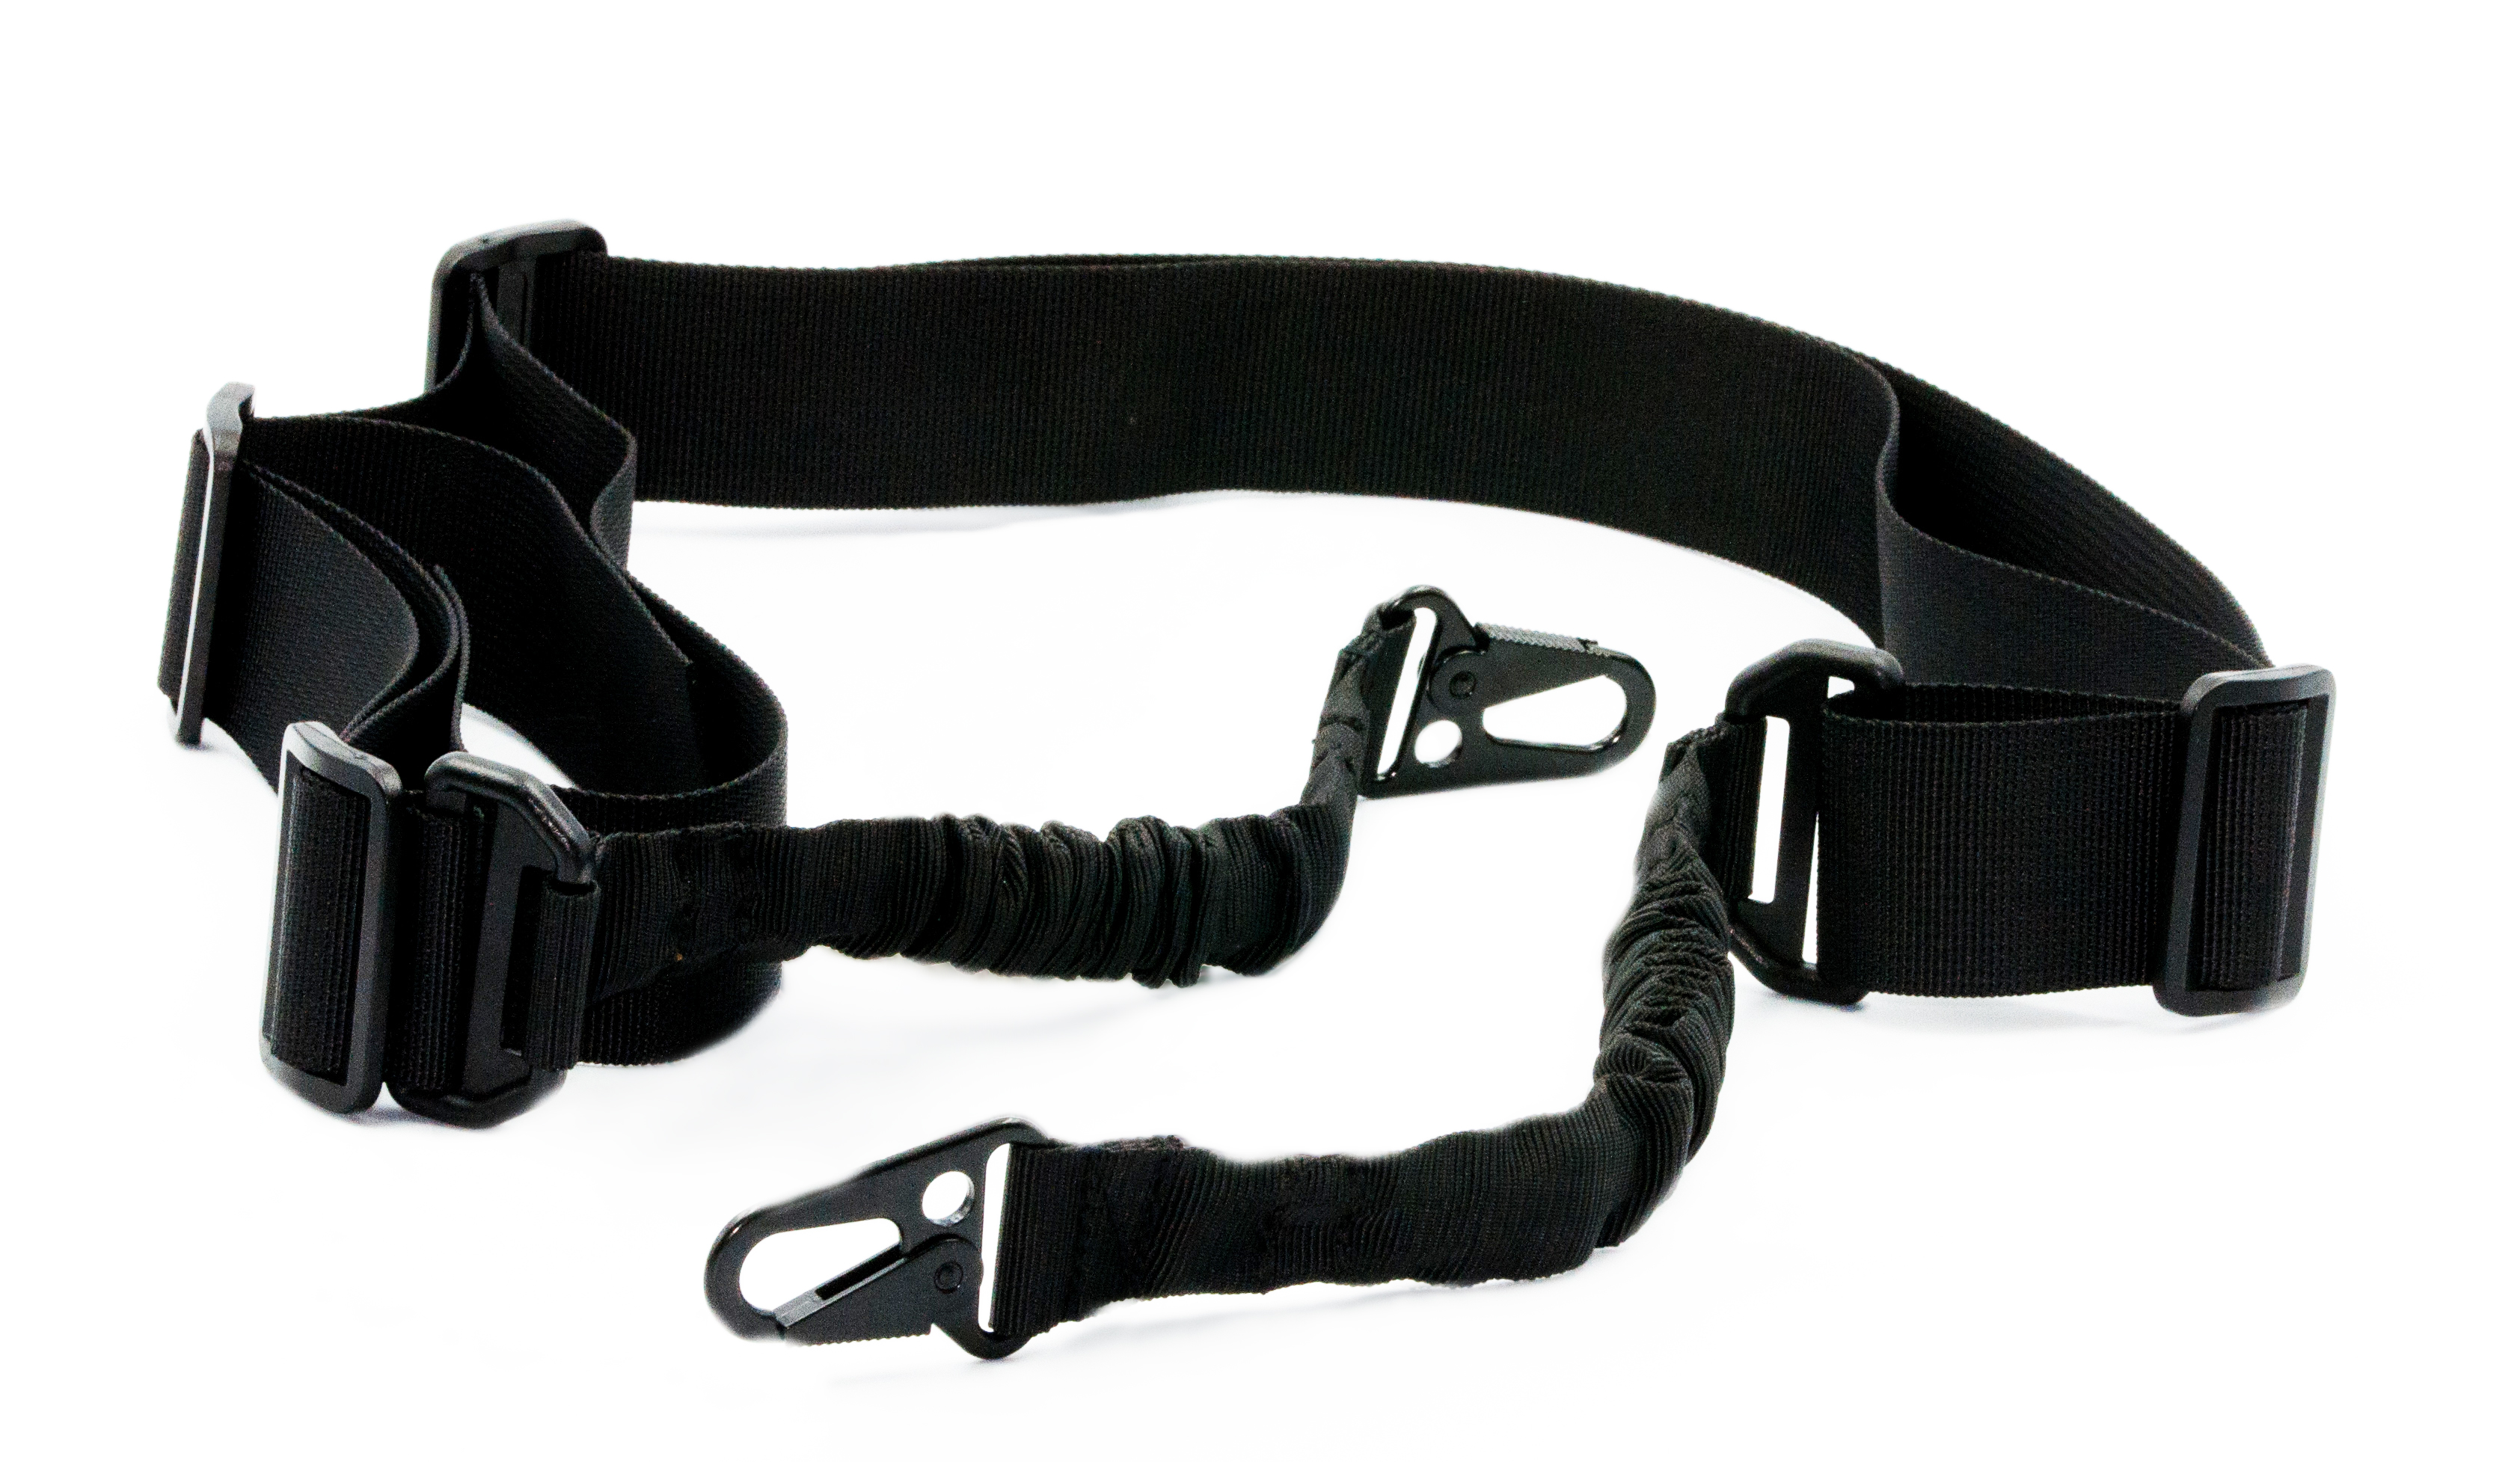
1 point or 2 points sling |
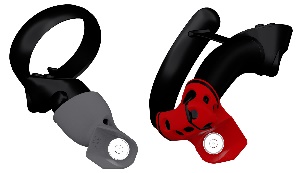
Left & Right MagCups |
Magnetic Supports |
Classic Stock |
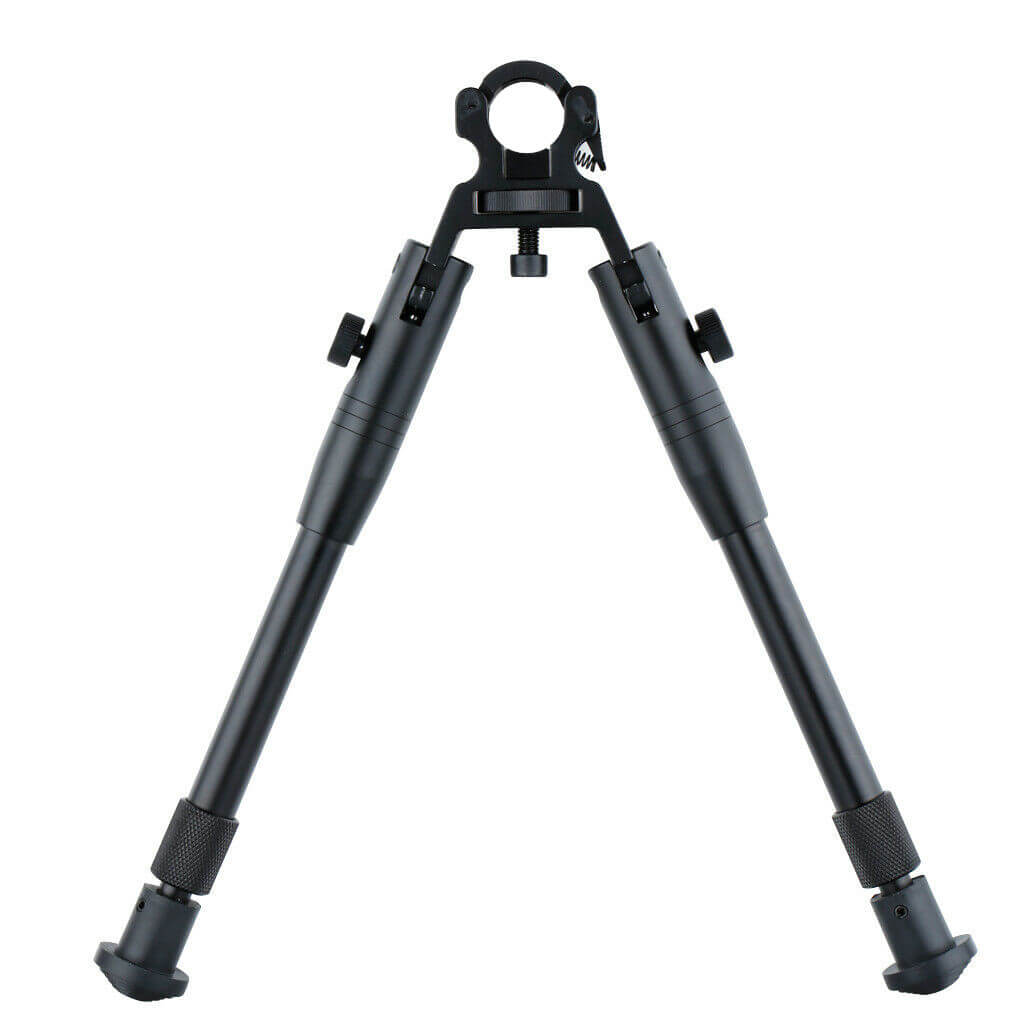
Optional : Bipod |


ForceTube - Rest of the box
|
|
|
|
|
|
|
|
x1 |
x1 |
x1 |
x1 |
x2 |
x2 |
|
Tube 130mm |
Tube 200mm |
Tube 250mm |
One Point or Two Points sling |
Left & Right MagCups |
Magnetic Support |
|
|
|
|
|
||
|
x1 |
x1 |
x1 |
x1 |
||
|
Haptic ForceTube Stock |
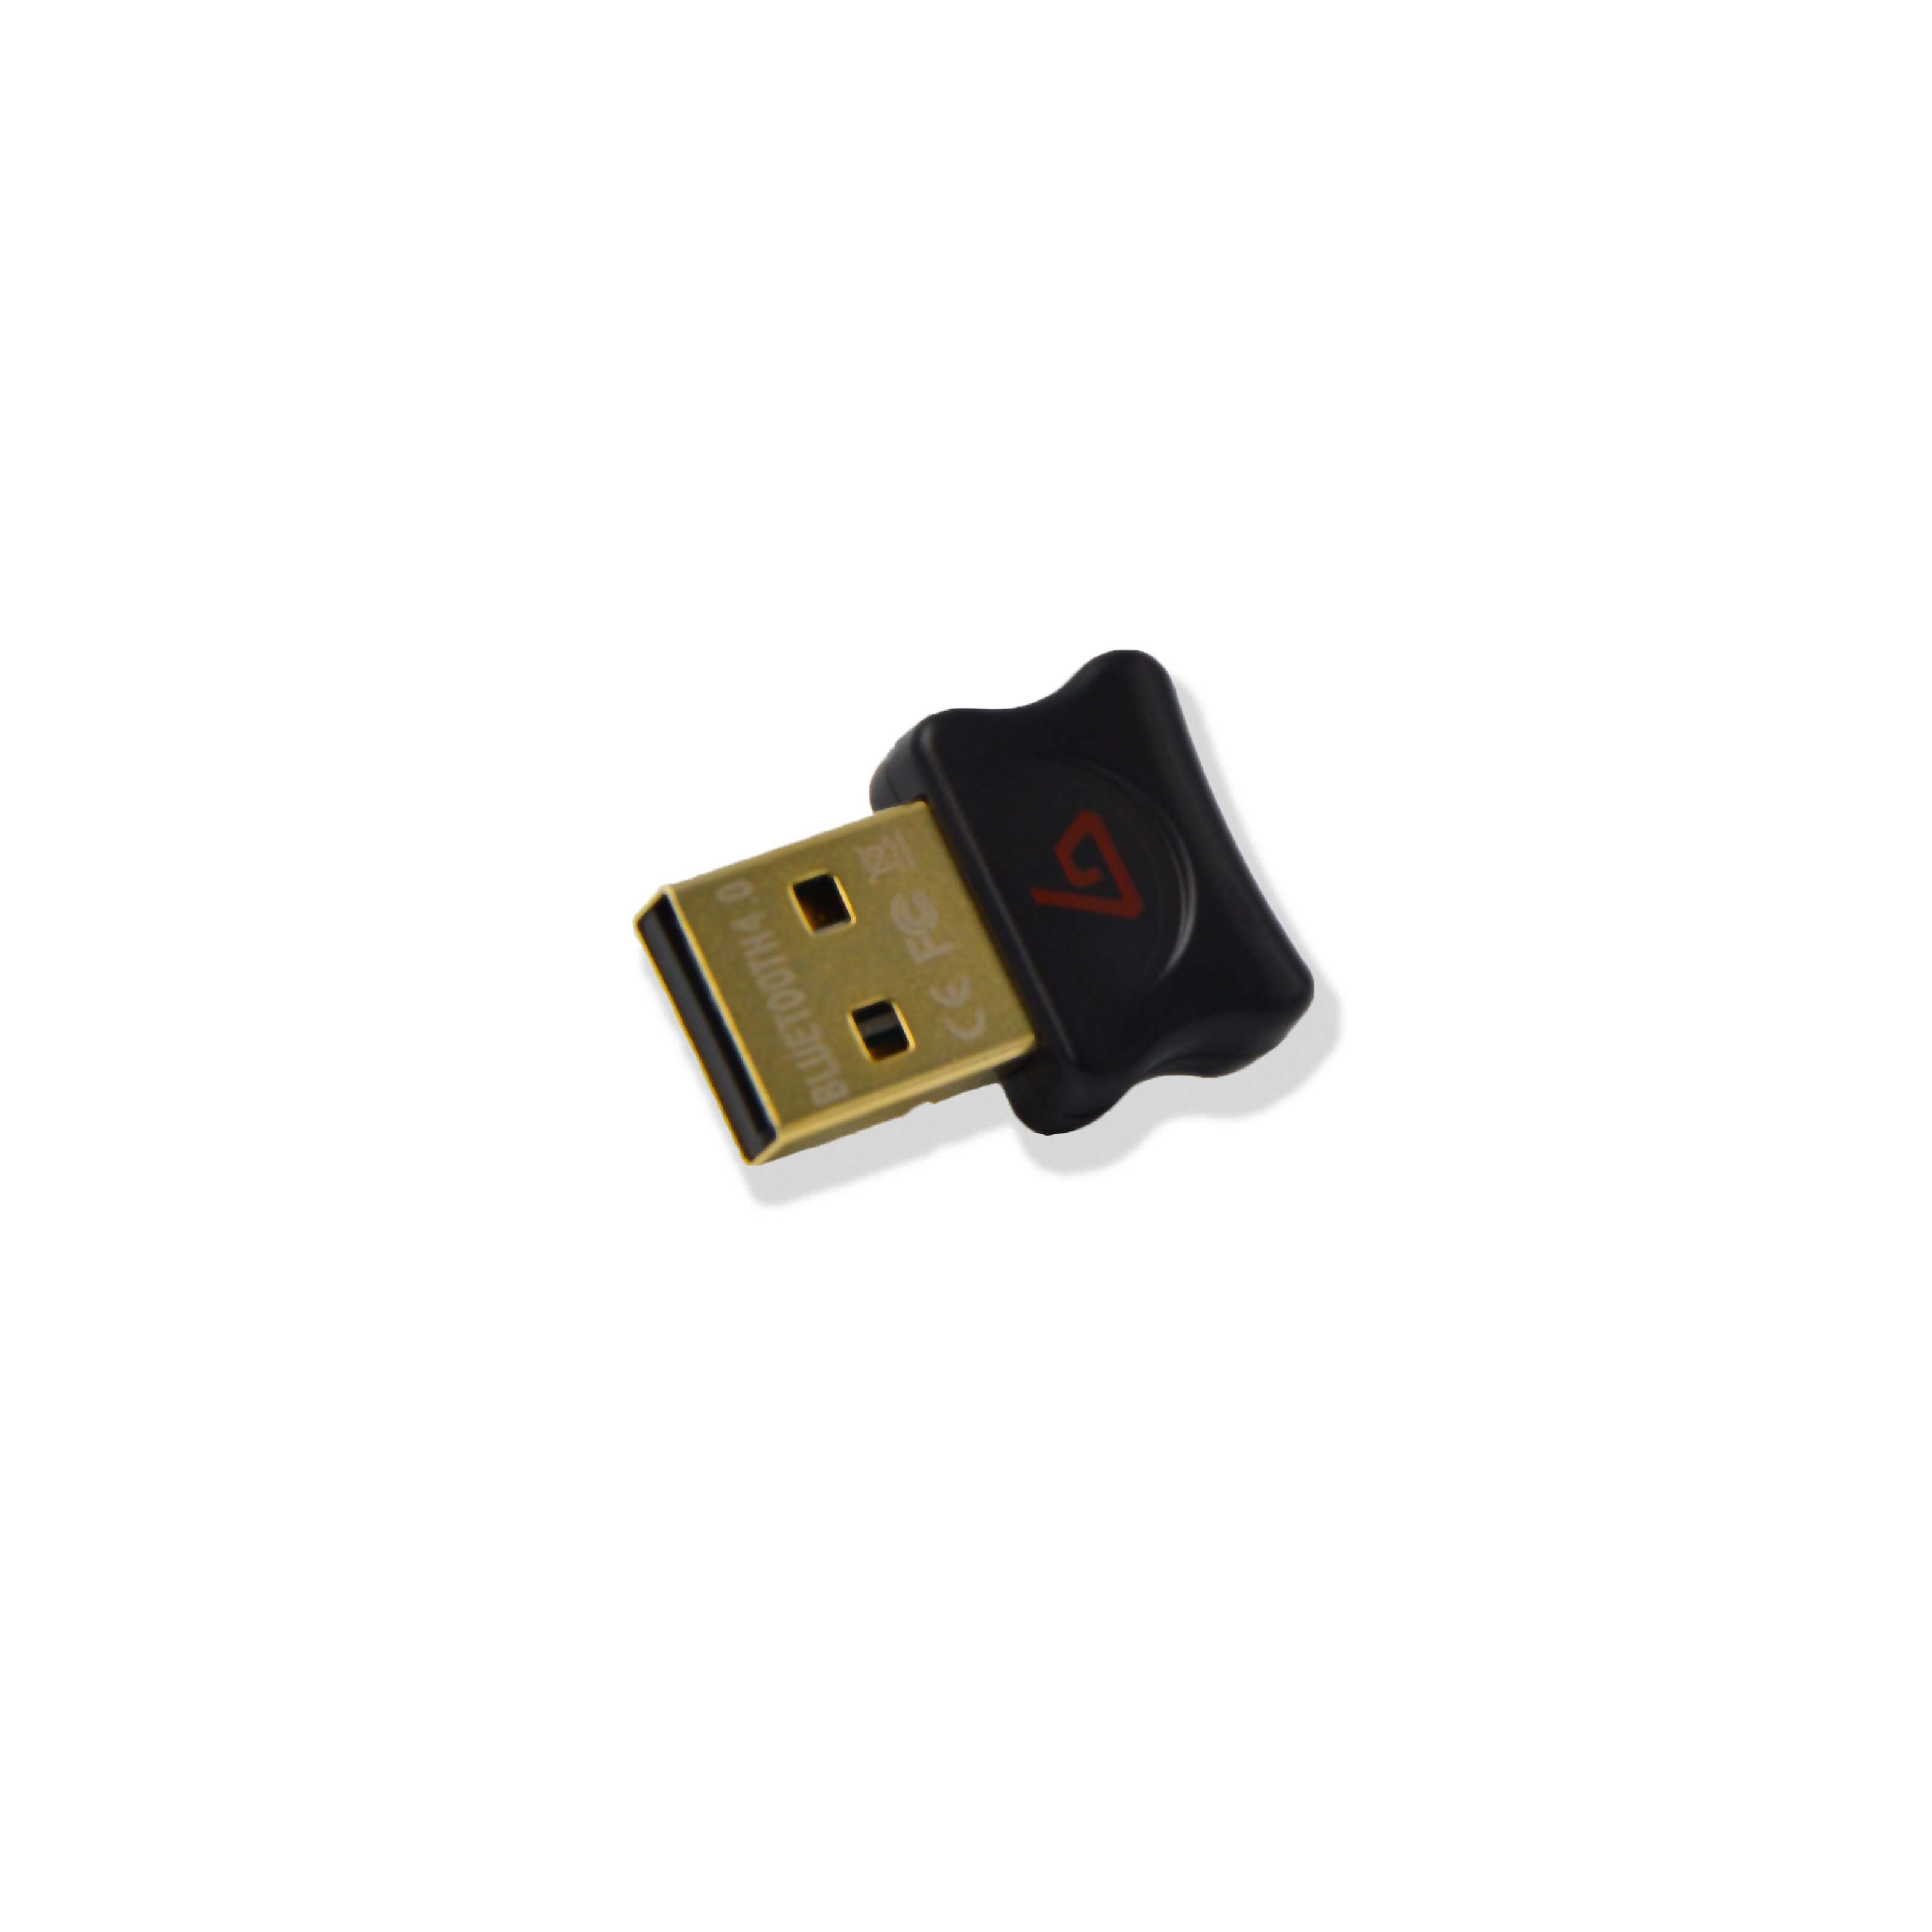
Bluetooth USB Dongle |
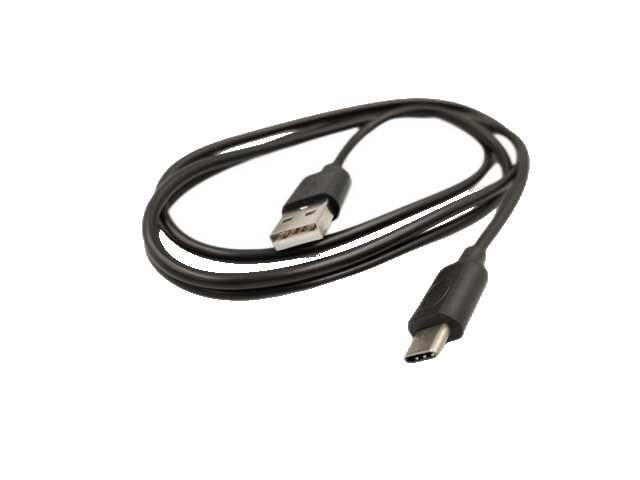
USB-C Charging cable |
Optional : Bipod |


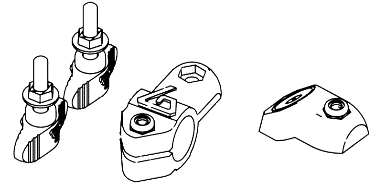
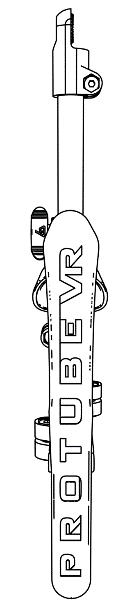
You will need: bag n°1, smallest tube and rifle stock.
|
|
|
|
|
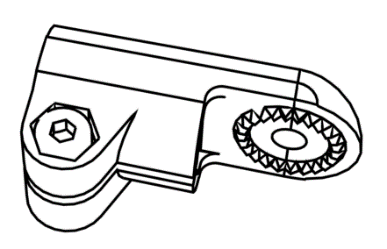
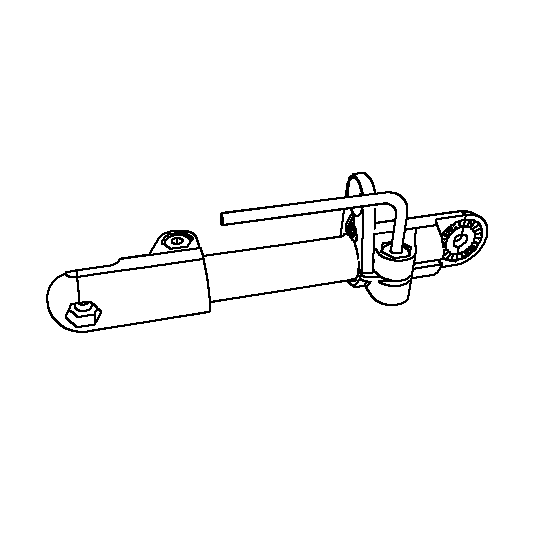
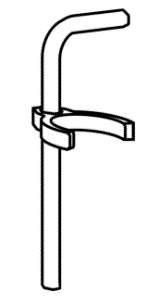
1.a – Put the wedge on the ring and put them both on the smallest tube. (This step is not needed if you have a ForceTube) |
1.b – Put the two connections with internal notches on each part of the small tube and screw them with the Hex key. |
1.c – Apply some oil all around the notches on the connection which is the nearest from the ring. |
|
|
|
|
|
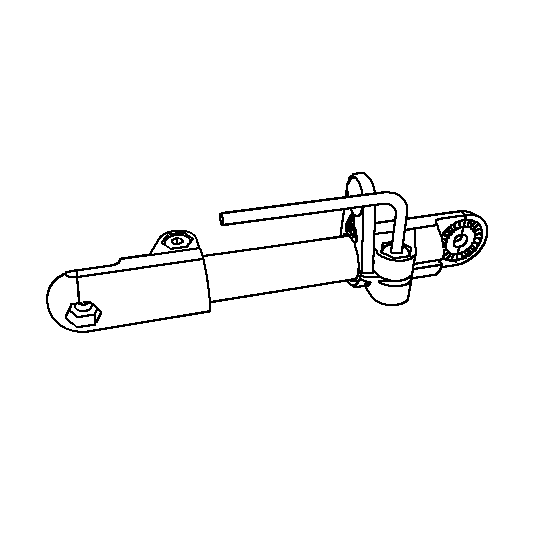
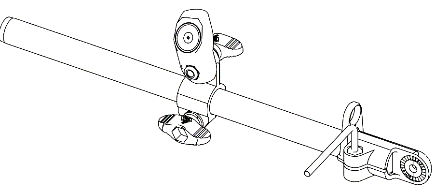
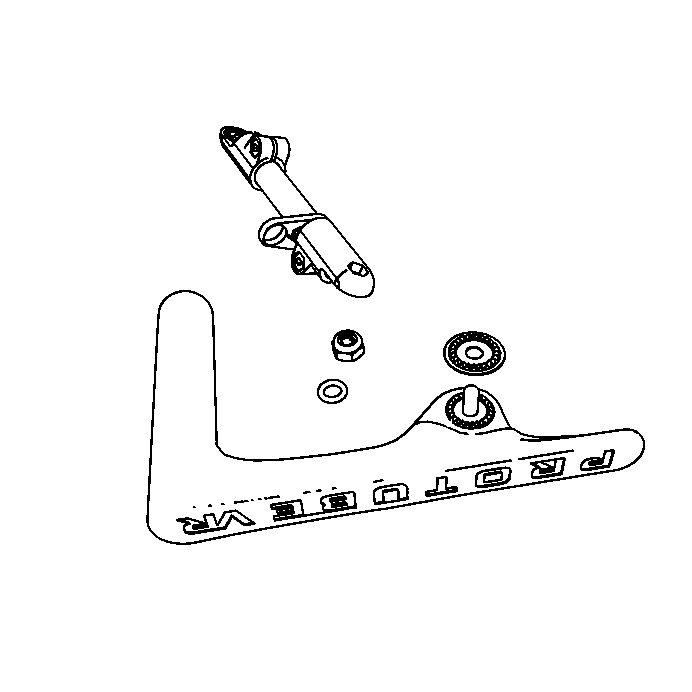
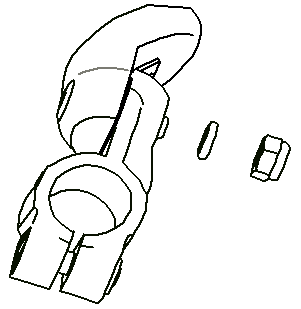
1.d – Put one O’ring on the 20mm screw, slot them both into the hole provided in the stock. |
1.e – Then slide the notched washer (the notches have to be facing the same way) and the previously oiled connection over the screw. |
1.f – Attach the screw securing the stock and the connection with one O’ring and the nut. |
|
|
||
|
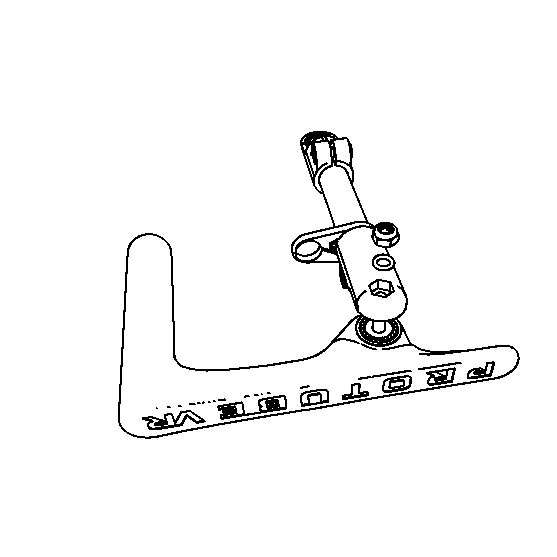
1.g – Screw all the pieces together taking care not to over tighten. You must be still able to rotate the stock by force. |
||


|
In the next steps, you will need the magnetic supports. They are usually magnetically attached to the MagCups. The magnets are quite strong when trying to detach them with hands, but do not be afraid of breaking them, they are made to resist this step. You just need a little force to separate them. |
|
|
To help, here is a .gif that shows how to separate them. |

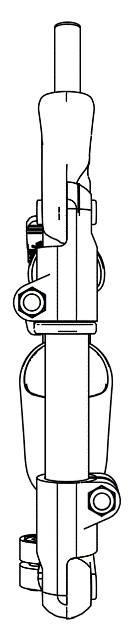
You will need: bag n°2, medium tube and notched magnetic bracket.
 |
The mag support is usually attached to the MagCup |
|
|
|
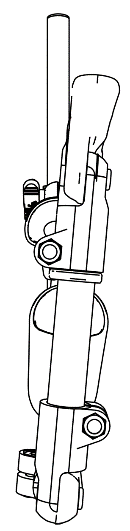
2.a – Apply some oil all around the notches on the T-notched connection. |
2.b – Put one O’ring on the 20mm screw, slot them both into the hole provided in the notched magnetic bracket. |
2.c – Then slide the previously oiled T-notched connection over the screw |
|
 |
 |
 |
|
|
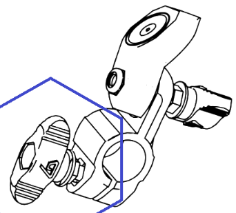
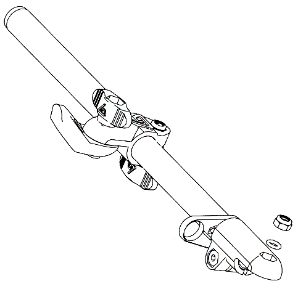
2.d – Put one O’ring on the 20mm screw, slot them both into the hole provided in the stock. |
2.e – Screw all the pieces together taking care not to over tighten. You must be still able to rotate the two parts by force. |
2.f – Unscrew the 18mm screw at the base of the T-notched connection. You will need it at the step 2.l). |
|
|
|
 |
 |
|
|
2.g – Set the butterfly screw on the hex washer. |
2.h – Screw the butterfly with the Hex screw to a nut on the other side. |
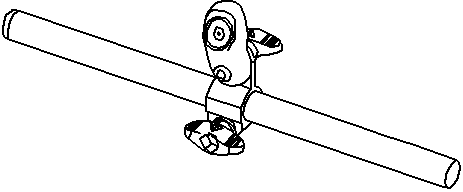
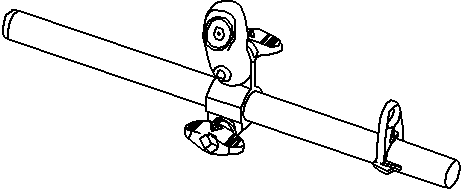
2.i – Slide the medium tube into the T-notched connection.
Then place the external notched connections on both side of the tube. |
|
 |
 |
|
|
|
2.j – Finally screw the two external notched connections on the tube. |
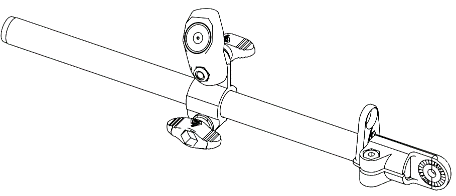
2.k – Apply some oil all around the external notches of the rear side. |
2.l – Place one O’ring on the 18mm screw (the one from 2.f). Slide them both through the internal notched connection and the external connection. |
|
|
|
|
||
|
2.m – Attach the screw securing both connection with one O’ring and the nut. |
2.n – Screw all the pieces together taking care not to over tighten. You must be still able to rotate the two parts using force. |
||


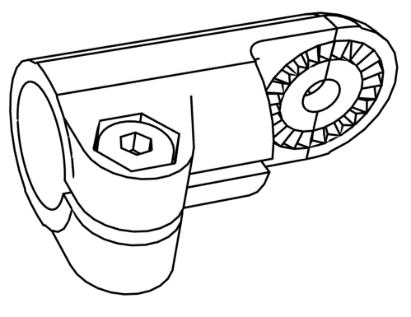
You will need: bag n°3M, longest tube and smooth magnetic bracket.
 |
|
The mag support is usually attached to the MagCup (cf. intro of instruction) 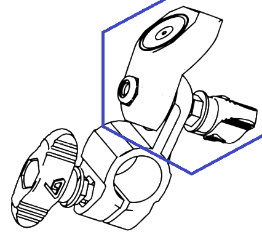 |
|
|
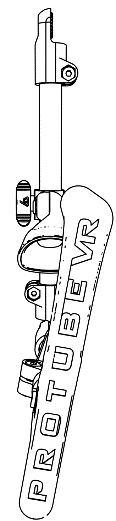
3.a – Apply a dot of oil on the base of the butterflies part and attach each butterfly with one Hex screw. |
3.b – Remove the 18mm screw on the T-notched connection. You will need it at step 3.j. Put the hex washers on the butterfly screws. Put one nut on the T-notched connection and one on the smooth magnetic bracket. |
3.c – Slot one butterfly screw into the hole provided on top of the T-notched connection. Then slot into the rubber washer. Then slot into the smooth magnetic bracket. Finally, secure with a nut. |
|
 |
 |
 |
|
|
3.d – Slide the other butterfly screw through the T-notched connection on the none-logo side. Secure with the nut previously installed in 3.b. |
3.e – Put the previously assembled part through the longest tube.
|
3.f – Put the wedge on the ring and slide them through the stock of the tube. |
|
|
|
 |
|
|
|
3.g – Put the connection with internal notches on the tube and screw it with the Hex key. |
3.h – Apply some oil around the internal notches. |
3.i – Place one O’ring and the nut on the internal notched connector. |
|
|
|
|
||
|
3.j – Place one O’ring on the 18mm screw previously removed from the T-notched connector (step 3.b). Slide them both through the external notched connection and the internal connection. Secure it with the nut on the other side. |
3.k – Screw all the pieces together taking care to not over tighten. You must be still able to rotate the two parts by force. |
||


|
|
      |
      |
|
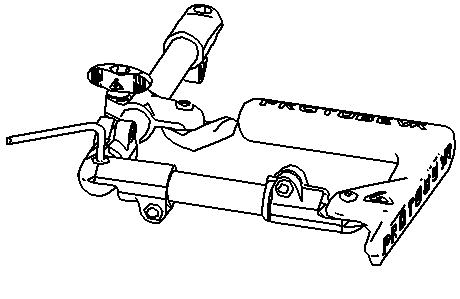
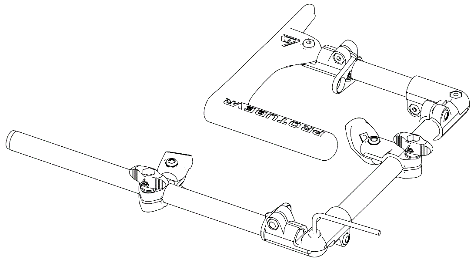
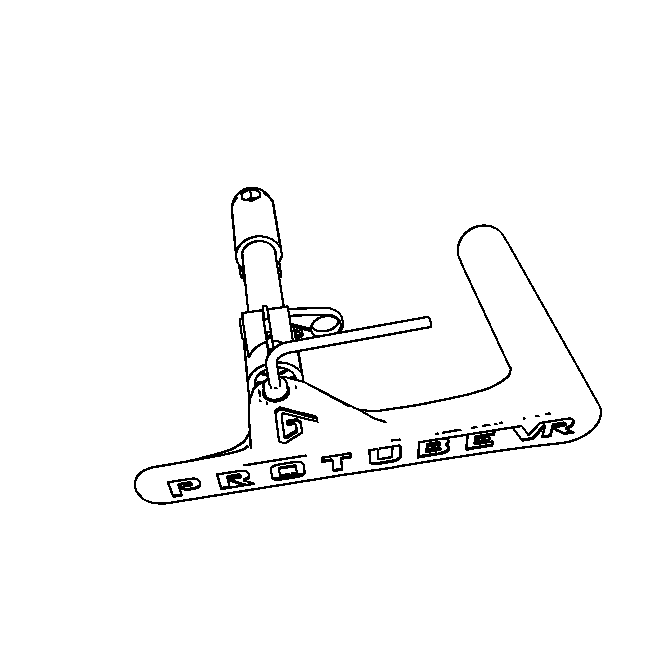
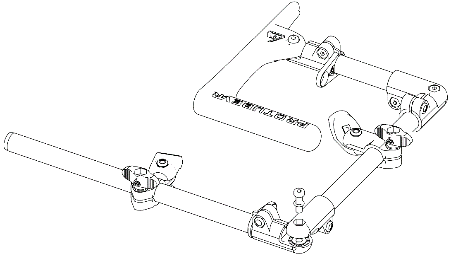
4.a – Bend all the connections at an angle of 90° so that the MagTube Rifle almost forms a square. |
4.b – Adjust the medium tube with the top of the stock and tighten a bit more the screw from step 1.b. |
4.c – Adjust the long tube with the rear of the butt and tighten a bit more the screw from step 2.j. |
|
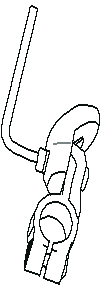
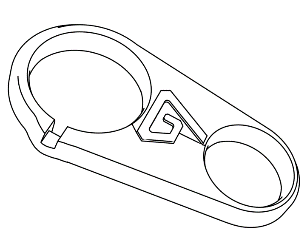
|
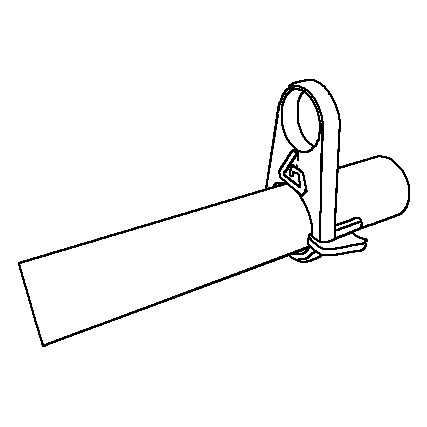
4.d – Slide the hex key through the clip, so you can clip it on your MagTube for later adjustments if needed. |
|


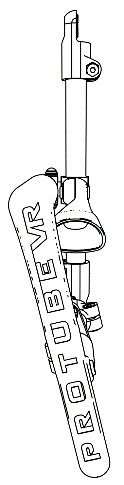
You can magnetically attach the MagCups to the black magnetic holders.
Make sure the logo on the cups are facing the front of the Rifle.
Now, you can remove the wrist straps of your controllers and replace them with the ProTubeVR ones.
|
|
Congratulations! Your MagTube rifle is now operational! As a reminder, your MagTube will highly improve your freedom, your reaction time, and your efficiency after some training. It may take some time to get used to. |

VERSION française
Sachet n°1
|
|
|
|
|
|
|
|
|
x1 |
x1 |
x2 |
x1 |
x2 |
x1 |
x1 |
|
Anneau |
Clavette |
Connection avec crantages intérieurs |
Vis de 20mm |
Joint torique |
Ecrou |
Rondelle crantée |


Sachet n°2
|
|
|
|
|
|
|
|
|
|
x2 |
x1 |
x1 |
x1 |
x1 |
x1 |
x4 |
x2 |
|
Connection avec crantage exterieur |
Connection en T crantée |
Vis hexagonale |
Papillon |
Rondelle hexagonale |
Vis de 20mm |
Joint torique |
Ecrou |


Sachet n°3
|
|
|
|
|
|
|
|
|
|
|
|
x1 |
x1 |
x1 |
x1 |
x2 |
x2 |
x2 |
x2 |
x1 |
x2 |
|
Anneau |
Clavette |
Connection avec crantages intérieurs |
Connection en T crantée |
Vis hexagonale |
Papillon |
Joint torique |
Ecrou |
Rondelle en caoutchouc |
Rondelle hexagonale |


Sachet n°4
|
|
|
|
x1 |
x1 |
|
Clef Allen 0,4cm |
Clef Allen 0,25cm |


MagTube – Reste du colis
|
|
|
|
|
|
|
|
|
|
x1 |
x1 |
x1 |
x1 |
x2 |
x2 |
x1 |
x1 |
|
Tube chrome ou carbone de 130mm |
Tube chrome ou carbone de 200mm |
Tube chrome ou carbone de 250mm |
Sangle 1 point ou 2 points |
Coupelles magnétiques droite & gauche |
Supports magnétiques |
Crosse classique |
Optionel : Bipod |


ForceTube – Reste du colis
|
|
|
|
|
|
|
|
x1 |
x1 |
x1 |
x1 |
x2 |
x2 |
|
Tube chrome ou carbone de 130mm |
Tube chrome ou carbone de 200mm |
Tube chrome ou carbone de 250mm |
Sangle 1 point ou 2 points |
Coupelles magnétiques droite & gauche |
Supports magnétiques |
|
|
|
|
|
||
|
x1 |
x1 |
x1 |
x1 |
||
|
Crosse à retour de force (Module ForceTube) |
Clef USB Bluetooth |
Cable de charge USB-C |
Optionel : Bipod |


Tu auras besoin du sachet N°1, du plus petit tube et de la crosse
|
|
|
|
|
1.a – Mets la clavette sur l’anneau et place les sur le plus petit tube. (Cette étape n’est pas necessaire si tu as un ForceTube) |
1.b – Insère les deux raccords avec crantages intérieurs sur chaque côté du petit tube et visse les avec la clé Allen. |
1.c – Applique un peu d’huile sur les crantages du raccord avec l’anneau. |
|
|
|
|
|
1.d – Place un joint torique sur la vis de 20mm, et mets les dans le trou de la crosse (côté logo). |
1.e –Place la rondelle crantée sur la vis (les crantages doivent être dans le même sens que ceux de la crosse), puis le raccord précédemment huilé. |
1.f – Sécurise la vis à l’aide d’un joint torique puis d’un écrou. |
|
|
||
|
1.g – Visse toutes les pièces ensemble en faisant attention de ne pas trop serrer. Tu dois toujours être capable de faire pivoter la crosse sur le tube en sentant les crantages. |
||


|
Dans la prochaine étape, tu auras besoin des tenons magnétiques. Ils sont généralement attachés magnétiquement au coupelles magnétiques. Les aimants sont assez puissants, mais n’aies pas peur de casser quoique ce soit, ces pièces sont faites pour résister à cette étape. Il te suffit d’utiliser un peu de force pour les séparer. |
|
|
Pour t’aider, voici un gif qui montre comment les séparer. |

Tu auras besoin du sachet N°2, du tube moyen et du support magnétique cranté.
 |
|
|
|
|
2.a – Applique un peu d’huile autour des crantages du raccord en T-cranté. |
2.b – Place un joint torique sur la vis de 20mm, insère les dans le trou du support magnétique. |
2.c – Insère le tout dans le raccord en T-cranté précédemment huilé. |
|
 |
 |
 |
|
|
2.d – Attache la vis à l’aide d’un joint torique et d’un écrou. |
2.e – Visse le tout ensemble en faisant attention à ne pas trop serrer. Tu dois être capable de faire pivoter les deux parties en utilisant un peu de force. |
2.f – Dévisse la vis de 18mm sur la base du raccord en T-cranté et mets-la de côté. Tu en auras besoin pour la partie 2.l. |
|
|
|
 |
 |
|
|
2.g – Applique une goutte d’huile sur la base du papillon. Puis assemble le papillon avec la vis hexagonale et la rondelle hexagonale. |
2.h – Visse le papillon avec la vis hexagonale (côté logo) dans un écrou à l’opposé. |
2.i – Fais glisser le tube dans le raccord en T-cranté.
Puis place les raccords avec crantages extérieurs sur les deux extrémités du tube. |
|
 |
 |
|
|
|
2.j – Pour finir, visse les deux raccords avec crantages extérieurs au tube. |
2.k – Applique un peu d’huile sur les crantages extérieurs du raccord à l’arrière. |
2.l – Place un joint torique sur la vis de 18mm (celle mise de côté en 2.f). Mets-les respectivement dans le raccord avec les crantages intérieurs et le raccord avec les crantages extérieurs. |
|
|
|
|
||
|
2.m – Attache la vis en sécurisant les deux raccords avec un joint torique et un écrou. |
2.n – Visse toutes les pièces ensemble en faisant attention à ne pas trop serrer. Tu dois toujours être capable de faire pivoter la crosse sur le tube en sentant les crantages. |
||


Tu auras besoin du sachet N°3, du tube le plus long et du support magnétique lisse.
 |
|
 |
|
|
3.a – Applique une goutte d’huile sur la base des papillons et assemble chaque papillon avec une vis hexagonale. |
3.b – Dévisse la vis de 18mm sur la base du raccord en T-cranté et mets-la de côté. Tu en auras besoin pour la partie 3.j. Mets les rondelles hexagonales sur les papillons. Place un écrou sur le raccord en T-cranté et un autre sur le support magnétique lisse. |
3.c – Mets une vis papillon dans le trou sur la partie haute du raccord en T-cranté. Suivie de la rondelle caoutchouc. Puis mets le support magnétique lisse. Et finalement, visse le tout avec l’écrou précédemment placé en 3.b. |
|
 |
 |
 |
|
|
3.d – Insère la vis papillon dans raccord en T-cranté (du côté sans logo). Sécurise la vis avec l’écrou précédemment installé en 3.b. |
3.e – Insère le tube dans la pièce qui vient d’être assemblée.
|
3.f – Place la clavette sur l’anneau et le tout sur l’arrière du tube. |
|
|
|
 |
|
|
|
3.g – Mets le raccord avec crantages intérieurs sur le tube et visse avec la clé Allen. |
3.h – Applique un peu d’huile sur les crantages intérieurs du raccord. |
3.i – Place un joint torique et un écrou dans le raccord avec crantages. |
|
|
|
|
||
|
3.j – Place un joint torique sur la vis de 18mm précédemment mise de côté (étape 3.b). Insère-les dans le raccord avec crantages extérieurs puis dans le raccord avec crantages intérieurs. Sécurise le tout avec le joint torique et l’écrou. |
3.k – Visse toutes les pièces ensemble en faisant attention à ne pas trop serrer. Tu dois toujours être capable de faire pivoter la crosse sur le tube en sentant les crantages. |
||


|
|
      |
      |
|
4.a – Plie tous les raccords en angle de 90° pour que le MagTube forme presque à un carré. |
4.b – Règle le tube moyen avec le dessus de la crosse et visse plus fermement la vis de l’étape 1.b. |
4.c – Règle le tube long avec la partie avant de la crosse et visse plus fermement la vis de l’étape 2.j. |
|
|
4.d – Glisse la clé Allen dans le clip, pour que tu puisses l’accrocher à ton MagTube pour ajuster à la volée les parties du fusil suivant tes préférences. |
|

Maintenant, tu peux fixer tes coupelles magnétiques aux supports magnétiques.
Assure-toi que les logos sur les coupelles font face à l’avant du fusil.
Tu peux également enlever les dragonnes de tes contrôleurs et les remplacer par celles de ProTubeVR.
|
|
Félicitation ! Ton Fusil VR est maintenant opérationnel ! Pour rappel, ton MagTube/ForceTube améliorera grandement ta liberté, ton temps de réaction et ton efficacité après un certain entraînement, le temps que tu t’y habitues |
