| Hello, fellow gamer! If you are reading this, you want to switch the laterality of your Starter CQB. And we will help you do it! We invite you to join our [**Discord**](https://discord.com/invite/kAsGHs2) community for any question or directly contact us through our [**support service**](https://protubevr.com/en/content/6-customer-support-hub) on [**our website**](https://www.protubevr.com/).  This process should take 10 minutes. For video setup, [you can check our YouTube Playlists](https://www.youtube.com/channel/UCnrBJ8KQE3-JQrwVBib7J-w). This tutorial shows right-handed to left-handed. Left-handed to right-handed use the same steps, you will just need to follow them in mirror. First, make sure you work in a clear area and be very careful. Some parts can get lost easily. | Salutations, ami gamer ! Si tu es en train de lire ceci, c’est que tu veux changer la latéralité de ton Starter CQB. Et nous allons t’y aider ! Nous t’invitons à rejoindre notre communauté [**Discord**](https://discord.com/invite/kAsGHs2) pour toute question ou à nous contacter directement via notre [**service d'assistance**](https://protubevr.com/fr/content/6-hub-du-support-client) sur notre [**site web**](https://www.protubevr.com/fr).  Ce procédé devrait te prendre 10 minutes. Pour des instructions vidéo, [tu peux regarder notre playlists YouTube](https://www.youtube.com/channel/UCnrBJ8KQE3-JQrwVBib7J-w). Ce tutoriel montre droitier vers gaucher. Pour passer de gaucher à droitier, les étapes sont les mêmes. Il faudra simplement les suivre en miroir. Avant tout, assure-toi de travailler dans une zone dégagée et sois très prudent, certaines pièces peuvent se perdre facilement. |
| **English version**: p2 | **Version française** : p4 |
| 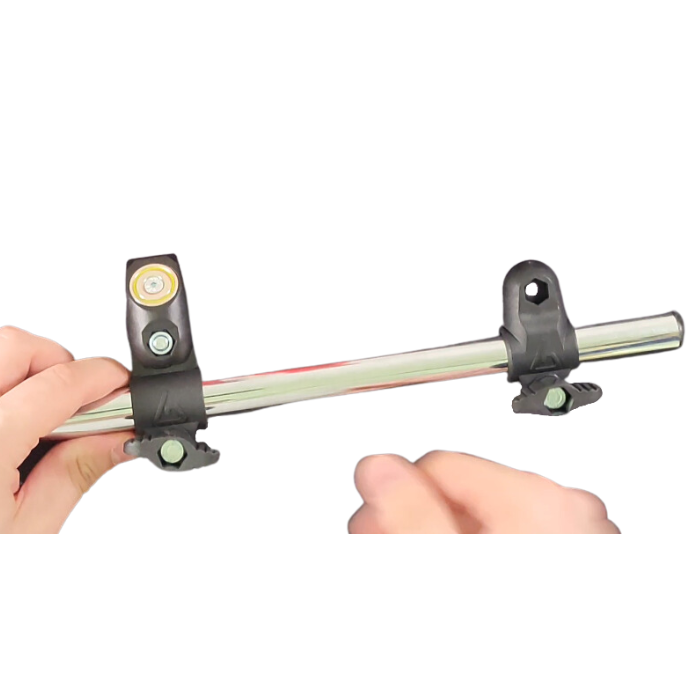 | 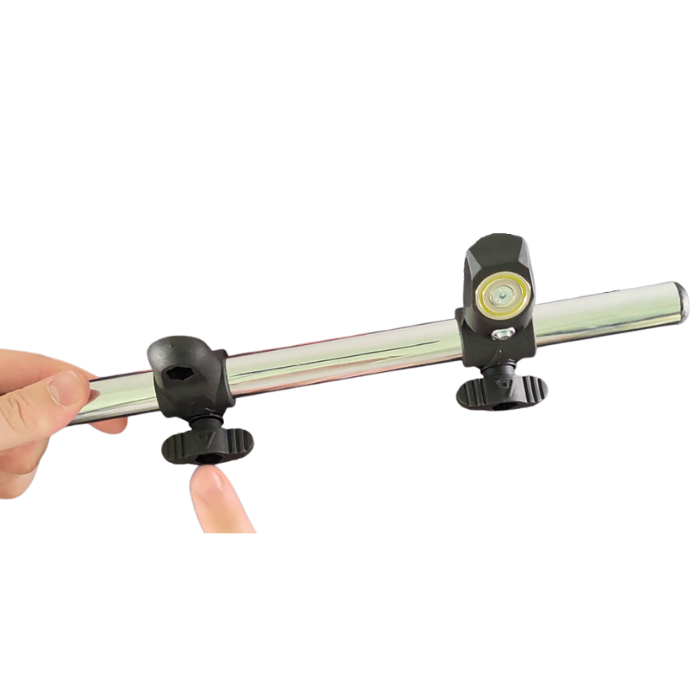 |
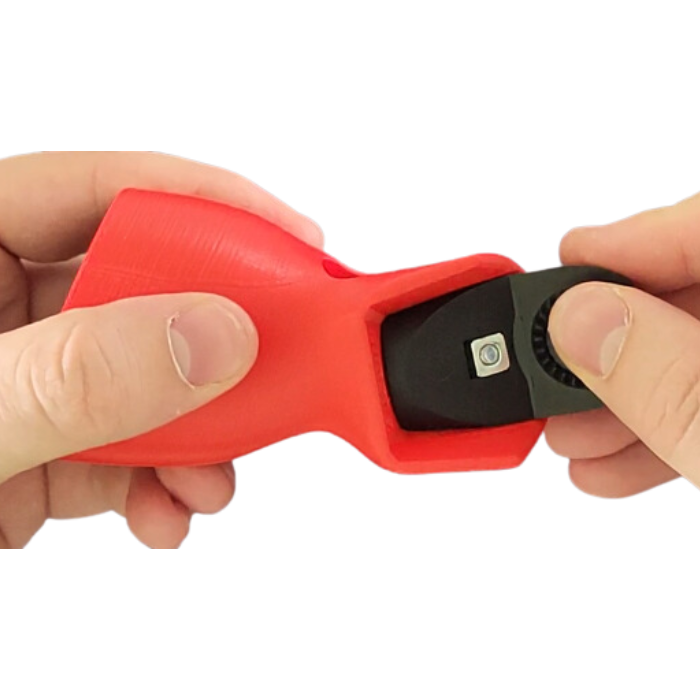
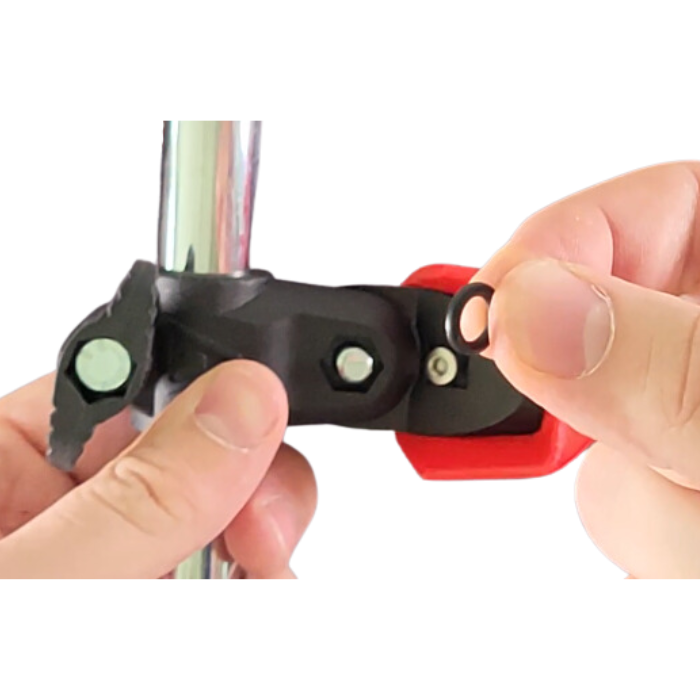
| Remove the fastened cup using the bigger Allen key, and detach the magnetic cup. *Keep all parts, you will need them to assemble the cup back.* | Exchange the position of both connections. *The butterfly screws must be on the same side.* |
| 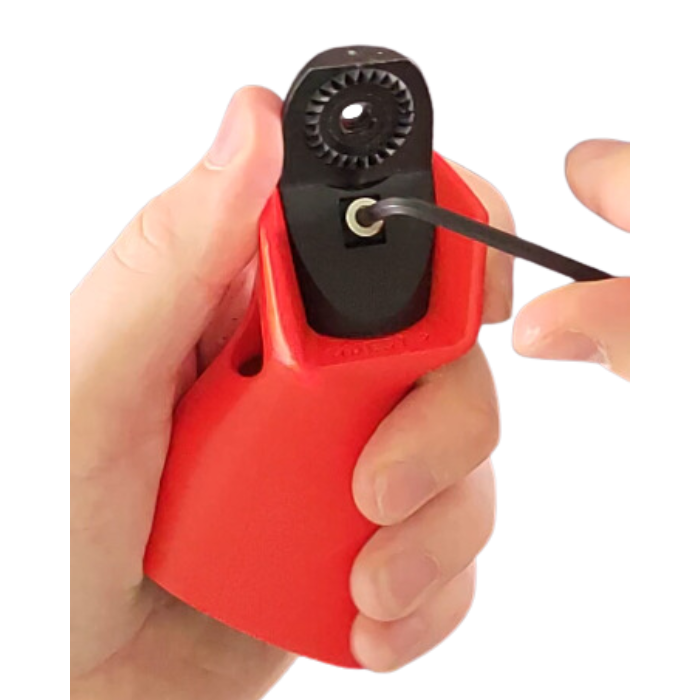 | 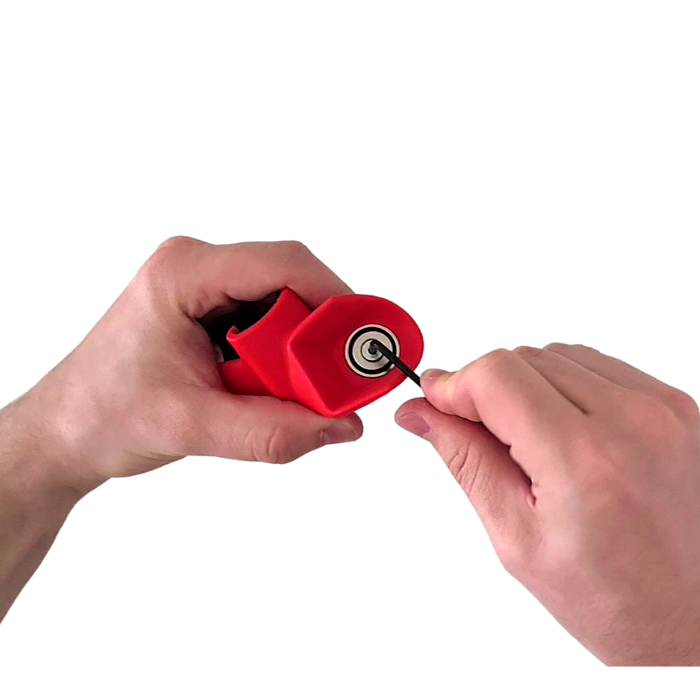 |
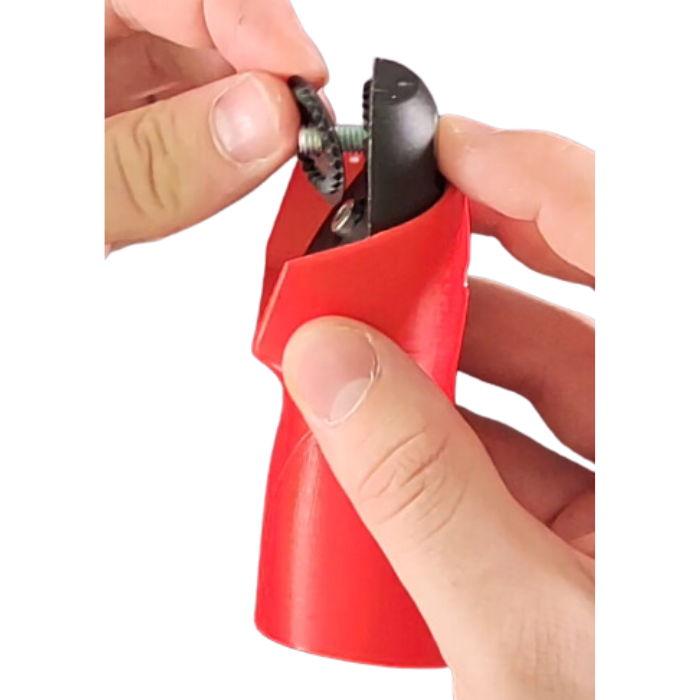
| Unscrew the black support on the fastened cup using the medium Allen key. *Take care not to lose the square nut on the back of the cup.* | Remove the magnet from the cup using the smaller Allen key, and screw it to the other cup. *Take care not to lose the square nut on the back of the cup.* |
|  | |
| You now have your magnetic cup for the other hand. | |
|  | 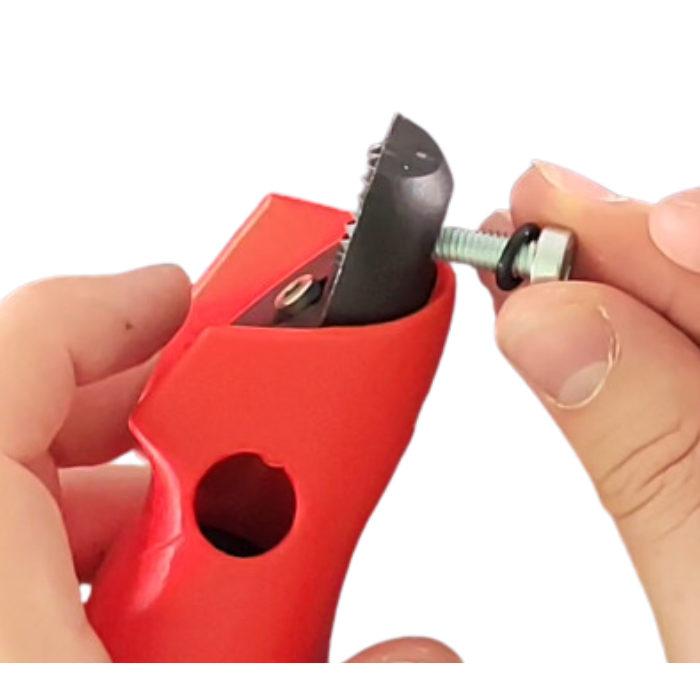 |  | |||
| You removed the magnet on the previous step. Screw the black support back on the cup that has no magnet. *Take care not to lose the square nut on the back of the cup.* | Put the screw with the O-ring back on the black support. | Place the notched washer on the screw. | |||
| 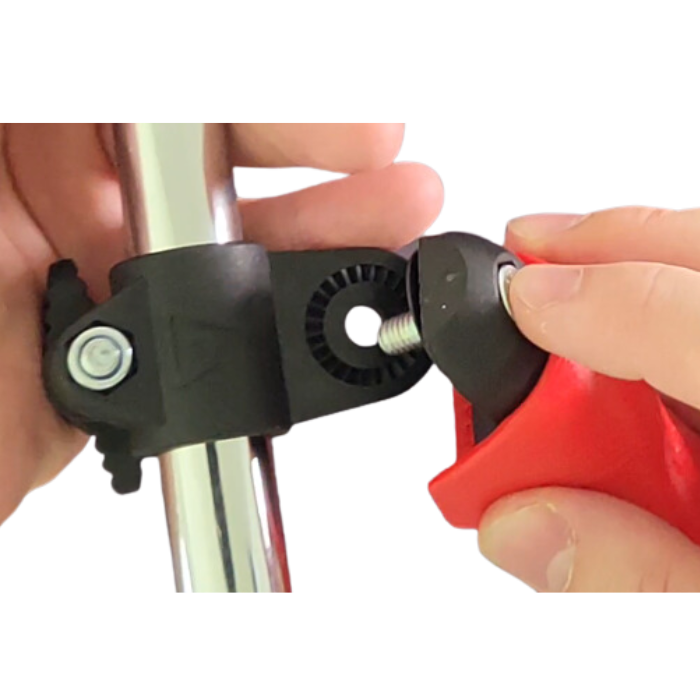 |  | 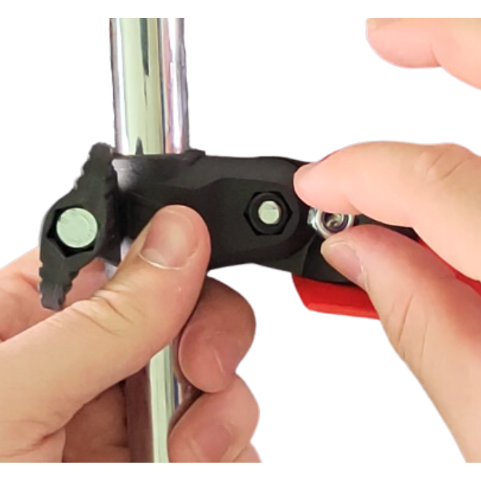 | |||
| Put them in the T-connection. | Place the second O-ring in the whole, around the screw. | Place the hex nut. Screw them all together. | |||
| 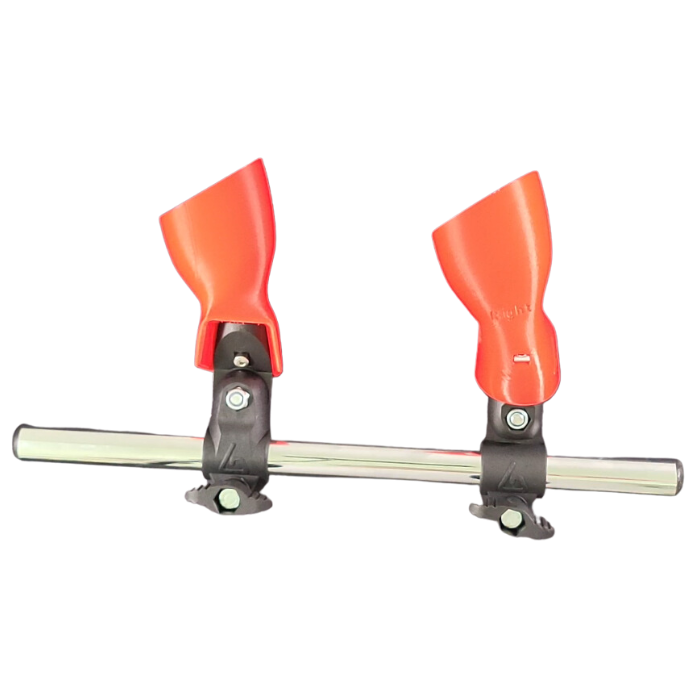 | |||||
| Now you can attach the magnetic cup to the back. And there you have your left-handed Starter CQB. | |||||
|  |  |
| Retire la coupelle fixe en utilisant la plus grosse clé Allen. Et détache la coupelle magnétique. *Garde bien toutes les pièces, tu en auras besoin pour réassembler le tout une fois fini.* | Échange les positions des deux raccords. *Les vis papillons doivent être du même côté.* |
|  |  |
| Enlève le support noir de la coupelle fixe en utilisant la clé Allen moyenne. *Attention à l’écrou carré à l’arrière de la coupelle, ne le perds pas.* | Enlève l’aimant de la coupelle magnétique en utilisant la plus petite clé Allen, et transfère-le sur l’autre coupelle pour la rendre magnétique. *Attention à l’écrou carré à l’arrière de la coupelle, ne le perds pas.* |
|  | |
| Tu as transformé la coupelle fixe en magnétque. | |
|  |  |  | |||
| Tu as enlevé l’aimant de la coupelle dans l’étape précédente. Visse le support noir à la coupelle qui n’a pas d’aimant. *Attention à l’écrou carré à l’arrière de la coupelle, ne le perds pas.* | Remets la vis avec le joint torique dans le trou du support noir. | Place la rondelle crantée sur la vis. | |||
|  |  |  | |||
| Place le tout dans le raccord en T. | Place le second joint torique dans le trou, sur la vis. | Place l’écrou hexagonal. Vis le tout avec la plus grosse clé Allen, et le tour est joué. | |||
| 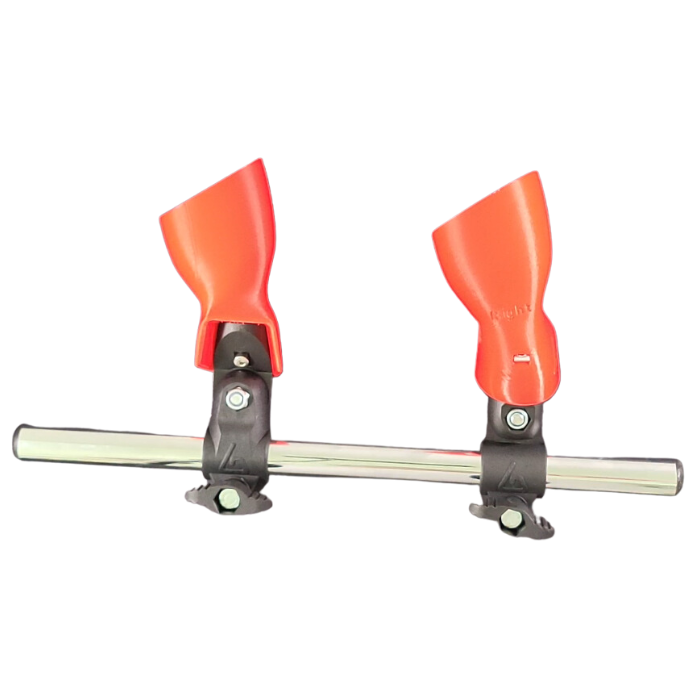 | |||||
| Tu peux maintenant attacher la coupelle magnétique. Et voilà, tu as maintenant un Starter CQB pour gaucher. | |||||