# Starter Switch Side instructions EN Test
Here is how to switch the laterality of your Starter CQB.
[](https://help.protubevr.com/uploads/images/gallery/2025-04/cTsimage.png) This process should take 10 minutes.
For video setup, [you can check our YouTube tutorial Playlists](https://www.youtube.com/channel/UCnrBJ8KQE3-JQrwVBib7J-w).
This tutorial shows right-handed to left-handed. Left-handed to right-handed use the same steps, you will just need to follow them in mirror.
Make sure you work in a clear area and be very careful. Some parts can easily be lost.
#### STEP 1: FASTENED TO MAGNETIC CUP
**\_\_\_\_\_\_\_\_\_\_\_\_\_\_\_\_\_\_\_\_\_\_\_\_\_\_\_\_\_\_\_\_\_\_\_\_\_\_\_\_\_\_\_\_\_\_\_\_\_\_\_\_\_\_\_\_\_\_\_\_\_\_\_\_\_\_\_\_\_\_\_\_\_\_\_\_\_\_\_\_\_\_\_\_\_\_\_\_\_\_\_\_\_\_\_\_\_\_\_\_\_\_\_\_\_\_\_\_\_\_\_\_\_\_\_\_\_\_\_\_\_\_\_\_\_\_\_\_\_\_\_\_\_\_\_\_\_\_\_\_\_\_\_\_**

| 
| 
|
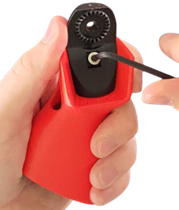
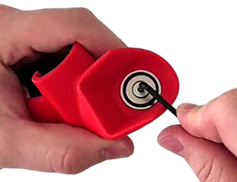
Remove the fastened cup using the bigger Allen key, and detach the magnetic cup.
*Keep all parts, you will need them to assemble the cup back.*
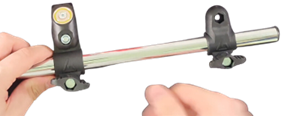
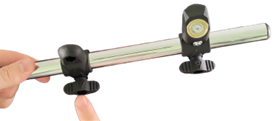
| Exchange the position of both connections.
*The butterfly screws must be on the same side.*
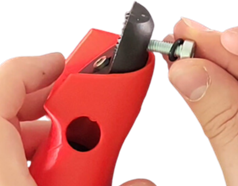
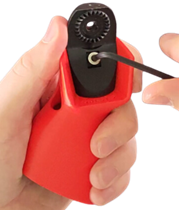
| Unscrew the black support on the fastened cup using the medium Allen key.
*Be careful not to lose the square nut on the back of the cup.*
|

| 
|
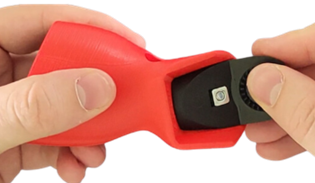
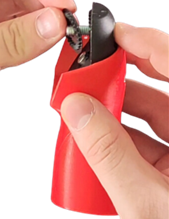
Remove the magnet from the cup using the smaller Allen key, and screw it to the other cup.
*Be careful not to lose the square nut here too.*
| You now have your magnetic cup for the other hand. |
#### STEP 2: MAGNETIC TO FASTENED CUP
**\_\_\_\_\_\_\_\_\_\_\_\_\_\_\_\_\_\_\_\_\_\_\_\_\_\_\_\_\_\_\_\_\_\_\_\_\_\_\_\_\_\_\_\_\_\_\_\_\_\_\_\_\_\_\_\_\_\_\_\_\_\_\_\_\_\_\_\_\_\_\_\_\_\_\_\_\_\_\_\_\_\_\_\_\_\_\_\_\_\_\_\_\_\_\_\_\_\_\_\_\_\_\_\_\_\_\_\_\_\_\_\_\_\_\_\_\_\_\_\_\_\_\_\_\_\_\_\_\_\_\_\_\_\_\_\_\_\_\_\_\_\_\_\_**

| 
| 
|
You removed the magnet on the previous step. Screw the black support back on the cup that has no magnet.
*Take care not to lose the square nut.*
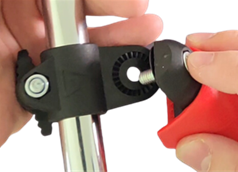
| Put the screw with the O-ring back on the black support. | Place the notched washer on the screw. |

| 
|  |
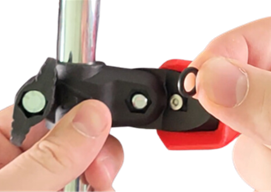
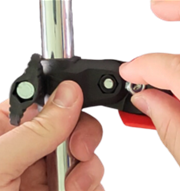
Slot them in the T-connection. | Place the second O-ring in the hole, around the screw. | Place the hex nut. Screw them all together. |

|
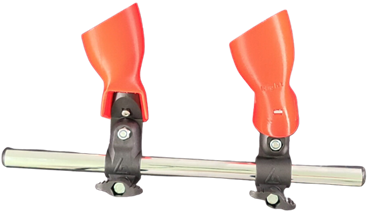
Now you can attach the magnetic cup back.
**And there you have your left-handed Starter CQB.**
|