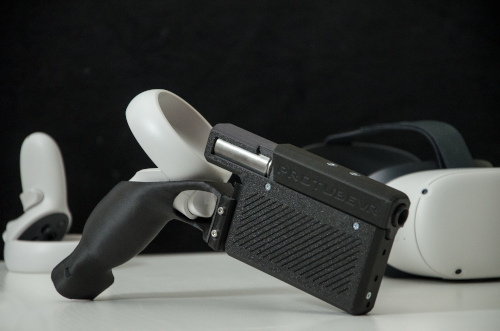
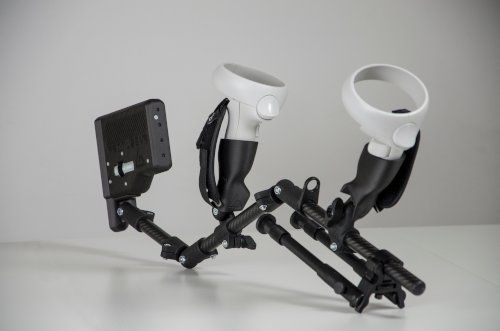
ProVolver Haptic Pistol

All documentation pertaining to our MagTube Gunstock including FAQ, Quick Start Guide, and Tutorials. 

ProVolver Haptic Pistol FAQ

Get to know the ProVolver Haptic Pistol better through these frequently asked questions. 

ProVolver Haptic Pistol FAQ

ForceTube & ProVolver FAQ

· How do the haptic products pair? Using Bluetooth. BT4.0 is on the PCB.

· What platforms are supported? PC Windows 10 & 11, Quest 1, Quest 2, Quest Pro, Quest 3, Pico 3, Pico 4.

· Can I use BT5.0 on PC? Or bHaptics with ForceTube & ProVolver on PC? Our haptic products do not officially support BT5.0. They are listed as BT4.0 devices and have BT4.0 on the PCB inside. Neither bHaptics devices work with the BT4.0 dongle we provide, nor our haptic devices work with the BT5.0 dongle bHaptics provide. There are solutions to make both work together. That being said I have gone to great lengths to detail how to get our haptic devices to work with BT5.0 on PC, or/as well as with bHaptics products, information on both of which can be found here and here. They will not pair with every BT5.0 transmitter, so pay close attention to what is confirmed to work by the community and how.

· What games are supported? Full list found in native-haptic-games. This list is for all platforms and always up to date. On PCVR there are also mods, which are listed in game-mods. In total, there are over 60 unique titles supported with more being added over time. On PCVR, there is also Companion App which enhances existing support, or allows basic kick and rumble across any SteamVR title with the backwards compatibility feature.

· Why is Companion App SteamVR OpenVR only? Because other API and standalone HMD security prevents necessary access for app to function as intended. Without a legal means to receive that without direct approval, there is no way to have the app available for any other platform at this time.

· Will game X receive support? It is up to the game developers to use our plugin to add support to their games. As a player, the best way you can help your favorite game receive native integration is to contact the game devs directly and request they add it. No small number of games have support today because enough people in their community requested it be added.

· If you are a game developer: These plugins are available for Unreal, Unity, and C++ (.dll) directly on our github. If you are interested in adding integration to your project, reach out to us at business@protubevr.com.

· What are the differences between ForceTube Explorer and Storm? A comparison of the specs, as seen on the product page, is in a picture below. To explain in words, the Storm is bigger, heavier, has double the batteries, and can draw over double the power from them per kick (12J vs 5J). We do not list a measurement for kick strength, but the part that kicks moves over twice the distance, and feeling wise it is roughly double the kick strength. Again, we don't list a measurement for the kick strength.

· Why can't I select controller brand X for ProVolver cup? Not all controller brands are compatible with ProVolver. Due to some controller shapes, they simply will not work with the ProVolver, or the design to make them work is far too impractical for a good experience.

· Can I use ProVolver on MagTube or ForceTube gunstock? Yes! As seen in ProVolver product images, the bottom of the cup uses our Mag system and works with our gunstock no problem. You can also use 2X haptic devices in some supported games.

· Can I set ProVolver to only kick when I fire pistols, and ForceTube to only kick when I fire rifles? Only when the game dev allows for it, and only on PC when using Companion App. Not every supported game has kick for pistols. Not every game supports 2X devices. For games that do, you may be able to use Companion App to set the channel dev used for Pistol to only kick on ProVolver, and channel dev used for Rifle to only kick on ForceTube. YMMV (your mileage may vary).

MtiwhzAwvq0dsdCZ.png

ProVolver Haptic Pistol FAQ

ForceTube vs ProVolver FAQ

ForceTube vs ProVolver:

· ForceTube or ProVolver which is better? I'm only buying one? This depends mainly on your use case and what you want to experience. ⁠The compatibility list indicates which games have haptics in game for the handguns. If you primarily play those games, the ProVolver will provide a better experience. If you primarily play games where only rifles are supported, then naturally you will want the ForceTube. Lastly, the ProVolver has a shoulder extension optional add on. It is much easier to use the ProVolver for rifles, than it is to use the ForceTube for hand guns.

· What are the main differences between ForceTube & ProVolver? ForceTube Explorer 5J and ProVolver both share the same internal parts, just oriented differently. This means the kick strength, battery life, etc. are the same for both. ForceTube kicks into your shoulder at the very back of the module where it touches your shoulder. It freely kicks regardless of whether or not you hold it up against your body. It replaces the shoulder stock of any of our products. The ProVolver kicks to simulate a hand gun rail slider. So the location of the kick, and therefore origin of the kick, is different between the two devices. The ProVolver uses a special cup, to simulate holding a handgun. Since the ForceTube and ProVolver are similar in weight, the ProVolver will naturally feel heavier because of how it is held and where the weight is located.

· Can I use ForceTube for hand guns in game? You can but it will not be a good experience. The ForceTube module replaces the shoulder stock on any of our products, and will always be intended to rest against your shoulder for use. This means you will always essentially be holding a rifle or SMG, because you are holding the full gunstock, when using it for hand guns. If you want to use it this way you can, but it is not the best experience.

· How good is the ProVolver for rifles or SMGs? When using the shoulder stock extension and front extension (change HMD on page) can do a better job as a rifle or SMG, than the ForceTube can as a hand gun. Keep in mind that the kick in the ProVolver is located in the slider. This may not be as immersive for rifles or SMGs as the ForceTube, which kicks directly against your shoulder. Lastly, keep in mind you can add a ForceTube to the shoulder extension add on of the ProVolver. Some games support using both devices to kick for same weapon in game, which we call ProTommy. Again refer to the compatibility list for a list of supported titles.


ProVolver Haptic Pistol FAQ

Native Games & Mods for our Haptic Devices

· Where can I see the full list of games that support ProTubeVR haptic devices (ForceTube Explorer, Storm, & ProVolver)? You can find the list on our website, reddit, and our discord. These lists are actively maintained, and anytime a new game receives support, or an existing game's support encounters an issue, we confirm the game in question and update the lists accordingly. 

· How do I find out when a new game receives support? Follow us on social media, sign up to the newsletter, or join the discord. In our discord's Channels & Roles you can self role for @New Native Haptic Game Ping for Native Game announcements, and @New Haptic Mod Ping for Haptic Mod announcements.

· How do I find out when an existing game's support encounters an issue? Be the first to know of any issues by joining our discord. In Channels & Roles you can self role for @All Haptics News Ping , or the Haptic News Ping for a specific platform (i.e. Quest). In every instance when such an announcement is made, we have already notified the devs, and in the announcement provide you with all the information we know. Since we are not the devs, and not maintaining any existing game's support, you would need to contact the devs yourselves for any further information.

· Will game X receive support? Short answer is we don't know or can't say. Unless a game dev announces they are adding support, we don't announce that game X is receiving support, until support is added because of NDA, or because we just weren't informed 😅. If you want to know whether or not an upcoming game will receive support, you will likely need to ask the game dev directly.

· How does a game receive native integration? It is up to the game developers to use our plugin (publicly available on our github for UE and Unity) to add support to their games, as well as to announce support is added. A great example of this is upcoming Zombie Army VR. In their game reveal they announced ProTube haptics support. As a player, the best way you can help your favorite game receive native integration is to contact the game devs directly and request they add it. No small number of games have support today because enough people in their community requested it be added.

· What happens when native support breaks? We first confirm support is broken and then inform the devs. It is up to the devs to maintain support. Once informed, we update the lists and let players know. We also share any updates from devs until it is fixed. Once fixed we confirm, update list, let players know.

· Specifically, as the community, how should we let game devs know we want support added? There are numerous ways you can reach out and share your request. Examples are social media by contacting them directly or making posts and tagging them, replying to existing posts they've made and asking them, in appropriate channels in their discord server (such as feedback, requests, suggestions), directly via e-mail to their listed contact information, on Steam Discussions for PC games, etc. For increased effect, ask in multiple places and at regular intervals (but not to the point of spamming or being annoying, of course). If you want your voices heard by a game dev, these are the most effective ways to go about it. When a lot of people let a game dev know through these methods, it helps send a message to the game dev that their community wants support added, and that it isn't just one or two people making a request. For live service games, devs' time and resources to work on new things is limited, and they will naturally be inclined to work on what people want, or their vision of the game. So naturally if a lot of people say they want something, it will be on their radar, and might become a higher priority for them to implement.


Quick Start Guide

Just got your ProVolver Haptic Pistol? Read this to learn how to use it like a pro in no time. This basic guide is intended to provide first time owners with the immediate necessary information to go from unboxing to using in game.

Quick Start Guide

Getting Started

Getting Started (haptic device):

1. After unboxing, the first thing you will need to do is charge your device. It arrives on low charge and takes about 7-8 hours to charge to full. You will know it is charging by the blinking yellow/orange LED when plugged in. To charge it, use the provided cable on a PC USB port, or 500mA USB charger. Again, if you do not see a blinking yellow/orange LED when plugged in, it is not charging and you will need to try a different power source. Quest headset power adapters will not charge your haptic device, for example.

2. Once fully charged (LED behavior varies, it will either show a white LED, or when unplugging from power and turning on the device will show a white LED) you may now pair to your respective VR setup. For PC you are pairing your device to PC, and for Standalone you are pairing your device directly to your headset. If you are using a Standalone HMD on PC, you will pair to PC.


Getting Starter (ProVolver cup):

1. (note: more detailed assembly instructions available in the Tutorials Chapter) After setting your Provolver to charge, the next thing you need to do is get the ProVolver cup. It will be in its own bubble wrap bag. For most HMD brands, a ProStrap will be included.

2. The ProStrap will need to be properly installed before inserting your controller. And your controller will need to be in the cup before attaching to the ProVolver haptic module. On the top of the ProStrap will be a filament insert intended to go inside the cup. Inside the cup near the top will be a small hole. A bump in the insert goes into that hole. The ProStrap is then held in place by the controller once inserted into the cup.

3. Before putting your controllers into the cup, it is suggested to wipe down the part of the controller that will go inside. This is to ensure optimal friction so they do not slide out easily. Next, observe the small hole in the bottom of the cup. This is intended for feeding the wrist strap through, and should be facing you, or away from the trigger button on the controller.

4. To install, simply start with the wrist strap and feed it through the small hole. Then push the controller into the cup until it cannot go any further. Use of excessive force is not required as it should easily go in until it hits friction, and then with a little bit of force you should be able to continue pushing in until it won't go any further. That is the point at which you should stop and it is considered installed in the cup. Refer to pics on the product page for how your controller should look. Please note: if you are using Index we have videos in Website tutorials under Cup.

5. With the ProStrap (if applicable) and controller correctly installed in the ProVolver cup you may now attach to the ProVolver. On one side of the ProVolver you will notice a rail mount system, like the one commonly found on rifle barrels. To attach the cup, you will need to extend the clamps and loosen the bolts to provide enough space to fit on the rail mount. We provide a small allen key for these bolts. Once loose enough, put one side on first, then you can move the other onto place. Make sure there is enough space so the top of your controller does not touch the top of the haptic module. When successful, retract the clamps and use the allen key to lock the bolts tight. Make sure there is no movement between the cup and the haptic module, and you are ready for use.

If you ordered the shoulder stock extension, wrist support, or the front extension, now is a good time to install those following our tutorials in the Tutorial Chapter.

Quick Start Guide

Bluetooth Pairing Standalone HMD (Quest 1, Quest 2, Quest Pro, Quest 3, Pico 3, Pico 4)

1. Before pairing for the first time, make sure your VR headset is fully charged.
2. Power on your haptic device, then use the headset to pair with Bluetooth like any other device. At some point in the pairing sequence you will see a confirmation code pop up. You can ignore (confirm) this since your haptic device does not have a screen from which to show the code. Proceed and then you are done. Your device will not show in actively connected devices. This is normal behavior.
3. To confirm whether or not it is successfully paired, launch a compatible game and enable haptics in game settings as required. Your haptic device will automatically pair with a distinct rumble, and the blinking white or green LED will turn solid as it rumbles. If it paired you are good to go! Skip to troubleshooting below if you encounter issues.

Quick Start Guide

Bluetooth Pairing Windows 10 & 11 PC VR

Bluetooth Pairing Windows 11 PC VR:

1. All the steps for Windows 10 below apply with 1 major difference.
2. Before you can find your haptic device in Windows, you need to change a setting. There's an option in "Bluetooth & other devices > Devices" called "Bluetooth devices discovery". Set that to "Advanced" to be able to see your haptic device in Windows. Guide from Microsoft here.


Bluetooth Pairing Windows 10 (& 11) PC VR:

1. Important notice. Our haptic devices are compatible on PC using BT dongle with BT4.0 dongles only. Use of BT5.0 dongles may cause your haptic device to not function as intended. Things such as powering off shortly after connecting, unresponsive kick and rumble, etc. If your desktop PC motherboard has built in Bluetooth that is BT5.0 or higher it may still work. Check to see if it is Intel chipset or something else. If it is Realtek it probably won't work and you will need to get something else. If you are on a laptop YMMV and you may need to use a BT4.0 dongle. (refer to bHaptics troubleshooting down below for more information Bluetooth behavior on PC)
2. If your PC already has Bluetooth, simply power on your haptic device and pair it like any other device. If it does not, use the plug and play dongle included in the box. Confirm in device manager the dongle is working properly. At some point in the pairing sequence, you will see a confirmation code pop up. You can ignore (confirm) this since your haptic device does not have a screen from which to show the code. Proceed and then you are done. Your device will not show in actively connected devices. This is normal behavior.
3. To confirm whether or not it is successfully paired, you can either try our companion app [CTA companion app], or try launching a compatible game [CTA to compatible game list?] and enabling haptics in settings as required. Your haptic device will automatically pair to either with a distinct rumble, and the blinking white or green LED will turn solid as it rumbles. If it paired you are good to go! Skip to troubleshooting below if you encounter issues such as delayed or unresponsive kick and rumble.
4. If it didn't pair, reconfirm your Bluetooth is functioning properly in device manager. If using Bluetooth your PC (desktop users only) already has, and your PC has built in Wi-Fi, plug in the Wi-Fi antenna if it isn't already. Bluetooth on these types of motherboards rely on the Wi-Fi antenna to boost signal/increase signal strength, even if Wi-Fi itself is not being used. This should allow you to connect. If it doesn't, you will need to use the dongle included in the box and disable your existing Bluetooth before use. That way your haptic device properly pairs to the dongle.
5. If after step 4 it still won't pair, the dongle could be faulty (possibly as already indicated in windows). You will want to try a different dongle. We offer free replacements covered by warranty for faulty ones through this form. If you choose to get your own dongle, make sure it is BT4.0 Intel chipset based. Realtek chipset based dongles do not play well with our devices for whatever reason and have difficulty pairing. Users have reported that the Asus BT4.0 dongle works well.

Quick Start Guide

Troubleshooting tips & tricks

Haptic device not connecting to PC VR

1. If it didn't pair, reconfirm your bluetooth is functioning properly in device manager. If using bluetooth your PC already has, and your PC has built in wifi, plug in the wifi antenna if it isn't already. Bluetooth on these types of motherboards rely on the wifi antenna to boost signal/increase signal strength. This should allow you to connect. If it doesn't, you will need to use the dongle included in the box. Note: does not apply to laptops, you will need to use a dongle if built in BT doesn't work. Try Asus's BT 4.0 dongle that other users have reported works.
2. If you a) already have bluetooth on your PC and b) want or need to use the dongle, you will need to disable your existing bluetooth first. You can do so from device manager by right clicking on the bluetooth, and disabling it.
3. If after step 2 it still won't pair, the dongle could be faulty (possibly as already indicated in windows). You will want to try a different dongle. We offer free replacements covered by warranty for faulty ones through this form. If you choose to get your own dongle, make sure it is BT4.0 that isn't Realtek chipset based. Realtek dongles do not play well with our devices for whatever reason and have difficulty pairing. If the other dongle you chose to try also doesn't work, you will need to try another dongle. Users have reported Asus's BT4.0 dongle works so get that!
4. If kick and rumble are delayed, stuttery, or unresponsive, bluetooth signal may be too weak. This is likely when using existing bluetooth and not the dongle. On desktops using onboard BT plug in the Wifi Antenna if available and that should solve it. If it doesn't, you will need to use the dongle. Laptops will need to use a dongle if built in BT causes this problem. Try Asus's BT 4.0 dongle that other users have reported works.
5. Lastly, if your haptic device functions for 5 minutes then shuts off, this could be due to using BT5.0. If using onboard BT and your desktop PC has WiFi, try with the antenna plugged in. If the issue persists you will need to use the dongle or get a new WiFi/BT expansion card. Refer to bHatpics troubleshooting below for more information. Laptops will need to use a dongle if you encounter this problem. Try Asus's BT 4.0 dongle that other users have reported works.

Tutorials

All the tutorials traditionally found on our website, pertaining to the ForceTube haptic gunstock in alphabetical order

Tutorials

Haptic Setup EN FR

Haptic Documentation

v.2024.08.09

English 2

Français 10

A black background with white text

Description automatically generated

Haptic Documentation

English

1 – Haptic Devices 3

2 – Battery and led 4

3 – Bluetooth and Pairing 5

3.1 – On Windows 5

3.2 – On Oculus Quest 7

4 – Play 8

4.1 – Native integration in games 8

4.2 – Backward Compatibility with SteamVR 9

5 – Steam Companion Application (for Windows) 9

6 – Wi-fi updater Error! Bookmark not defined.

Introduction

The ForceTube and the ProVolver use the same Haptic technology, so all the following instructions are similar for both. If there are any differences, we will let you know.

As the ForceTube is the original product, all the haptic devices are called “ForceTube” on the Bluetooth pairing and on the Companion app.

1 – Haptic Devices

Be sure to know what model you have before doing any software update. The device will not work if you do it wrong. This will not be taken under warranty.

Power button

Charging slot

ForceTube

Explorer

ForceTube
Storm

Charging slot

Power button

Power button

Power button

Charging slot

ProVolver
Explorer

ForceTube
Gen2

Charging slot

2 – Battery and LED

There are 2 LEDs inside the haptic device:

After unboxing, the first thing you will need to do is charge your device. It arrives on low charge and takes about 7-8 hours to full charge*. You will know it is charging by the yellow/orange LED when plugged in. To charge it, use the provided cable on a PC USB port, or 500mA USB charger. Again, if you do not see a yellow/orange LED when plugged in, it is not charging, and you will need to try a different power source.

Important: trying to use a USB-C-to-USB-C or an electrical outlet instead of your PC can result in the module not receiving any charge or damaging the battery cell. You should use it as instructed above for it to charge!

The battery level LED turns orange when the module is charging. After 6 to 8 hours of charging, your Haptic device will be fully charged. You can check it by unplugging it (restart it if it shuts down when unplugging) and check the battery level LED is white.

We also recommend that you charge your device every 5-6 months if it is not actively in use.

Basically, charge it only when the battery is low (battery level LED is red), avoiding the battery cell to be damaged.

*After full charge, unplug the module without too much delay. Overcharging is the best way to damage batteries and shorten their lifespan.

3 – Bluetooth pairing

To use the Haptic device, you first need to power it on and pair it with Bluetooth on your OS (Android for Meta Quest and Windows for PC HMDs).

3.1 – On Windows

If your computer does not have Bluetooth, plug in the provided Bluetooth dongle, and enable Bluetooth. To pair it to Windows 10, power your module on and make sure it is not connected to another computer/phone/Meta Quest before (the batteries level LED should blink).

Windows 11 user, please check those settings first:

- In "Bluetooth & other devices > Devices" (Bluetooth & other devices>view more devices) change the option "Bluetooth devices discovery" to "Advanced".
- Click on the "More Bluetooth settings" and check the "Allow Bluetooth devices to find this PC" box.

Windows 10 user, you can skip to those following steps directely:

  1. Open the Windows settings.
  2. Click "Devices".
  3. Click "Bluetooth and other devices".
  4. Turn on Bluetooth if it isn't done.
  5. Click "Add Bluetooth or other device".
  6. Click "Bluetooth".

Une image contenant capture d’écran

Description générée automatiquement

4

5

  1. (as mentioned above, all the haptic devices are called “ForceTube” on the Bluetooth pairing and on the Companion app.)

Your module should appear with numbers aside. It’s your module’s ID.

Une image contenant capture d’écran

Description générée automatiquement

  1. Click on your ForceTube.
  2. Wait a few seconds while your module is pairing to Windows.

Troubleshooting:

If your Haptic device is paired on Windows but cannot connect in games or the Companion Application, it may be due to a pairing to the bad Bluetooth transmitter (mainly Windows problem).

Windows OS usually works with one Bluetooth transmitter, but all devices ever paired to one transmitter cannot be paired to another from the same computer.

This problem can occur if you have different Bluetooth transmitters installed or even if you moved your Bluetooth dongle to a new USB port and Windows had difficulties recognizing it, assuming it is a new Bluetooth dongle even if it isn't.

So, you should try to remove the ForceTube from your Bluetooth devices to pair it again.

If you have difficulties to remove it:

  1. Go to your Device Manager.
  2. Click on "View".
  3. Click on "Show Hidden Devices".
  4. Open the "Bluetooth" tab.
  5. In this "Bluetooth" tab, uninstall all unconnected devices (they have lighter icons) by right-clicking them and selecting "Uninstall device" and restart your computer.
  6. Once done, try to pair again your module on Windows.

If you accidentally remove a device, you should not, try to unplug it, restart your computer, and plug it again.

Une image contenant capture d’écran

Description générée automatiquement

If you have the bug just described, uninstall all lighter icons devices from the Bluetooth tab.

Additional Connection Troubleshooting:

If after the troubleshooting steps you still cannot get the haptic device to connect to the companion app or games, or perhaps to be seen by Bluetooth to pair, here are some more steps to try:

  1. If you have an Android phone:
  • Download the APK on our GitHub.
  • Install the ForceTube’s Android application APK on your phone.
  • Try to pair the haptic device to your phone (like a normal Bluetooth device) with the application.
    • If you see it and the module is pairing, then the problem is somewhere on your computer.
    • If it still does not connect, contact our Customer service on our website.
  1. If the problem is on your computer, the first thing to check is the Bluetooth dongle.
  • If you were using one you already had, try uninstalling it and using the provided one.
  • If you were using the provided dongle, try uninstalling it, restart your computer, and reinstalling it on different USB ports.
    • If after trying various USB ports it still does not work, then the issue is likely the Bluetooth dongle. Contact our Customer service on our website to have your Bluetooth dongle replaced.
    • Alternatively, simply acquire another Bluetooth dongle to test. It must be 4.2 Bluetooth compatible or less.

3.2 – On Meta Quest

To pair a haptic device on Meta Quest:

  1. Power on the module and the Meta Quest.
  2. In the Meta Quest home, open the "Quick Settings".
  3. Click on "Settings" in the top right corner.
  4. Click on "Devices".
  5. Next, in the "Bluetooth" tab, click on "Pair".
  6. Slide down the list of devices and when you find your module’s serial number, click on it.
  7. After a few seconds, click on "Pair".
  8. Your module is now paired to your Meta Quest / Quest 2.
  9. The module will only “connect” once a compatible game is launched (refer to part 4.1 below).

4 – Play

4.1 – Native integration in games

Some games integrate the haptic device to be natively compatible.

List of compatible games (Reddit post)

You can refer to this Reddit post to see the list of all natively compatible games.

This list show which games can be played with our haptic devices without needed an external app.
It also explain which game has which feature (rifle, handgun, both-handed handguns or multi device supports).

It also tells on which platform the compatibility is supported (represented by a link to the related platform’s store).

You are invited to read everything from this post, as every information is crucial.

For PC VR users (Steam), some games have mods that allow native compatibility.
Some manipulation is required, so please refer the list of native mods (Reddit post).

These natively compatible games only need you to keep a paired module when you launch them, and it will automatically connect.

You can adjust the power and duration of haptic feedback using the Companion Application.

For more details, go to section 5.

Troubleshooting:

If you cannot get a game to connect, you might have to update the library file, with a .dll extension. It is located in our Companion Application install folder. You can download it with the following link:

Download the Companion App’s Git Hub

If you can’t download the .rar file from the previous link:

  1. Go here: https://github.com/ProTubeVR/ForceTubeVR-User-Content.
  2. Select “ForceTubeVR Companion”.
  3. Select “ForceTubeVR Companion Application.rar”.
  4. Select “Download” to download the .rar file.

To update the .dll:

  1. Go to the game’s local files.
  2. Find the ForceTube.dll file. It will be named something like “ForceTubeVR_API_x32.dll” or “ForceTubeVR_API_x64.dll”.
  3. Add “old” to the name of the existing one.
  4. Copy the new .dll from the previously downloaded .rar file and paste it (take the x32 if you replace the x32, and x64 if you replace the x64) to the location with the “old” one.
  5. Rename the new .dll to the existing one’s name before you added “old”.
  6. Restart the game and try connecting again.

If it still doesn’t connect, contact our Support on our website.

4.2 – Backward compatibility with SteamVR

Other (non-natively compatible) games will work with the haptic devices if you launch them via SteamVR and use the Companion Application.

For more details, go to section 5.

4.3 – Playing with an Oculus/Meta Quest Headset

When playing with Meta Quest headset using the Quest link/Air link/Virtual Desktop, if the Steam game has an OculusVR Mode, Steam may start it by default, so you need to make sure Steam uses SteamVR:

Be sure to launch your games from SteamVR, especially if using Virtual Desktop (do not launch games directly from it).

5 – Steam Companion Application (for Windows)

The companion application allows our haptic devices to work with any games launched through SteamVR to have haptic feedback. Even those that are not natively compatible.

For more information, and how to use it, please refer to the Companion Application documentation.

You can download the Companion Application (Steam) here.

Have fun!

A black background with white text

Description automatically generated

Documentation Haptique

Français

1 – Les differents périphériques Haptiques 11

2 – Batterie et Led 12

3 – Apparaige Bluetooth 13

3.1 – Sur Windows 13

3.2 – Sur Oculus Quest 15

4 – Jouer 16

4.1 – Integration Native en Jeu 16

4.2 – Retrocompatibilité pour SteamVR 17

5 – Application compagnon Steam (pour Windows) 17

6 – Mise à jour par Wi-Fi Error! Bookmark not defined.

Introduction

Le ForceTube et le ProVolver utilisent la même technologie haptique, les instructions suivantes s’appliquent donc aux deux produits.

Comme le ForceTube est le produit original, tous les modules haptiques sont appelés "ForceTube" lors du couplage Bluetooth et dans l'application Compagnon.

1 – Les differents périphériques Haptiques

Assure-toi de savoir quel périphérique haptique tu possèdes avant de faire une mise à jour du logiciel. L’appareil ne fonctionnera plus si tu le fais pour le mauvais périphérique. Cela ne sera pas pris sous la garantie.

ForceTube

Explorer

ForceTube
Storm

Bouton de marche-arrêt

Port de charge

Port de charge

Bouton de marche-arrêt

Bouton de marche-arrêt

ProVolver
Explorer

ForceTube
Gen2

Port de charge

Port de charge / Bouton de marche-arrêt

2 – Batterie et LED

Il y a 2 LED dans le module haptique :

La seconde LED clignote plus lentement (1 fois par seconde) lorsque le périphérique haptique n’est pas connecté à une application (à ne pas confondre avec lorsque qu’il n’est pas appairé à un PC/Quest/téléphone) et est stable une fois connecté.

A l’ouverture de la boite, la première chose à faire est de charger l’appareil. Il arrive avec une charge faible et il lui faut environ 7 à 8 heures pour le charger complètement*. Tu sauras qu'il est en train de charger grâce au voyant jaune/orange lorsqu'il est branché. Pour le charger, utilise le câble fourni sur le port USB d'un PC ou sur un chargeur USB de 500 mA. Encore une fois, si tu ne vois pas de LED jaune/orange lorsqu’il est branché, c'est qu'il n'est pas en train de charger et tu devras essayer une autre source d'alimentation.

Important : Tenter d’utiliser un câble USB-C à USB-C ou un adaptateur à prise mural à la place d’un PC peut résulter à la non-charge du module. Tu devrais l’utiliser comme instruit au-dessus pour que la charge fonctionne correctement !

La LED du niveau de batterie devient orange quand le module haptique est en charge. Après 6 à 8 heures de charge, ton module sera complètement chargé. Tu peux le vérifier en le débranchant (redémarre-le s’il s’éteint lors du débranchement) et vérifie si la lumière de la LED est blanche.

Nous recommandons également de recharger l’appareil tous les 5 à 6 mois s'il n'est pas utilisé activement.

En gros, ne le charge que lorsque la batterie est faible (le voyant de niveau de la batterie est rouge), afin d'éviter d'endommager la batterie.

*Une fois le modulé chargé à 100%, il est préférable de le débrancher sans trop de délai. La surcharge est le meilleur moyen d'endommager les batteries et de raccourcir leur durée de vie.

3 – Appairage Bluetooth

Pour utiliser le module haptique, tu auras premièrement besoin de l’allumer et de l’appairer à un système d’exploitation (Android pour Meta Quest et Windows pour PC) grâce au Bluetooth.

3.1 – Sur Windows

Si ton ordinateur n’a pas de Bluetooth, branche la clef Bluetooth fournie. Pour appairer sur Windows 10, allume ton module et assure-toi, avant tout, qu’il ne soit pas déjà connecté à un autre appareil (PC/téléphone/Meta Quest). La LED de batterie devrait clignoter.

Utilisateur sous Windows 11, merci de vérifier ses paramètres avant tout :

- Dans "Bluetooth et appareils > appareils" (Bluetooth et autres appareils>afficher d’autres périphériques) change l’option "Découverte des appareils Bluetooth" en "Avancé".
- Clique sur "Plus de paramètres Bluetooth" Et coche la case "Autoriser les périphériques Bluetooth à détecter de PC".

Utilisateur Windows 10, tu peux passer directement aux étapes suivantes :

  1. Ouvre les paramètres Windows.
  2. Clique sur "Périphérique".
  3. Clique sur "Appareils Bluetooth et autres".
  4. Allume le Bluetooth si cela n’est pas déjà fait.
  5. Clique sure “Ajouter un appareil Bluetooth ou un autre appareil".
  6. Clique sur "Bluetooth".

5

4

  1. (Comme mentionné ci-dessus, tous les modules haptiques sont appelés "ForceTube" sur le jumelage Bluetooth et sur l'application Compagnon).

Ton module haptique devrait apparaitre avec un numéro à côté (c’est la référence de ton module haptique).

7

  1. Clique sur ton module haptique.
  2. Attends quelques secondes le temps que ton module haptique se paire à Windows.

Dépannage :

Si ton Module haptique est appairé à Windows mais n’arrive pas à se connecter en jeu ou dans l’application compagnon, cela peut être dû à un appairage du transmetteur Bluetooth du Module haptique se pairant au mauvais transmetteur Bluetooth de l’appareil (principalement un problème Windows).

Le système d’exploitation Windows fonctionne en général avec un seul transmetteur Bluetooth, mais tout appareil appairé à un transmetteur et ne peut pas s’appairer à un autre transmetteur du même ordinateur.

Ce problème peut arriver si tu as plusieurs transmetteurs Bluetooth ou si tu déplaces la clé Bluetooth sur un autre port USB. Windows peut rencontrer des difficultés, pensant que c’est une nouvelle clé Bluetooth même si ce n’est pas le cas.

Dans ce cas, tu devrais enlever le module haptique de tes appareils appairés en Bluetooth et le réappairer.

Si tu ne sais pas comment faire, voici comment :

  1. Va dans le Gestionnaire de périphériques.
  2. Clique sur "Affichage".
  3. Clique sur "Afficher les périphériques cachés".
  4. Développe l’onglet "Bluetooth".
  5. Dans cet onglet "Bluetooth", désinstalle tous les appareils non connectés (Ils ont une icône plus claire) en faisant un clic droit dessus, et sélectionne "Désinstaller l’appareil", puis redémarre ton ordinateur.
  6. Une fois redémarré, essaie d’appairer le module haptique à nouveau.

Si tu as désinstallé un appareil que tu n’aurais pas dû, débranche-le, redémarre ton ordinateur, et rebranche l’appareil.

Une image contenant capture d’écran

Description générée automatiquement

Si tu as le bug qui vient d’être décrit, désinstalle tous les appareils avec une icône plus claire.

Dépannage des problèmes de connexion supplémentaires :

Si après le dépannage précédent tu n’arrives toujours pas à faire que le module haptique se connecte à l’application compagnon ou aux jeux, ou bien n’est pas vu par le Bluetooth afin d’être appairé, voici quelques autres étapes à essayer :

  1. Si tu as un téléphone sous Android :
  • Télécharge le fichier .APK sur notre GitHub.
  • Installe l’application du module haptique pour Android sur ton téléphone.
  • Essaie d’appairer le module haptique à ton téléphone (comme tu le ferais pour n’importe quel autre appareil en Bluetooth) avec l’application.
    • Si tu le vois et que le module haptique se paire, cela signifie que le problème vient de ton ordinateur et non du module haptique.
    • S’il ne se connecte toujours pas, contacte le Service client sur notre site.
  1. Si le problème vient de ton ordinateur, la première chose à vérifier est la clef Bluetooth.
  • Si tu utilises une clef que tu possédais déjà, essaie de la désinstaller et d’utiliser celle que nous te fournissons.
  • Si tu utilises la clef que nous fournissons, désinstalle-la, redémarre ton ordinateur, et réinstalle-la sur un autre port USB (à l’avant de l’ordinateur si possible).
    • Si après avoir essayé sur différents ports USB cela ne fonctionne toujours pas, alors le problème vient directement de la clef Bluetooth. Dans ce cas, contacte le Service client sur notre site pour que nous remplacions ta clef Bluetooth.
    • Ou bien, tu peux acquérir une autre clef Bluetooth pour faire le test. Il est important que ce soit une clef Bluetooth 4.2 ou moins.

3.2 – Sur Meta Quest

Pour appairer le module haptique sur le Quest :

  1. Allume le module haptique et le Meta Quest.
  2. Dans le menu principal, clique sur "Paramètres rapides".
  3. Clique sur "Paramètres" dans le coin en haut à droite.
  4. Clique sur "Appareils".
  5. Puis dans la partie "Bluetooth", clique sur "Appairer".
  6. Fais défiler la liste des appareils et lorsque tu trouves le numéro de série de ton module haptique, clique dessus.
  7. Après un court instant, une fenêtre s’ouvre, il faut cliquer sur "associer".
  8. Ton module est maintenant appairer à ton casque Meta Quest.
  9. Le module ne se “connecte” que quand un jeu compatible est lancé (réfère toi à la partie 4.1 dessous).

4 – Jouer

4.1 – Intégration native en jeu

Certains jeux intègrent le module haptique afin qu’il soit nativement compatible.

Liste de jeux compatibles (poste Reddit)

Tu peux te référer à ce poste Reddit pour voir la liste des jeux nativement compatibles.

Celle liste montre quels jeux peuvent êtres utilisez avec nos périphériques haptiques sans avoir besoin d’application externe.

Elle explique aussi quel jeu à quelles fonctions (fusil à deux main, pistolet, double pistolets, multi périphérique…).

Ainsi que sur quelle plateforme la compatibilité est supportés (représenté par un lien vers la boutique de la plateforme en question).

Nous t’invitons à lire tout le poste, car chaque information est importante.

Pour les utilisateurs PC VR (Steam), certains jeux ont un mod qui permet de créer une compatibilité native.
Quelques manipulations sont nécessaire, tu peux donc te référer à la liste des mods natifs (poste Reddit).

Ces jeux nativement compatibles ont seulement besoin que le module haptique soit appairé au system d’exploitation lorsqu’ils sont lancés, et s’y connecteront automatiquement.

Tu peux ajuster la puissance et la longueur du retour de force du Module haptique en utilisant l’Application compagnon.

Pour plus de détails, va à la section 5.3.

Dépannage :

Si la connexion entre le module et le jeu ne se fait pas, il faut peut-être mettre à jour le fichier de librairie avec l’extension .dll. Il se situe dans le fichier d’installation de l’application compagnon. Tu peux le télécharger sur le lien suivant :

Télécharge l’Application Compagnon sur le Git Hub

Si tu ne peux pas télécharger le fichier .rar depuis le lien précèdent :

  1. Va ici: https://github.com/ProTubeVR/ForceTubeVR-User-Content.
  2. Sélectionne “ForceTubeVR Companion”.
  3. Sélectionne “ ForceTubeVR Companion Application.rar”.
  4. Et Sélectionne “Download” pour télécharger le fichier .rar.

Pour mettre à jour le fichier .dll :

  1. Va dans les fichiers locaux du jeu.
  2. Trouve le fichier ForceTube.dll. Il s’appelle “ForceTubeVR_API_x32.dll” ou “ForceTubeVR_API_x64.dll”.
  3. Ajoute “old” au nom du fichier existant.
  4. Copie le nouveau .dll depuis le fichier .rar précédemment téléchargé (prends le x32 si tu remplaces le x32, et le x64 si tu remplaces le x64) et colle-le là où tu as renommé l’ancien avec “old”.
  5. Renomme le nouveau fichier .dll avec le nom de l’ancien fichier .dll avant d’avoir ajouté “old”.
  6. Redémarre le jeu et tente de te connecter à nouveau.

Si tu n’arrives toujours pas à te connecter, contacte le Service de support sur notre site.

4.2 – Rétrocompatibilité pour SteamVR

D’autres jeux peuvent fonctionner avec le module haptique à condition qu’ils soient lancés avec SteamVR et d’utiliser l’Application compagnon.

Pour plus de détail, va à la section 5.2

4.3 – Jouer avec un casque Meta

En utilisant un casque Meta avec Steam, si le jeu possède un mode OculusVR, Steam pourrait lancer le jeu avec ce mode par défaut. Pour utiliser l’application compagnon, il faut s’assurer que Steam utilise le mode SteamVR :

Sois sûr de lancer tes jeux depuis l’environnement SteamVR, surtout si tu utilises un Quest avec Virtual Desktop.

5 –Application compagnon Steam (pour Windows)

L’application compagnon permet à nos périphériques haptiques de fonctionner avec n’importe quel jeu lancé sur SteamVR d’avoir des réactions haptiques. Même si ce jeu n’est pas nativement compatible.

Pour plus d’information, et pour savoir comment l’utiliser, merci de te référer à la documentation de l’Application Compagnon.

Tu peux télécharger l’Application compagnon (Steam) ici.

Amuse-toi bien !

Tutorials

Companion App Guide EN

Companion App guide

for Haptic VR accessories


Orange and Black software box for ProTubeVR Companion App
provollver haptic pistol
forcetube haptic gun stock

The Companion App creates a backwards compatibility for SteamVR and OpenVR games to our haptic devices, such as the ForceTube gunstock and the ProVolver pistol.

We call this SteamVR compatibility.

What does it mean?

1) This little software will detect when your avatar presses the trigger of your in-game weapon(s).

2) It will understand what kind of weapon(s) you are using and do some wizardry (quite a lot of maths and electrical conversion, tbh).

3) The Companion App sends a signal to your haptic device(s).

4) The device(s) will activate, replicating the recoil and rumble of what's happening on your in-game weapon(s).

What do i need?

You only need the Companion App if you are using PCVR.

If you are playing games directly on your standalone HMD (such as Meta Quest 2 and Quest 3 without PCVR link), our haptic devices are natively compatible with an extensive and ever growing list of VR games.

If you use a Meta HMD with PCVR, you need to changes the runtime. More info in the FAQ below.

Compatible games and mods

Through our collaboration with VR studios, the compatibility and calibration of our haptic devices are directly integrated into games.

This native integration does not require the use of the SteamVR compatibility feature and is present in over 60 titles across multiple platforms including PC, Quest, & Pico headsets. This list of native titles is growing continuously. 

In addition to these titles, wonderful modders from the community are adding mods to enable native integration into popular games that do not. For games with such a mod, usage of the Companion App SteamVR compatibility feature is not required, just like with native titles.

For PCVR games that are neither native nor have a mod, you need to use the Companion App SteamVR compatibility feature. 

For PCVR games that are native, you can use the Companion App to finetune your experience.

Check the haptic compatibilities page for more details.


Install the Companion App


companion app steam page

1. Go on the Companion App Steam page.


companion app shortcut

2. Add the Companion App to your Steam library.

3. Install the Companion App from your Steam library, like any other game.

4. Use the created shortcut to start the Companion App.

Companion App instruction Manual

General preview

Definitions


  • Device: The electronic equipment you're connecting to the application.
  • Channel: A reserved space where you can connect your devices and isolate specific received signals.
  • ms: Milliseconds.
  • Preset: A configuration file that contains saved channels and device info.
companion app general preview

Left Side panel

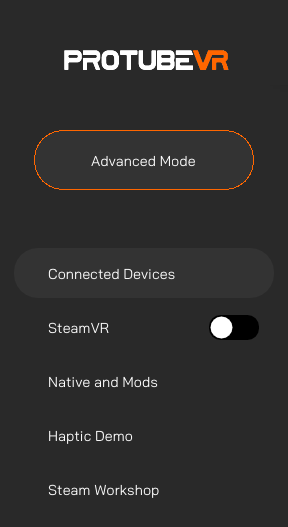
Default mode

You have some tabs available by default:


companion app side panel default

Advanced mode

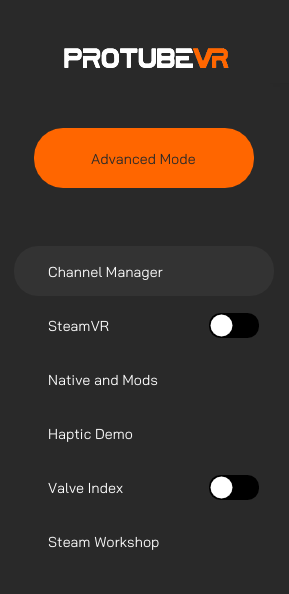
Switching between modes enable/disable advanced features, like assignng custom channels to your device.


companion app side panel advanced

Top bar Widget

Auto-connect

The Companion application will automatically try to connect to the devices remembered by your PC.

Disable this option if you want only some devices to connect.


In advanced mode, the Stream Plugin button appears.


companion app top bar

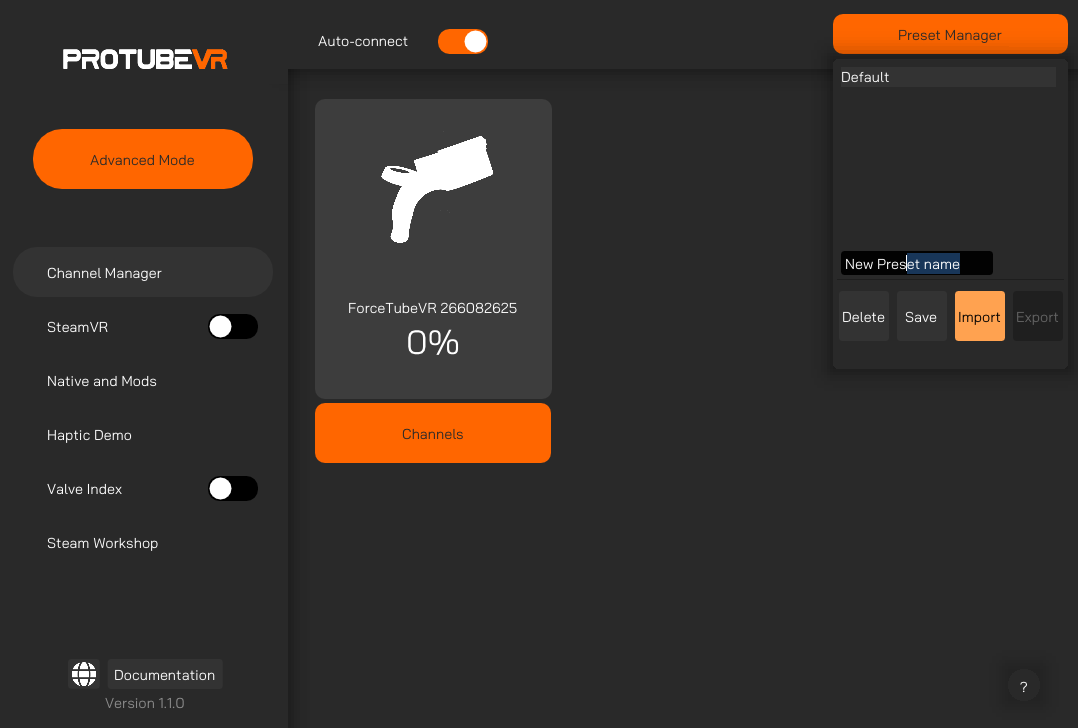
Preset Manager

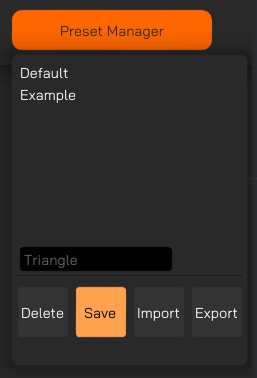
When launched, the Companion App always loads on the default parameters. If you want to keep your modified settings, you must save it in a preset.

Double-clicking on a preset will load its settings.

Save: Create a new preset with the name in the black text box and saves current configs including:

  • Assigned device channels.
  • SteamVR settings.
  • Native Compatibility Settings.
  • Knuckles Fix values.

Saving a setting to an existing preset overwrites it.

If you want the retrieve the default preset, close the Companion App, reopen it, and save the parameters loaded by default in a new preset. 


Import: Import a configuration file. You can find shared presets from our Discord community.  

Export: Export all saved configurations as a file. You can share it with our Discord community. 

Delete: Delete the selected preset.


companion app preset

Connected devices and Channels

What are channels?


To operate, the Companion App catches in-game signals, converts them and send them to your devices, making them kick.

These signals go through Channels.

There are 6 of them. By default, the signal will go through the 6 channels and your device will kick. 

Why are channels important?


If you have 2 or more haptic devices, channels allow them to kick separetly. 

If you prefer they not kick at the same time, you need to select a specific channel for each of them.

Doing so, you avoid the ProVolver Pistol kicking when you use your ForceTube Rifle for example.

Or if you have a pair of ProVolver haptic pistols, you only want to feel the recoil on the hand holding the gun that's firing it.

Special channels for some games


To ensure maximum compatibility and flexibility, a game only sends signals to a channel if its developers have set up that specific channel.

Some developers have only set up 1 or 2 channels for their game. If you use custom Channels setup instead of the Default one for these games, you have to select the configured channel.

From our own testing, we established a list of games and their specific channel(s). You can find this list within the Special Native Customization section below.

Automatically assigned channels


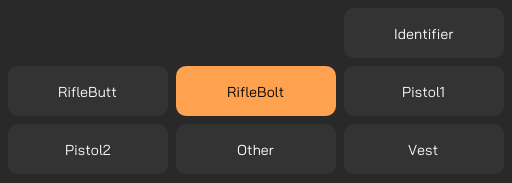
Connecting your new device will assign it to a signal channel automatically in this order:

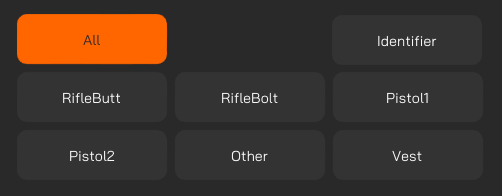
RifleButt - RifleBolt - Pistol1 - Pistol2 - Other - Vest

If you connect more devices than the total channel number available, auto-assign will loop back to RifleButt and so on.


Default mode

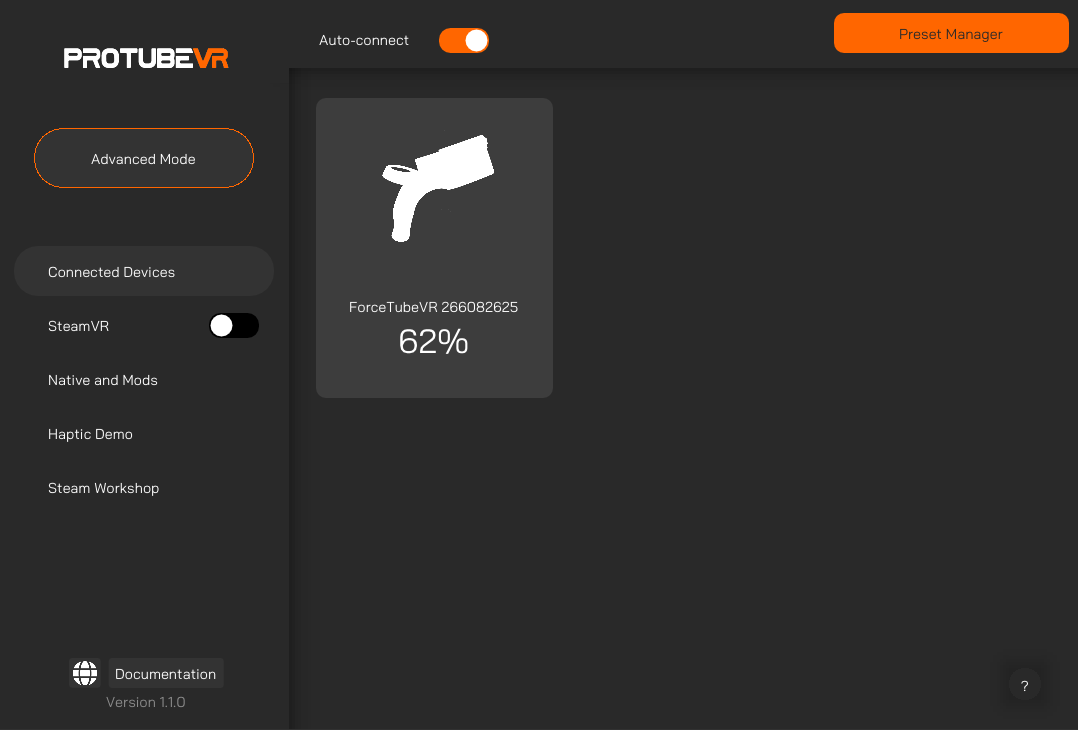
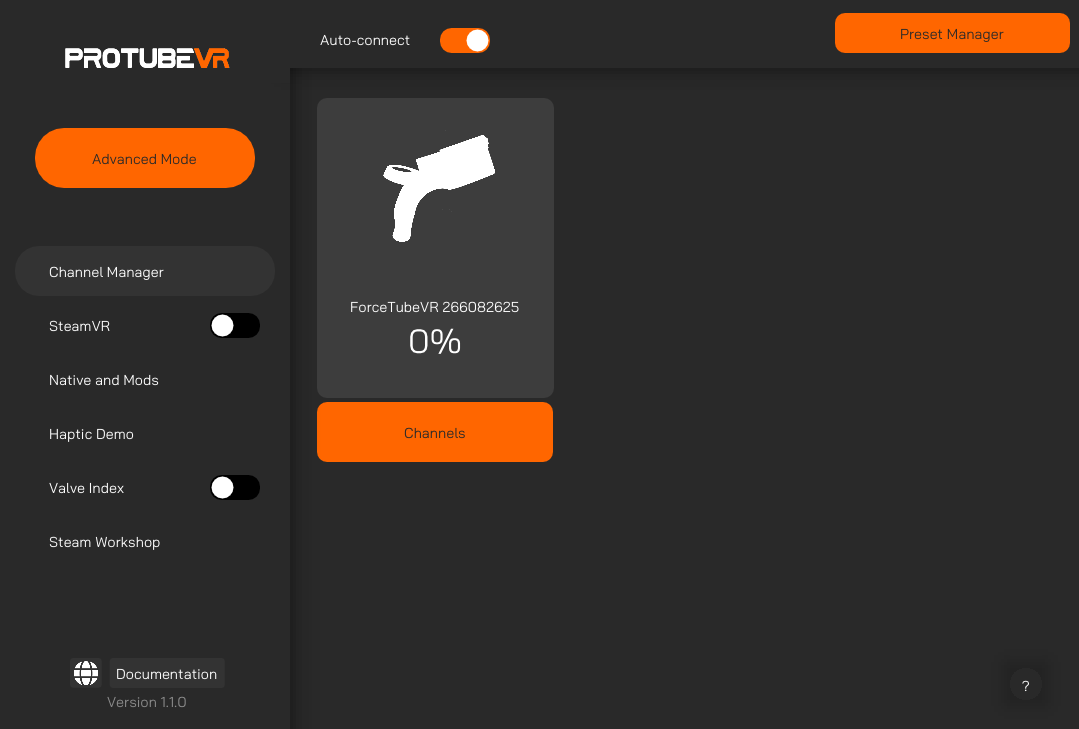
This is the page you land on when you start the application. By default, you will see each connected device here. 

You can click on any device card to change its type, and the application will remember which device is what. 


companion app connected devices default

Advanced mode

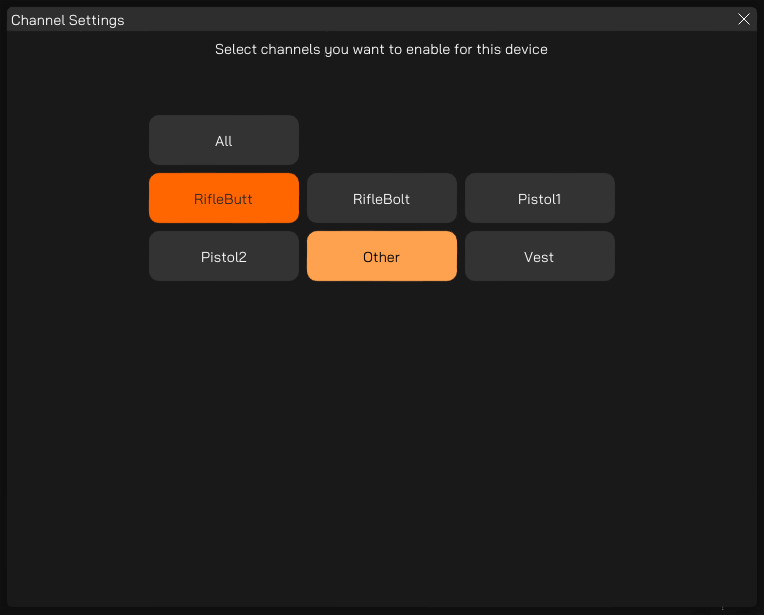
In advanced mode, you have a Channels button appearing under each device.

Clicking on this button will bring-up a menu where you can manually assign channels to your device.

It is important for some games and/or if you have several haptic devices.


companion app connected devices advanced view
companion app connected devices advanced

SteamVR

Customize the SteamVR Compatibility Feature.

If you use a Meta HMD with PCVR, you need to change the runtime. Every step in the FAQ.

Default mode

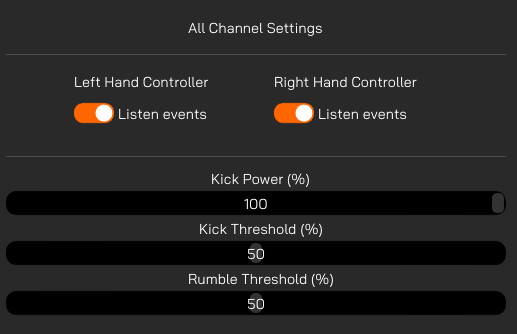
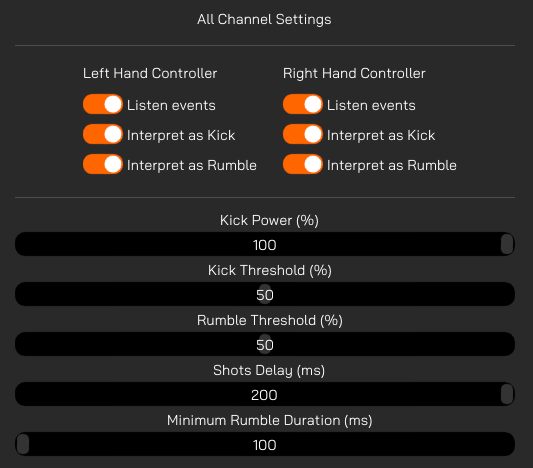
Listen Events: Whether you want your channel to react when your left/right hand triggers an haptic event.

Kick Power: Controls the kick power of your devices.

Kick Threshold: Adjust this variable to control required power for SteamVR events to trigger you device kick response. Each game has different values defined by the developers, you will have to do some testing to get a good result.

Rumble Threshold: Adjust this variable to control required power for SteamVR to trigger your device rumbe response.


companion app steamvr compatibility

Advanced mode

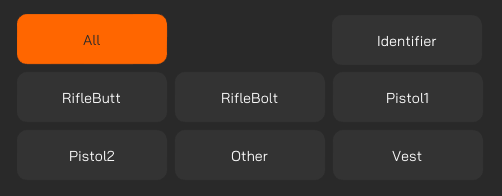
Start by selecting a channel and tweak your settings from here. 

Make sure your device is in the right channel by checking in your channel manager. You can also use the "Identifier" command below.

Identifier: Sends a kick command to the selected channel.

Tips: If identifying a channel does not result in any connected device kicking, it probably means that no device has that current channel assigned. A device is considered connected if its battery displays a percentage superior to 0.


companion app steamvr advanced

Interpret as kick / Interpret as rumble: If you want your right or left controller events being interpreted as a kick, rumble or both.

Shots Delay: Limits the reaction rate of your devices. Avoids triggering event bursts on each in-game interaction.

Minimum Rumble Duration: Controls the duration between each vibration.


companion app steamvr advanced all channel settings

Haptic demo

Default mode

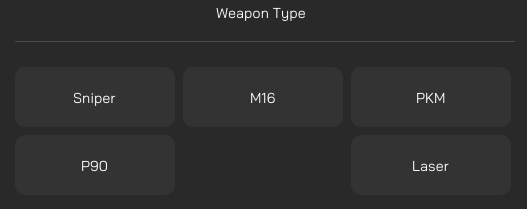
Mainly used to simulate different types of weapons.

  • Sniper : Kick with vibration.
  • M16: Launches a salvo of 3 consecutive kicks.
  • PKM: Continuous burst of kicks and rapid vibration.
  • P90: Continuous burst of rapid kicks.
  • Laser: Vibrates to charge the shots, then kicks after charging. 
companion app haptic demo default

Advanced mode

Start by selecting a channel and tweak your settings from here. 

Make sure your device is in the right channel by checking in your channel manager.

Identifier: Sends a kick command to the selected channel.

Tips: If identifying a channel does not result in any connected device kicking, it probably means that no device has that current channel assigned. A device is considered connected if its battery displays a percentage superior to 0.


companion app haptic demo advanced

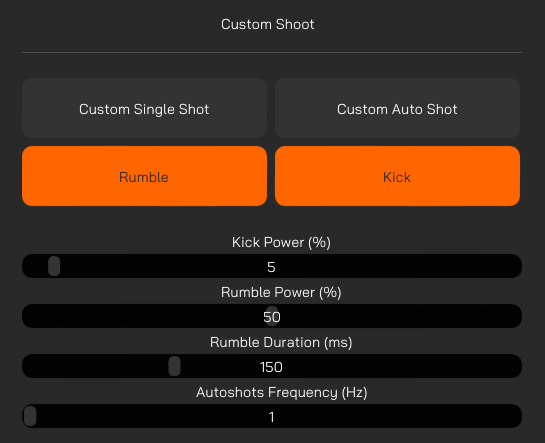
Custom Single Shot: Shoots once using specified parameters in brlow sliders.

Custom Auto Shot: Shoots using specified parameters and loops based on frequency slider.

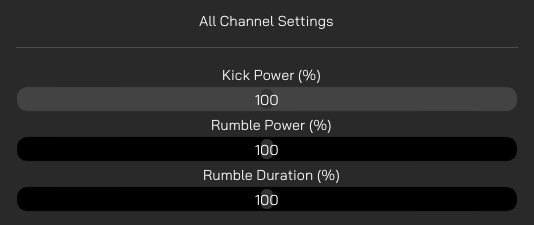
Kick Power: Controls the kick power for demo mode.

Rumble Power: Controls the rumble power for demo mode.

Rumble duration: Controls the rumble duration on each shot. Max is 500 ms.

Autoshots Frequency: How many times per second you want to shoot with Custom Auto Shot for the demo mode. 


companion app haptic demo custom shoot

Native and Mods

On PCVR, if you are playing a native game or a game with integration enable by a mod, you can customize your inputs.


These games do not need the Companion application to work, but it will allow you to finetune some settings if you have the need to. 


Make sure to connect any desired device to the app first, and then start your game.

Default mode

By default, your device will listen to all channels at once ensuring most of the compatibility.

For each of the below parameters, refer to this chart: 

  • 0% : No power
  • 100% : Original game power
  • 200% : Double original power

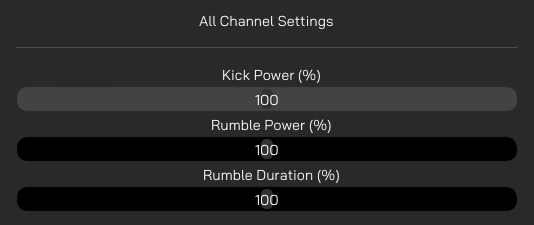
Kick Power: Controls the kick power percentage.

Rumble Power: Controls the rumble power percentage.

Rumble duration: Controls the rumble duration percentage for each shot.


companion app native mods default

Advanced mode

Start by selecting a channel and tweak your settings from here. This allow your devices to kick separately.

Make sure your device is in the right channel by checking in your channel manager.

Identifier: Sends a kick command to the selected channel.

Tips: If identifying a channel does not result in any connected device kicking, it probably means that no device has that current channel assigned. A device is considered connected if its battery displays a percentage superior to 0.


companion app native mods advanced
companion app native mods advanced all channel settings

Special Channel Settings

Your devices need to use the correct channels set by the developers for customization to take effect.

For the following games, make sure your Haptic devices are set in the right channels when enabling Native Customization.

If a game on this list doesn't work, search and enable ForceTube settings in your game menu.

If your native or mod-compatible game doesn't appear on this list, you will have to find the used channels via trial and error.

Any game that is not native or mod-compatible will work with SteamVR compatibility.


Dead Second Pistol1
Surv1v3 Pistol1

Cactus cowboy Plants at War

RifleButt
RifleBolt

Cactus cowboy 3 Fully loaded RifleButt
RifleBolt
Hotdogs Horseshoes and Handgrenades RifleButt
RifleBolt
Larcenauts Pistol1
Pistol2
Resist
(enable parameter in game settings)
Pistol1
Pistol2
Onward RifleButt
RifleBolt
Contractors RifleButt
RifleBolt
Tales of Glory 2: Retalation

RifleButt
RifleBolt

Vertigo 2

RifleButt
RifleBolt

Gun club VR RifleButt
RifleBolt

Warchasm
(no Companion App customization available)

Akimbo out of the box

Gambit !
(Pistol only, right hand only. Start the Companion app after the game connects to the devices)
Pistol2

Valve Index with Knuckles

A few players using a Valve Index HMD and their Knuckles have reported us their in-game hands fly away while shooting in long burst. 

We have developed a driver to fix this. 

The driver does not work with other headsets; only Valve Index might need it. If you don't own a Valve Index headset or your in-game hands don't fly away while using the Knuckles controllers with your Index HMD, you can skip this section.

Install the driver


  1. Close the Companion-App and shut down VR if it's been turned on.
  2. Go to your Companion App installation folder. 
  3. Open the folder "Valve-Index-Knuckles-driver".
  4. Install the driver.
  5. Restart the Companion App.
  6. Enable Advanced mode.
  7. Go to Valve Index tab.
  8. Enable the feature with the toggle button and tweak the sliders to your preferences.

Uninstall the driver


  1. Go to the folder "C:\ Program Files (x86)\ Steam\ steamapps\ common\ SteamVR\ drivers".
  2. Delete the folder "!ProtubeDriver1”.

Finetune your Knuckles settings

Additional help :

  1. Try to reduce the kick power produced by the mode you're currently using (either SteamVR or Native/Mods).
  2. Extend the Shots delay.
  3. Reduce the rumble duration.
  4. Don't forget to save your configuration.

Accelero Max: Limits max acceleration of your in-game hand.

Freeze Duration: How much time your hand gets frozen after a kick if it hits max acceleration.


companion app valve index knuckles fix settings

Steam Workshop

You can download and share presets with the community with the Companion App' Steam Workshop.

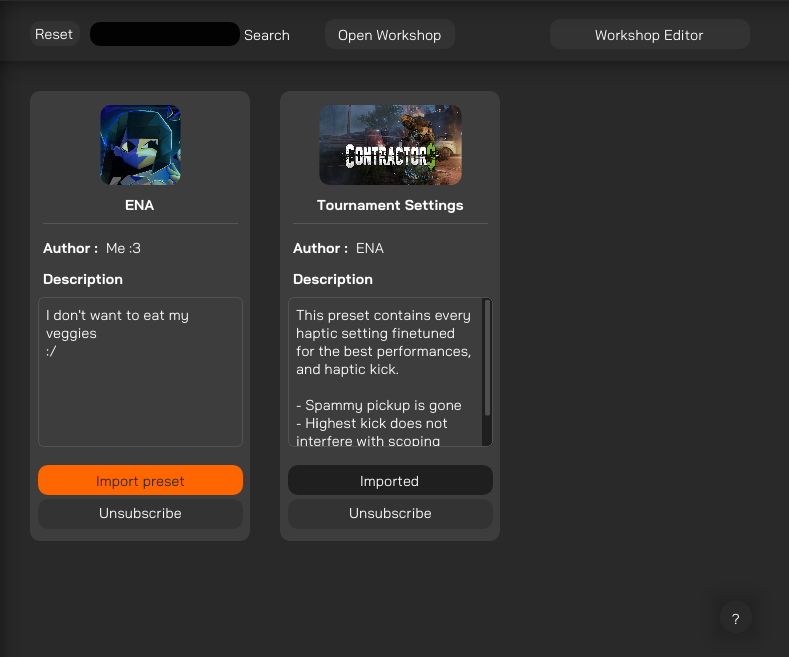
This page lists all items you’ve previously subscribed to for the Companion-app.

You can search for a specific item in your list using the search bar.


companion app steam workshop page

Importing presets

If you don’t have any items yet or want to open the application workshop in a single click, you can press the “Open Workshop” button. 

After subscribing to an item from the steam application, you might have to restart the Companion-application to see newly added items.

To import a subscribed item into the preset manager, click the “Import Preset” button.

Your preset will be imported, and the button will change its status to “Imported”.

To unsubscribe and delete the item from your computer, click the “Unsubscribe” button.

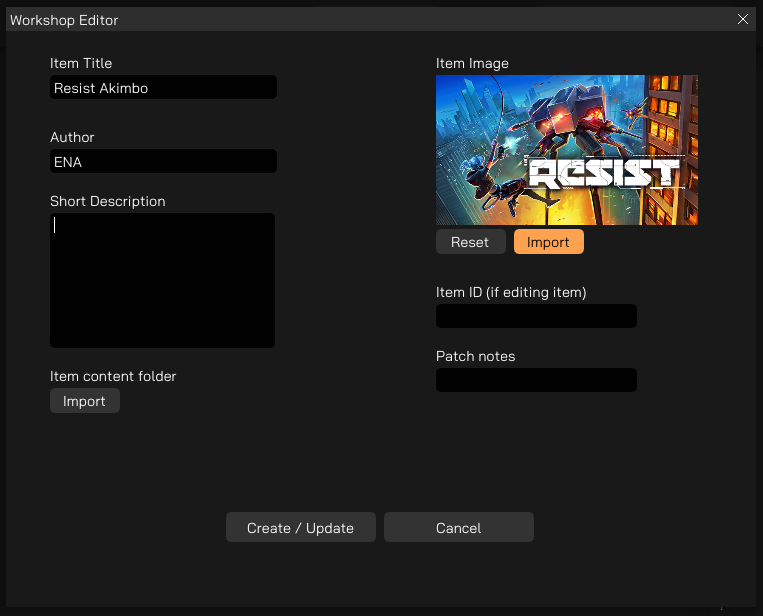
Steam Workshop Editor

In advanced mode, you can upload your own items after clicking on the “Workshop Editor” button.

You can upload a new item every 15 minutes but if you need to modify an existing one the delay is shorter (no delay on lightweight items).

Your item can be reported and will be removed from the Workshop if it doesn’t respect Steam guidelines.

Exporting your presets

To export your presets and upload an item:

  1. Start by preparing a folder outside the Companion-application. The folder will be your item uploaded on Steam Workshop.
  2. If it’s not already done, export your desired preset to the folder, or move the preset to that folder.
  3. When your folder is ready and you’ve put all your files inside, open the Editor in the Companion-application.
  4. Fill in the required fields.
  5. Precise your prepared folder location.
  6. Import an image that will represent your content.
companion app steam workshop editor

Edit existing item

If you want to edit an existing item belonging to you, you will have to specify its ID.

Your Item ID is the last numbers in the URL bar of the Steam app workshop, either web or desktop. Example: “https://steamcommunity.com/workshop/filedetails/?id=3104917878” 

Patch notes: Not required but can provide useful information to users on item updates.

When you’re done, click the “Create/Update” button to upload your item on steam.


Streamers Addon

In advanced mode, the top bar contains a “Stream Plugin” button.

This feature is destined for content creators and streamers. It is similar to input overlay for gaming controllers. 

With it, you show an icon of your haptic devices on your stream overlay. This icon will blink each time you use it. 

Clicking the button opens a browser window.

You can import that browser source inside your favorite streaming software.

Then, follow the written instructions on the source.

You can change the device type by clicking on the image logo multiple times, and the channel by clicking on the button right under each device.

Once set-up, the tracked devices will be highlighted when a kick is detected.

By confirming changes, you save the current settings for your next broadcast sessions.

When you erase all, your saved configuration will be cleared.

FAQ and Troubleshooting


Runtime for Meta HMD and PCVR


The Companion-app currently works with OpenVR runtime exclusively. If you own an Oculus/Meta HMD, you can follow these steps to enable OpenVR globally. 


Method 1: changes runtime globally. 

  1. Open Oculus App
  2. Go to Settings
  3. Go to General
  4. Select OpenXR Runetime
  5. Set SteamVR as active


Method 2: change runtime for specific games. 

  1. Open Steam
  2. Go to your desired game
  3. Open setting
  4. Open file Location
  5. Right click the .exe file
  6. Properties
  7. Compatibility
  8. Run in compatibility mode for Windows 7


Note: OculusSDK-exclusive games won't work with the companion-app even by changing the runtime. 

I want to set up my 2 devices for SteamVR


  1. Make sure Advanced mode is disabled (the button should be gray)
  2. Make sure both of your devices are connected to your PC by going into the side panel option "Connected Devices"
  3. If you see 2 cards with a non-zero battery percentage, you're set.
  4. Now, go to SteamVR tab right below.
  5. There should be 2 toggle buttons present on the menu
  6. Make sure they're ticked "on"
  7. Enable SteamVR tab toggle button
  8. Finetune your SteamVR settings
  9. Create new presets and save them through the preset manager if you want to keep your settings on your next session.

I want my 2 devices to kick separately in Steamvr mode


  1. Make sure both of your devices are connected to your PC by going into the side panel option "Connected Devices". If you see 2 cards with a non-zero battery percentage, you're set.
  2. Enable advanced mode. You can manage signals by channel from there when advanced mode is enabled.
  3. Go to SteamVR tab right below.
  4. Disable the listen events on "All" channel.
  5. If you didn't change manually your channels, your first 2 devices are going to be in RifleButt and RifleBolt (1 device per channel).
  6. Make sure you have only 1 listen event side (right or left) enabled on each Channel setting.


If your left device shoots on right events: 

  1. Enable SteamVR tab toggle button
  2. Swap the listen event between the 2 channel settings.
  3. You should be all set up.


If your devices still don't kick although they display percentages:

  1. Note in which channels you just enabled your parameters 
  2. Navigate to "Channel manager" tab.
  3. There is an orange button under each of your devices.
  4. Ensure that each device assigned canal. corresponds to the ones you just set up in SteamVR.

How can I reduce the kick or rumble of natively compatible games or mods using the companion-app?


  1. Launch the Companion-App first, then your game.
  2. If you didn't set channels manually go directly under "Native and mods" tab.
  3. Adjust the sliders until you have a good result.
  4. Save your configuration as a preset if you want to keep it for your next session.

Pistol1 is not always Left hand


Pistol1 may not always be the left hand, and which gets assigned to it depends on which device pairs to game first.

Games that have Pistol1+Pistol2 have an 'invert channel' or 'swap hands' option in the settings to allow you to change which hand your 2 ProVolvers are assigned to.

More than 2 devices kicking at the same time impossible


It is only possible to use 2x devices at a time.

If one tries to pair 3x or more, only the first 2 devices paired to a game will receive events. The rest receive nothing even if they pair to the game.

In some games, pairing more than 2x, or having more than 2x devices in device history even if only 1-2x are powered on to actually connect to game, completely breaks pairing, causing an infinite feedback loop of all devices reconnecting to the game every 5-20 seconds.

More than 2 devices and game crashes with Companion app


Dead Second and some mods simply don't work with Companion App at all when using 2x devices.

If Companion App is already running, affected games crash and won't launch properly.

If one launches Companion App after game is running, it may still crash, or haptic device constantly pair over and over.

Even if none of these occur, any changes made to native game effects will not apply no matter what.

Device history with modded games


To use any mod on PC, you must only have 2x devices in device history for game to give events to devices properly.

Otherwise it can't tell that the devices that aren't powered on that are in device history aren't the ones being used, so it will always pick one of the ones not actually powered on to receive Pistol2 signal.

bHaptics & ProTubeVR haptics on PC


ForceTube and ProVolver only work on BT4.0 dongles. Not compatible with BT5.0 dongles. They can work, according to customers, on Intel chipset (specifically AX200, AX210, AX220) Wifi+BT which can be found directly on some motherboards, or bought as PCIE adapter cards. Also, they do not work well with Realtek chipset in any capacity. 

The BT4.0 dongle we provide runs a Qualcomm chipset. It does not have the capability to let you run both ForceTube/ProVolver & bHaptics simultaneously. 

Newest bHaptics products come with a BT5.0 dongle that runs on a Realtek chipset. They used to come with a BT4.0 dongle that let users run both products simultaneously. 

bHaptics products still work with BT4.0 (according to their website). 


The solution is to find Bluetooth that can let both ForceTube/ProVolver & bHaptics work at same time.

This is 1 of 3 things, either: 

1. The BT4.0 dongle bHaptics used to provide with their products until they changed to BT5.0 

2. A BT4.0 dongle that is not Realtek. May take trial and error to find one that works well with both. Asus BT4.0 dongle has been reported to work! 

3. Onboard Bluetooth from desktop motherboard or PCIE Card that is Intel Chipset AX200, AX210, or AX220. Make sure to install WiFi antenna even if you don't use WiFi, because it boosts BT signal strength allowing it to work. This also means it will likely not work on laptop and you need to use a BT4.0 dongle. 

Disclaimer: BT transmitters have a limit on how many devices can be actively paired simultaneously. This means it is not possible to use every single bHaptics product while also using 2 of our haptic devices (ForceTube+ProVolver, or 2X ProVolver).

Tutorials

Guide Companion App FR

Guide de la Companion App

pour les accessoires VR haptiques


Boite logiciel Companion App de ProTubeVR
Pistolet haptique VR ProVolver
Gunstock VR ForceTube haptique

La Companion App crée une rétrocompatibilité pour les jeux SteamVR et OpenVR avec nos dispositifs haptiques, tels que la crosse ForceTube et le pistolet ProVolver.


C'est ce que nous appelons la compatibilité SteamVR.

Qu'est-ce que cela signifie?

1) Ce petit logiciel détectera lorsque ton avatar appuie sur la gâchette de tes armes virtuelles.


2) Il comprendra quel type d'armes tu utilises. C'est là où la magie opère (beaucoup de maths et de conversion électrique, pour être honnête).


3) La Companion App envoie un signal à tes dispositifs haptiques.


4) Les dispositifs s'activeront, reproduisant le recul et les vibrations de ce qui se passe sur tes armes en jeu. 

De quoi ai-je besoin?

Tu n'as besoin de l'application Compagnon que si tu es en PCVR.


Si tu joues à des jeux directement sur ton casque autonome (comme le Meta Quest 2 et le Quest 3 sans lien PCVR), nos dispositifs haptiques sont nativement compatibles avec une liste étendue et en constante évolution de jeux VR.


A noter : Si tu utilises un casque Meta avec PCVR, tu dois changer le runtime. Plus d'infos dans la FAQ ci-dessous.

Jeux compatibles ou moddés

Grâce à notre collaboration avec les studios VR, la compatibilité et la calibration de nos dispositifs haptiques sont directement intégrées dans les jeux.


Cette intégration native ne nécessite pas l'utilisation de la fonctionnalité de compatibilité SteamVR et est présente dans plus de 60 titres sur plusieurs plateformes, y compris les casques PC, Quest et Pico. Cette liste de titres natifs ne cesse de s'allonger. 


En plus de ces titres, des moddeurs talentueux de la communauté ajoutent des mods pour permettre l'intégration native dans des jeux populaires qui ne l'ont pas. Pour les jeux avec un tel mod, l'utilisation de la compatibilité SteamVR de la Companion App n'est pas nécessaire, tout comme pour les titres natifs.


Pour les jeux PCVR qui ne sont ni natifs ni moddés, tu dois utiliser la fonctionnalité de compatibilité SteamVR de la Companion App.


Pour les jeux PCVR avec intégration, tu peux utiliser la Companion App pour affiner ton expérience.


Installation de la Companion App


page Steam de la Companion App pour téléchargement

1. Va sur la page Steam de la Companion App.


Raccourci de la Companion App

2. Ajoute la Companion App à ta bibliothèque Steam.


3. Installe la Companion App depuis ta bibliothèque Steam, comme n'importe quel jeu.


4. Utilise le raccourci créé pour lancer la Companion App.

Manuel d'utilisation de la Companion App

Aperçu général

Définitions


  • Appareil: L'équipement électronique que tu connectes à l'application.
  • Canal: Un espace dédié où tu peux connecter tes appareils et isoler les signaux reçus de manière spécifique.
  • ms: Millisecondes.
  • Preset: Un fichier de configuration qui contient les canaux sauvegardés et les informations de tes appareils.
Aperçu général de la companion app

Panneau de gauche

Mode par défaut

Par défaut, voici les options disponibles :

Mode Avancé

Le passage d'un mode à l'autre permet d'activer ou de désactiver des fonctions avancées, comme l'attribution de canaux personnalisés à ton appareil.

Barre supérieure

Auto-connexion

La Companion app essaie de se connecter aux appareils qui sont connus par ton PC.


Désactive cette option après avoir connecté les appareils pour que les suivants ne se connectent pas.


En mode avancé, le bouton Stream Plugin apparait. 


Barre supérieure de la companion app

Gestionnaire de Preset

Au lancement, l'application compagnon se charge toujours avec les paramètres par défaut. Si tu souhaites conserver tes paramètres modifiés, tu dois les enregistrer dans un preset.


Double-cliquer sur un preset chargera la configuration associée.


Enreg: Créer un nouveau preset à partir du nom dans la zone de texte noire et sauvegarde les configurations actuelles en incluant:

  • Canaux assignés des appareils.
  • Paramètres SteamVR.
  • Paramètres de compatibilité Native
  • Valeurs des réglages Valve Index.

L'enregistrement d'un paramètre dans un preset existant écrase ce dernier.


Pour récupérer les réglages par défaut si tu as supprimé ou ecrasé le preset "Default", redémarres l'application et enregistre un nouveau preset avec le gestionnaire.


Import: Importe un fichier preset existant. Tu peux trouver des presets partagés sur notre communauté Discord.  


Export: Exporte tous les presets dans un fichier. Tu peux les partager avec le reste de notre communauté Discord. 


Suppr: Supprime le preset actuellement en surbrillance.


gestionnaire de preset de la companion app

Appareils connectés et canaux


Que sont les canaux ?


Pour fonctionner, la Companion App capte les signaux du jeu, les convertit et les envoie à tes appareils, créant le retour haptique.

Ces signaux passent par des canaux.

Il y en a 6. Par défaut, le signal passera par les 6 canaux et ton appareil générera le retour. 

Pourquoi les canaux sont importants ?


Si tu as 2 appareils haptiques ou plus, les canaux leur permettent de se déclencher séparément. 

Si tu souhaites des retours de force indépendant, tu dois sélectionner un canal spécifique pour chacun d'entre eux.

Ainsi, tu éviteras que le pistolet ProVolver génère un recul quand tu utilises ton fusil ForceTube, par exemple.

Si tu as une paire de pistolet haptiques ProVolver, cela te permet aussi de ne sentir le recul que sur la main qui tire.

Canaux spéciaux pour les jeux natifs


Pour assurer une compatibilité et une flexibilité maximales, un jeu natif n'envoie des signaux à un canal que si ses développeurs ont configuré ce canal spécifique.

Certains développeurs n'ont configuré qu'un ou deux canaux pour leur jeu. Si tu utilises une configuration de canaux personnalisée au lieu de la configuration par défaut pour ces jeux, tu dois sélectionner le canal configuré.

D'après nos propres tests, nous avons établi une liste de jeux et de leurs canaux spécifiques. Tu peux trouver cette liste dans la section des Réglages des canaux spéciaux ci-dessous.

Assignation automatique des canaux


Connecter ton nouvel appareil l'assignera automatiquement à un canal de signal dans cet ordre :

RifleButt - RifleBolt - Pistol1 - Pistol2 - Other - Vest

Si tu connectes plus de dispositifs que le nombre total de canaux disponibles, l'assignation automatique recommencera à RifleButt et ainsi de suite.


Mode par défaut

C'est la page sur laquelle tu arrives lorsque tu démarres l'application. Par défaut, tu verras chaque dispositif connecté ici. 


Tu peux cliquer sur n'importe quelle carte d'appareil pour changer son type, et l'application s'en souviendra jusqu'à nouvel ordre. 


appareils connecté par défaut de la companion app

Mode Avancé

En mode avancé, un bouton Canaux apparaît sous chaque appareil.


Cliquer sur ce bouton fait apparaître un menu où tu peux assigner manuellement des canaux à ton appareil haptique.


C'est important pour certains jeux et/ou si tu as plusieurs dispositifs haptiques.


apparail connecté avancé de la companion app
détail des canaux d'un appareil de la companion app

SteamVR

Personnalise les signaux venant de la compatibilité SteamVR.


Si tu utilises un casque Meta en PCVR, tu dois changer le runtime. Chaque étape est détaillée dans la FAQ.

Mode par défaut

Ecouter événements : Si tu veux que le canal actuel fasse réagir les appareils quand ta main droite ou gauche déclenche un évènement haptique en jeu.


Puissance du kick : Contrôle la puissance de tir de tes appareils.


Seuil du kick : Ajuste cette variable pour contrôler la puissance requise par les évènements SteamVR pour déclencher un tir. Chaque jeu a des valeurs différentes définies par les développeurs, tu devras faire quelques essais pour obtenir un bon résultat.


Seuil de vibrations : Ajuste cette variable pour contrôler la puissance requise par les évènements SteamVR pour déclencher des vibrations.


mode par défaut pour SteamVR de la Companion App

Mode Avancé

Commence par sélectionner un canal et modifie tes paramètres à partir de là.


Assure-toi que ton appareil se trouve dans le bon canal en consultant le gestionnaire de canaux. Tu peux aussi utiliser la commande "Identifier".


Identifier : Envoie une commande de recul/kick dans le canal sélectionné


Astuces : Si identifier un canal n'entraîne pas de kick sur un appareil, cela veut probablement dire qu’aucun appareil n’a ce canal d’assigné. Un appareil est considéré comme connecté si sa batterie affiche un pourcentage supérieur à 0.


mode avancé pour SteamVR de la Companion App

Interpréter comme kick ou vibrations : Si tu veux que les évènements de ta manette droite ou gauche soient interprétés en tant que Kick, Vibrations, ou les deux.


Délai des tirs : Limite le temps de réaction de tes appareils. Il évite de déclencher des salves d'évènements à chaque interaction en jeu.


Durée minimum des vibrations : Contrôle la durée de chaque vibration.


détails des canaux pour SteamVR de la Companion App

Démo haptique

Mode par défaut

Utilisé pour simuler différents types d’armes.

  • Sniper : Recul avec vibration.
  • M16 : Salve de 3 tirs consécutifs.
  • PKM : Salve de tirs rapides en continu.
  • P90 : Salve de tirs et vibrations rapides en continu.
  • Laser : Vibre pour charger l'arme, puis décharge en un tir. 
type d'arme de la démo de la Companion App

Mode Avancé

Tu peux accéder à la personnalisation des canaux pour la démo en mode avancé.


Assure-toi que ton appareil se trouve dans le bon canal en consultant le gestionnaire de canaux. Tu peux aussi utiliser la commande "Identifier".


Identifier : Envoie une commande de recul/kick dans le canal sélectionné.


Astuces : Si identifier un canal n'entraîne pas de kick sur un appareil, cela veut probablement dire qu’aucun appareil n’a ce canal d’assigné. Un appareil est considéré comme connecté si sa batterie affiche un pourcentage supérieur à 0.


détail des canaux de la démo haptique de la Companion App

Tir simple : Tire une seule fois en utilisant les paramètres des sliders ci-dessous.


Tir auto : Tire en continu en utilisant les paramètres des sliders ci-dessous.


Puissance des kicks : Contrôle la puissance de kick pour le mode démo.


Puissance des vibrations : Contrôle la puissance des vibrations pour le mode démo.


Durée de vibration : Contrôle la durée des vibrations à chaque tir pour le mode démo. 500ms maximum.


Fréquence des tirs auto : Combien de fois par secondes tu veux tirer avec le mode de Tir Auto pour la démo. 


personnalisation du tir dans la démo haptique de la Companion App

Natives et Mods

Sur PCVR, si tu joues à un jeu natif ou à un jeu dont l'intégration est permise par un mod, tu peux personnaliser les signaux.


Ces jeux n'ont pas besoin de la Companion App pour fonctionner, mais elle te permettra d'affiner certains paramètres si tu en as besoin. 


Tu dois d'abord connecter l'appareil désiré à la Companion App, puis lancer ton jeu.

Mode par défaut

Par défaut, ton appareil écoute tous les canaux à la fois, ce qui garantit la plupart des compatibilités.


Pour chacun des paramètres, réfère-toi à ces valeurs : 

  • 0% : Aucune puissance.
  • 100% : Puissance d'origine.
  • 200% : Puissance doublée.


Puissance de kick : Contrôle le pourcentage de puissance du kick.


Puissance des vibrations : Contrôle le pourcentage de puissance des vibrations.


Durée de vibration : Contrôle le pourcentage de durée de vibration pour chaque tir


personnalisation de l'effet par défaut pour les jeux intégrés nativement de la Companion App

Mode Avancé

Accède à la personnalisation des canaux pour tes jeux natifs et moddés en mode avancé.  Cela permet à tes appareils de fonctionner séparément.


Assure-toi que ton appareil se trouve dans le bon canal en consultant le gestionnaire de canaux. Tu peux aussi utiliser la commande "Identifier".


Identifier : Envoie une commande de recul/kick dans le canal sélectionné.


Astuces : Si identifier un canal n'entraîne pas de kick sur un appareil, cela veut probablement dire qu’aucun appareil n’a ce canal d’assigné. Un appareil est considéré comme connecté si sa batterie affiche un pourcentage supérieur à 0.


canaux pour les jeux intégrés nativement de la Companion App
personnalisation du tir pour chaque canal des jeux natifs de la Companion App

Réglages des canaux spéciaux

Tes appareils doivent utiliser les canaux corrects définis par les développeurs pour que la personnalisation prenne effet.


Pour les jeux suivants, lorsque tu actives la personnalisation des jeux natifs et moddés, assure-toi que tes dispositifs haptiques sont réglés sur les bons canaux.


Si un jeu de cette liste ne fonctionne pas, recherche et active les paramètres ForceTube dans le menu de ton jeu.


Si ton jeu natif ou compatible avec un mod n'apparait pas dans cette liste, tu devras trouver les canaux utilisés par tâtonnement.


Tout jeu qui n'est pas intégré nativement ou par un mod fonctionnera avec la compatibilité SteamVR.


Dead Second Pistol1
Surv1v3 Pistol1

Cactus cowboy Plants at War

RifleButt
RifleBolt

Cactus cowboy 3 Fully loaded RifleButt
RifleBolt
Hotdogs Horseshoes and Handgrenades RifleButt
RifleBolt
Larcenauts Pistol1
Pistol2
Resist
(active le paramètre dans les options du jeu)
Pistol1
Pistol2
Onward RifleButt
RifleBolt
Contractors RifleButt
RifleBolt
Tales of Glory 2: Retalation

RifleButt
RifleBolt

Vertigo 2

RifleButt
RifleBolt

Gun club VR RifleButt
RifleBolt

Warchasm
(pas de personnalisation possible avec la Companion App)

Akimbo directement

Gambit !
(Pistol uniquement, main droite uniquement. Lance la Companion App après que le jeu se soit connecté aux appareils haptiques)
Pistol2

Valve Index avec Knuckles

Quelques joueurs utilisant un HMD Valve Index et leurs Knuckles nous ont signalé que leurs mains virtuelles s'envolaient lorsqu'ils tiraient en rafale. 


Nous avons développé un pilote pour résoudre ce problème.


Le pilote ne fonctionne pas pour les autres casques : seul le Valve Index en a besoin. Si tu ne possèdes pas de casque Valve Index ou si tu ne rencontres pas ce problème avec les Knuckles, tu peux sauter cette section. 

Installer le pilote


  1. Ferme la Companion App et éteins la VR si elle est activée.
  2. Va dans le dossier d'installation de la Companion App. 
  3. Ouvre le dossier "Valve-Index-Knuckles-driver".
  4. Installe le pilote.
  5. Relance la Companion App.
  6. Active le mode Avancé.
  7. Va sur la section Valve Index.
  8. Active l'option avec le bouton à bascule et commence la personnalisation des options.

Désinstaller le pilote


  1. Va dans le dossier "C:\ Program Files(x86)\ Steam\ steamapps\ common\ SteamVR\ drivers".
  2. Supprime le dossier “!ProtubeDriver1”.

Affiner les réglages des Knuckles

Aides supplémentaires : 

  1. Essaye de réduire la puissance de kick produite dans la section de la Companion App que tu utilises (SteamVR ou Native et Mods).
  2. Augmente le délai de tir.
  3. Réduire la durée de vibrations.
  4. N'oublie pas de sauvegarder le preset.


Acceleration max : Limite l'accélération maximum de ta main en jeu.


Durée de gel après kick : Combien de temps ta main est gelée après un kick si elle atteint l'accélération max.


paramètrage des knuckles du Valve Index dans la Companion App

Steam Workshop

Tu peux télécharger et partager des pré-réglages avec la communauté, grâce au Steam Workshop de la Companion App.


Cette page liste tous les items auxquels tu t’es précédemment abonné pour la Companion-App.


Tu peux rechercher un item en particulier dans la liste en utilisant la barre de recherche.


companion app steam workshop page

Importer un preset

Si tu n’as pas encore d’item ou si tu veux ouvrir le Workshop de l’application en un clic, appuis sur le bouton « Ouvrir Workshop ».


Après t’être abonné à un item depuis l’application Steam, tu devras redémarrer la Companion App pour afficher les items fraichement ajoutés.


Pour importer un item auquel tu t’es abonné dans ton gestionnaire de presets, clique sur le bouton "Importer preset".


Ton preset sera importé, et le bouton se changera en "Importé".


Pour te désabonner et supprimer un item de ton ordinateur, clique sur le bouton "Se désabonner". 

Éditeur Steam Workshop

En mode avancé, tu peux uploader tes propres items après avoir cliqué sur le bouton "Editeur du Workshop".


Tu peux uploader un nouvel item toutes les 15 minutes mais si tu modifies un item existant, le délai est plus court (aucun délai pour les items très légers).


Ton item peut être signalé et sera retiré du Workshop s’il ne respecte pas les règles Steam.


companion app steam workshop editor

Exporter les presets

Pour exporter tes presets et téléverser un item :

  1. Commence par préparer un dossier en dehors de la Companion-App. Ce dossier contiendra ton item.
  2. Si ce n’est pas déjà fait, exporte ton preset vers le dossier, ou bien déplace-le vers ce dossier.
  3. Quand ton dossier est prêt, et que tu as mis tous tes fichiers à l’intérieur, ouvre l’éditeur de la Companion-App.
  4. Remplis les champs requis.
  5. Précise l’emplacement du dossier préparé.
  6. Importe une image qui représentera ton contenu.

Éditer un item existant

Si tu veux modifier un item publié qui t’appartient déjà, tu devras spécifier son ID.


Ce sont les derniers chiffres dans la barre URL de l’application Steam sur la page de ton item, sur la version bureau ou web. Exemple :  “https://steamcommunity.com/workshop/filedetails/?id=3104917878” 


Notes de Patch : Non requis, mais permet de partager des informations utiles aux autres utilisateurs quand tu mets ton item à jour.


Quand tu as terminé de tout remplir, clique sur le bouton "Créer/Modifier" pour uploader ton item sur Steam. 


Streamers Addon

En mode avancé, la bar du haut contient le bouton "Stream Plugin".


Cette fonctionnalité est destinée aux créateurs de contenus et aux streameurs. Elle est similaire à l'input overlay des manettes de jeu. 


Avec elle, tu affiches une icône de tes appareils haptiques sur ton interface de stream. Cette icône clignotte à chaque fois que tu utilises ton accessoire.

Cliquer sur le bouton ouvre une fenêtre dans ton navigateur.


Tu peux importer la source du navigateur dans ton logiciel de streaming préféré.


Ensuite, suis les instructions écrites sur la source. 


Tu peux interagir avec le widget dans ta scène avec un clic droit et en sélectionnant l’option "Interagir". 

  • Le premier bouton crée des appareils à afficher sur ta source.
  • Cliquer sur l’image du logo plusieurs fois de suite change le type d’appareil affiché.
  • Cliquer sur la zone sous l’image change le canal à traquer.


Une fois configuré, clique sur "Confirm Changes" pour verrouiller l’interface et permettre à ta source de sauvegarder la configuration pour ta prochaine session.


Les appareils traqués seront mis en surbrillance quand un kick dans le canal associé est détecté.


Tu peux supprimer la configuration en cliquant sur le bouton "Erase All".


companion app steam workshop editor

FAQ et Dépannage


Runtime pour HMD Meta sur PCVR


La Companion App fonctionne actuellement avec le runtime OpenVR exclusivement. Si tu possèdes un HMD Oculus/Meta, tu dois suivre ces étapes pour activer OpenVR. 


Méthode 1 : changer le runtime partout. 

  1. Ouvre l'Oculus App (Meta Quest Link)
  2. Va dans les paramètres
  3. Va dans Général
  4. Sélectionne Execution OpenXR
  5. Active SteamVR


Méthode 2 : changer le runtime pour des jeux spécifiques. 

  1. Ouvrir Steam
  2. Aller dans le jeu désiré
  3. Ouvrir les paramètres
  4. Ouvrir l'emplacement des fichiers
  5. Faire un clic droit sur le fichier .exe
  6. Aller dans Propriété
  7. Aller dans Compatibilité
  8. Lancer en mode compatibilité pour Windows 7


Note : Les jeux exclusifs à l'OculusSDK ne fonctionneront pas avec la Companion App, même en changeant le runtime. 

Je veux configurer mes 2 appareils pour SteamVR


  1. Assure-toi que le mode avancé est désactivé (le bouton doit être gris).
  2. Assure-toi que tes 2 appareils sont connectés à ton PC en allant dans l'option "Appareils connectés" du panneau latéral
  3. Si tu vois 2 cartes avec un pourcentage de batterie supérieur à 0, passe à la suite.
  4. Va dans l'onglet SteamVR juste en dessous.
  5. Il devrait y avoir 2 boutons à bascule dans le menu
  6. Assure-toi qu'ils sont activés
  7. Active le bouton de l'onglet SteamVR
  8. Ajuste tes paramètres SteamVR
  9. Crée de nouveaux préréglages et enregistre-les dans le gestionnaire de preset si tu souhaites les conserver pour ta prochaine session.

Je veux que mes deux appareils fonctionnent séparément en mode SteamVR


  1. Assure-toi que tes 2 appareils sont connectés à ton PC en allant dans l'option "Appareils connectés" du panneau latéral. Si tu vois 2 cartes avec un pourcentage de batterie supérieur à 0, passe à la suite.
  2. Active le mode avancé. Tu peux maintenant gérer les signaux par canal.
  3. Va dans l'onglet SteamVR juste en dessous.
  4. Désactive les événements d'écoute sur le canal "All".
  5. Si tu n'as pas changé manuellement tes canaux, tes 2 premiers appareils seront dans RifleButt et RifleBolt (1 appareil par canal).
  6. Assure-toi de n'avoir qu'un seul canal d'écoute ("manette gauche" ou "manette droite") activé sur chaque paramètres du canal.    


Si ton appareil gauche tire sur les événements de droite : 

  1. Active le bouton à bascule de l'onglet SteamVR
  2. Permute l'événement d'écoute entre les 2 paramètres de canal ("manette gauche" ou "manette droite").


Si tes appareils ne fonctionnent toujours pas bien alors qu'ils affichent des pourcentages de batterie :

  1. Note dans quels canaux tu dois activer les paramètres.
  2. Navigue vers l'onglet "Gestionnaire de canaux".
  3. Il y a un bouton orange sous chacun de tes appareils.
  4. Assure-toi que chaque canal assigné à un appareil correspond à ceux que tu viens de configurer dans SteamVR.

Comment puis-je réduire la puissance des jeux ou des mods compatibles en natif à l'aide de la Companion App ?


  1. Lance d'abord la Companion App, puis ton jeu.
  2. Si tu n'as pas réglé les canaux manuellement, va directement dans l'onglet "Native and mods".
  3. Ajuste les curseurs jusqu'à ce que tu obtiennes le résultat désiré.
  4. Sauvegarde ta configuration en tant que preset si tu souhaites la retrouver à la prochaine session.

Pistol1 n'est pas toujours assigné à la main gauche en mode Natif


Le canal Pistol1 n'est pas toujours la main gauche, et la main qui lui est attribuée dépend de l'appareil qui est associé au jeu en premier.

Les jeux qui ont Pistol1+Pistol2 ont une option "inverser le canal" ou "échanger les mains" dans les paramètres pour te permettre de changer la main de tes 2 ProVolvers.

Impossibile d'utiliser plus de 2 appareils haptiques en même temps


Il n'est possible d'utiliser que 2 appareils à la fois.

Si l'on essaie d'en appairer 3x ou plus, seuls les 2 premiers appareils appairés à un jeu recevront des signaux. Les autres ne reçoivent rien, même s'ils sont associés au jeu.

Dans certains jeux, l'appairage de plus de 2 appareils, ou le fait d'avoir plus de 2 appareils dans l'historique de l'appareil (connectés ou non), interrompt complètement l'appairage. Cela provoque une boucle de rétroaction infinie où tous les appareils se reconnectent au jeu toutes les 5 à 20 secondes.

Plus de 2 appareils et le jeu se plante avec la Companion App


Dead Second et certains mods ne fonctionnent tout simplement pas avec la Companion App lorsqu'on utilise deux appareils.

Si la Companion App est déjà en cours d'exécution, les jeux concernés plantent et ne se lancent pas correctement.

Si l'on lance Companion App une fois que le jeu est lancé, le jeu peut encore planter, ou les dispositifs haptique peuvent rentrer dans une boucle d'appairage.

Même si aucune de ces situations ne se produit, les modifications apportées dans les options de ces jeux ne s'appliqueront pas.

Historique des appareils avec les jeux moddés


Pour utiliser n'importe quel mod sur PC, tu ne dois avoir que 2 appareils dans l'historique des appareils pour que le jeu leur transmette les signaux correctement.

Le jeu ne peut pas faire la distinction entre appareils connectés et déconnectés dans l'historique des appareils. Il risque de toujours choisir l'un des non-connectés pour recevoir le signal de Pistol2.

bHaptics et produits haptiques ProTubeVR


Le ForceTube et ProVolver ne fonctionnent qu'avec les dongles BT4.0. Ils ne sont pas compatibles avec les dongles BT5.0. Ils peuvent fonctionner, selon les clients, sur les chipsets Intel (spécifiquement AX200, AX210, AX220) Wifi+BT qui peuvent être trouvés directement sur certaines cartes mères, ou achetés en tant que cartes adaptatrices PCIE. Ils ne fonctionnent pas non plus avec les chipsets Realtek, quelle que soit leur capacité. 

Le dongle BT4.0 que nous fournissons utilise un chipset Qualcomm. Il ne permet pas de faire fonctionner simultanément le ForceTube/ProVolver et bHaptics. 

Les produits bHaptics les plus récents sont livrés avec un dongle BT5.0 qui fonctionne avec un chipset Realtek. Auparavant, ils étaient livrés avec un dongle BT4.0 qui permettait aux utilisateurs d'utiliser les deux produits simultanément. 

Les produits bHaptics fonctionnent toujours avec BT4.0 (selon leur site web). 


La solution est de trouver un Bluetooth qui permette à ForceTube/ProVolver et bHaptics de fonctionner en même temps.

C'est l'une des 3 possibilités suivantes : 

1. Le dongle BT4.0 que bHaptics fournissait avec ses produits jusqu'à ce qu'ils passent à BT5.0. 

2. Un dongle BT4.0 qui n'est pas Realtek. Il faudra peut-être procéder par essais et erreurs pour en trouver un qui fonctionne bien avec les deux. Le dongle BT4.0 d'Asus a été signalé comme fonctionnant ! 

3. Bluetooth intégré de la carte mère de l'ordinateur de bureau ou de la carte PCIE qui est Intel Chipset AX200, AX210, ou AX220. Veillez à installer l'antenne WiFi même si vous n'utilisez pas le WiFi, car elle augmente la force du signal BT, ce qui lui permet de fonctionner. Cela signifie également qu'il ne fonctionnera probablement pas sur un ordinateur portable et que vous devrez utiliser un dongle BT4.0. 


Note : les émetteurs BT ont une limite quant au nombre d'appareils pouvant être appariés simultanément. Cela signifie qu'il n'est pas possible d'utiliser tous les produits bHaptics tout en utilisant 2 de nos dispositifs haptiques (ForceTube+ProVolver, ou 2X ProVolver).

Tutorials

ProVolver Setup EN test

You got your hand on a ProVolver. With this, you will increase your immersion while playing.
The ProVolver allows you to feel the handguns in your games. You can use it with one hand or with two hands with the front extension.

image.png Setting up your ProVolver should take 10 to 20 minutes.

First, make sure you work in a clear area and be very careful. Some parts can get lost easily.

Parts list

....................................................................................................................................................................................................................................................................................

Content of the box
image.png image.png
prostraps-cushion-alone-right-FRONT.png image.png
image.png
x1 x1 x1 x1 x1
ProVolver haptic Module ProVolver rear controller mount (cup) ProStrap Charging cable USB to USB-C  USB Bluetooth dongle

....................................................................................................................................................................................................................................................................................

If you took the front extension
provolver-right-front-bracket-COTE.png image.png
image.png
prostraps-cushion-alone-right-FRONT.png
x1 x2 x1 x1
Front magnetic bracket M4x12 screw Controller mount (cup) ProStrap

....................................................................................................................................................................................................................................................................................


Tool bag


image.png image.png

x1 x1

Hex Key 0,4cm Hex Key 0,25cm


image.png

Step 1: Slot the controller into the rear cup

________________________________________________________________________________________________________________________________________________

For Quest
image.png Slide the controller into the Cup. If you chose the right-handed version, put the right controller in and vice versa.

image.png

For Rift S, Quest 1, 2, 3, 3S & Pro, you need to press the trigger to introduce and remove the controller from the cup.
For Valve Index
image.png
Detach the strap’s string from the controller and put the cup into the controller’s handle, like shown in the picture above.
image.png
Just clip the controller in the cup and put back the strap’s string through the cup and controller.

Step 2: Attach the Main cup to the ProVolver

________________________________________________________________________________________________________________________________________________

image.png

image.png

Make sure the clamps are loosened (see picture above). Place one side of the female rail on the male rail. Then clip the other side of the female rail (it can be a little tricky at first since the piece is not shaped yet).

image.png

Clip the first clamp. Use the provided Allen key to loosen the screw and adjust the tightness.
Do the same on the other side to lock the module.

image.png

If you got the ProVolver for Valve Index, there will be a magnetic add-on provided. You will need it only if you choose to use it with a gunstock or with a stock extension. You can fix it forward or backward or in the middle, as you prefer.

Note: if you install it before trying to fit the controller in, you will not be able to. Neither will you be able to remove it.
You will need to remove the magnetic part beforehand.

image.png
Congratulations! Your ProVolver is now ready to use.

If you use your ProVolver single-handedly, you can refer to the Haptic documentation to connect it to your wireless Headset or PC.

If you took the front magnetic bracket in option to use the ProVolver as a two-handed weapon, keep following this tutorial.

(note to Tao: pay attention to each image in this section, none of the red indicators are present)

Step 3: Attach the front extension

________________________________________________________________________________________________________________________________________________

image.png________________________________________________________________________________________________________________________________________________

image.pngprovolver-right-front-bracket-COTE.png

For this last step, you will need the front magnetic bracket and both M4x12 screws.


PVR Ext.png

PVR Ext vis 1.pngPVR Ext vis 2.png

You can place the bracket on either position 1 (higher) or position 2 (lower) as shown above depending on your appreciation. Screw it in place using the smaller Allen key and both screws.


image.png
PVR Ext Ajust.png
Put the front cup on the Magnetic support. Loosen the thumbscrew to adjust it.
Slot the controller in the cup.
Adjust your front hand in game and tighten the screw back.
Congratulations! Your ProVolver is now ready to be paired.

You can now follow the Haptic documentation to connect it to your gear and enjoy the recoil in your favorite shooters!

________________________________________________________________________________________________________________________________________________