| ### Compatible games and mods Through our collaboration with VR game studios, the compatibility and calibration of our haptic devices are directly integrated into games. This **native compatibility** does not require the use of the SteamVR compatibility feature and is present in over 60 titles across multiple platforms including PC, Quest & Pico headsets. This list of native titles is growing continuously. In addition to these titles, wonderful modders from the community are adding **mods to enable native integration** into popular games that do not. For games with such a mod, usage of the Companion App SteamVR compatibility feature is not required, just like with native titles. Those mods are only available for SteamVR games (PC). For PCVR games that are neither native nor have a mod, you need to use the **Companion App SteamVR compatibility** feature. For PCVR games that are native, you can use the Companion App to finetune your experience. Check [**the native compatiblilities page**](https://help.protubevr.com/books/forcetube-haptic-gunstock/page/haptic-compatibility-and-vr-games) for more details. | |
| [](https://bit.ly/PTVR-CompApp) | 1\. Go on the **[Companion App Steam page](https://bit.ly/PTVR-CompApp)**.
|
| ### General preview | |
| ##### Vocabulary
| |
| ### Left Side panel | |
| ##### Default mode
You have some tabs available by default:
- **Connected Devices**
- **SteamVR**
- **Native and Mods**
- **Haptic Demo**
- **Steam workshop**
| ##### Advanced mode
Switching between modes enable/disable advanced features, like assignng custom channels to your device.
- **Connected Devices (advanced)**
- **SteamVR (advanced)**
- **Native and Mods (advanced)**
- **Haptic Demo (advanced)**
- **Valve Index**
- **Steam workshop**
|
| ### Haptic demo | |
| ### Default mode
Mainly used to simulate different types of weapons.
| ##### Advanced mode Start by selecting a channel and tweak your settings from here. Make sure your device is in the right channel by checking in your channel manager. **Identifier:** Sends a kick command to the selected channel. *Tips: If identifying a channel does not result in any connected device kicking, it probably means that no device has that current channel assigned. A device is considered connected if its battery displays a percentage superior to 0.* *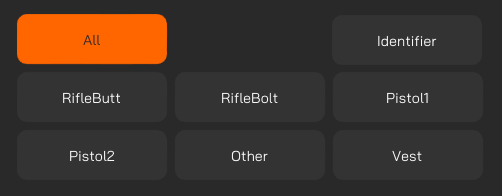* **Custom Single Shot**: Shoots once using specified parameters in brlow sliders. **Custom Auto Shot**: Shoots using specified parameters and loops based on frequency slider. **Kick Power**: Controls the kick power for demo mode. **Rumble Power**: Controls the rumble power for demo mode. **Rumble duration**: Controls the rumble duration on each shot. Max is 500 ms. **Autoshots Frequency**: How many times per second you want to shoot with Custom Auto Shot for the demo mode. 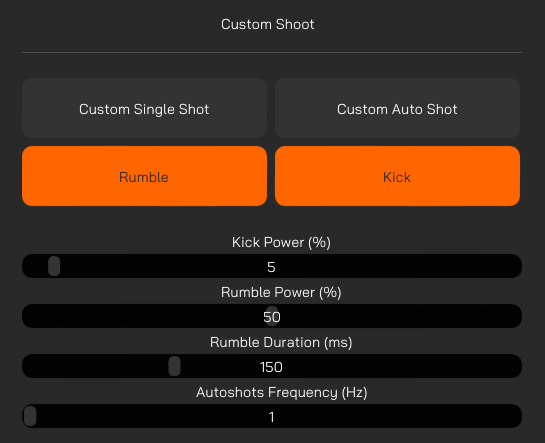 |
| ### FAQ and Troubleshooting |
I want to set up my 2 devices for SteamVR1. Make sure Advanced mode is disabled (the button should be gray). 2. Make sure both of your devices are connected to your PC by going into the side panel option "Connected Devices". If you see 2 cards with a battery percentage above 0, you're set. 3. Now, go to SteamVR tab below. 4. There should be 2 toggle buttons present on the menu. Make sure they're ticked "on". 5. Enable the SteamVR tab's toggle button. 6. Fine-tune your SteamVR settings. 7. Create new presets and save them through the preset manager (top right) if you want to keep your settings for your next sessions.I want my 2 devices to kick separately in Steamvr mode1. Make sure both of your devices are connected to your PC by going into the side panel option "Connected Devices". If you see 2 cards with a battery percentage above 0, you're set.
2. Enable the Advanced mode. The "Connected Devices" panel becomes "Channel Manager". You can manage signals by channel.
3. Go to SteamVR tab below.
4. Disable the listen events on "All" channel.
5. If you didn't change manually your channels, your first 2 devices are going to be in RifleButt and RifleBolt (1 device per channel).
6. Make sure you have only 1 listen event side (right or left) enabled on each Channel setting (eg. RifleButt only has Left-hand controller and RifleBolt only has Right-hand controller).
1. Enable SteamVR tab's toggle button
2. Swap the listen event between the 2 channel settings.
3. You should be all set up.
1. Note in which channels you just enabled your parameters.
2. Assuming you are still in Advanced mode, navigate to "Channel manager" tab.
3. There is an orange button under each of your devices.
4. Ensure that each device's assigned canal corresponds to the ones you just set up in the SteamVR tab.
How can I reduce the kick or rumble of natively compatible games or mods using the companion-app?1. Launch the Companion App first, then your game. 2. If you didn't set channels manually, go directly to the "Native and Mods" tab. 3. Adjust the sliders until you have a good result while testing in-game. 4. Save your configuration as a preset so you can keep it for your next session.Pistol1 is not always Left handPistol1 may not always be set as the left hand, and which gets assigned to it depends on which device paired first to the game. Games that have Pistol1 + Pistol2 usually have an "invert channel" or "swap hands" option in the settings allowing you to change which hand your 2 ProVolvers are assigned to.More than 2 devices kicking at the same time impossibleIt is only possible to use a maximum of 2 devices at a time. If one tries to pair 3 devices or more, only the first 2 devices paired to a game will receive informations. The remaining will receive nothing even if they pair to the game. In some games, paring more than 2 devices will result in interrupting the pairing process of the "additional device".More than 2 devices and game crashes with Companion appSome native or modded games simply don't work with the Companion App at all when using 2 devices. If the Companion App is already running, affected games may crash or won't launch properly. If one launches the Companion App after a game is running, it may still crash, or haptic device constantly pair over and over. Even if none of these occur, any changes made to the game's haptic events will not apply no matter what.Device history with modded gamesTo use any mod on PC, you must have a maximum of 2 devices paired for a game to transmit haptic signals to a devices properly. The game cannot know if your paired devices are on or off. So there is a risk that a signal is sent to an off device. To be safe, unpair any unused devices from the Bluetooth menu.bHaptics & ProTubeVR haptics on PCThe ForceTube and ProVolver only work with Bluetooth 4. They are not compatible with Bluetooth 5 dongles. They can work, according to some customers, on Intel chipset WiFi+BT (specifically AX200, AX210, AX220) which can be found directly on some motherboards, or bought as PCIE adapter cards. Also, they do not work well with Realtek chipset in any capacity. There is always a risk that those do not work, so be aware. The Bluetooth 4.2 dongle we provide runs a Qualcomm chipset. It does not have the capability to let you run both a ForceTube or ProVolver & a bHaptics product simultaneously. Newest bHaptics products come with a Bluetooth 5 dongle that runs on a Realtek chipset. They used to come with a Bluetooth 4 dongle that let users run both ProTubeVR and bHaptics devices simultaneously. bHaptics products still work with BT4.0 (according to their website). The solution is to find a Bluetooth dongle that can let both ForceTube/ProVolver & bHaptics work at same time. DISCLAIMER: Please keep in mind that none of the solutions proposed under are certified to work. The provided Bluetooth 4 dongle we provide is certified to work with any ProTubeVR's haptic devices. bHaptics being a different company and using a different technology, we ask you not to expect a magical working solution. 1 - Get which Bluetooth 4 dongle bHaptics used to provide with their products and aquire it. 2 - Find a Bluetooth 4 dongle that is not Realtek. It may take tries and errors to find one that works well with both ProTubeVR and bHaptics devices. Asus USB-BT400 and TP-Link UB400 dongle has been reported to work! 3 - For users with onboard Bluetooth from motherboard or PCIE Card that is Intel Chipset AX200, AX210, or AX220. Make sure to install WiFi antenna even if you don't use WiFi, because it boosts BT signal strength. Note: Bluetooth transmitters have a limit on how many devices can be actively paired simultaneously. This means it is not possible to use every single bHaptics product while also using 2 of our haptic devices (ForceTube+ProVolver, or 2X ProVolver). |
| ##### **ForceTube** | ||
|  | 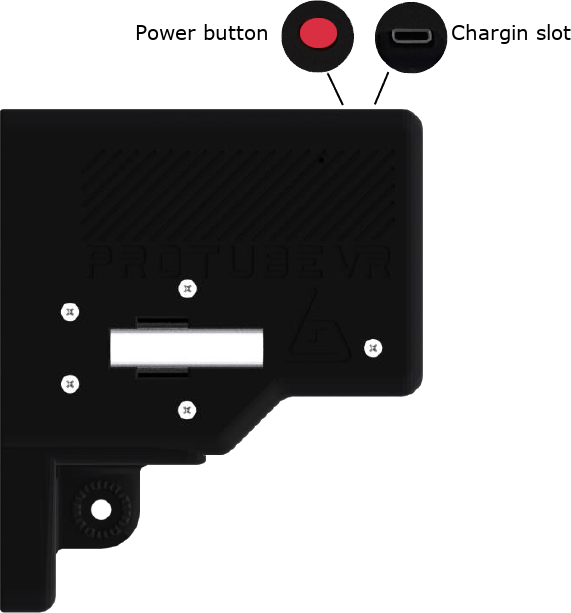 | 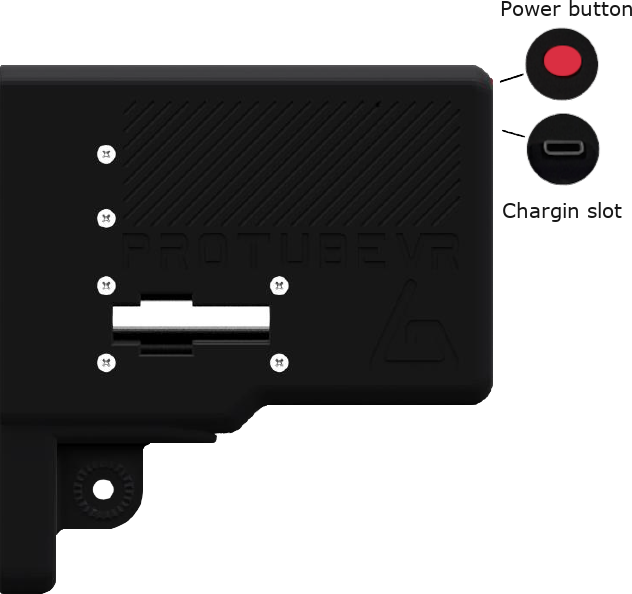 |
| **ForceTube Gen2 ***Discontinued* | **ForceTube Explorer** | **ForceTube Storm** |
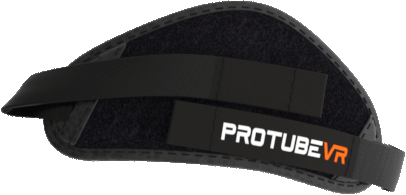
| **Content of the box | ||||
|  |  |  |  |  |
| x1 | x1 | x1 | x1 | x1 |
| ProVolver haptic Module | ProVolver rear controller mount (cup) | ProStrap | Charging cable USB to USB-C | USB Bluetooth dongle |
| **If you took the front extension | |||
|  |  |  |  |
| x1 | x2 | x1 | x1 |
| Front magnetic bracket | M4x12 screw | Controller mount (cup) | ProStrap |
| **Tool bag | |||
|  |  | ||
| x1 | x1 | ||
| Hex Key 0,4cm | Hex Key 0,25cm | ||
| **For Quest** | |
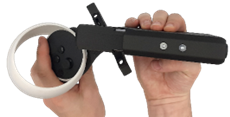
|  | Slide the controller into the Cup. If you chose the right-handed version, put the right controller in and vice versa. |
|  | For Rift S, Quest 1, 2, 3, 3S & Pro, you need to press the trigger to introduce and remove the controller from the cup. |
| **For Valve Index** | |
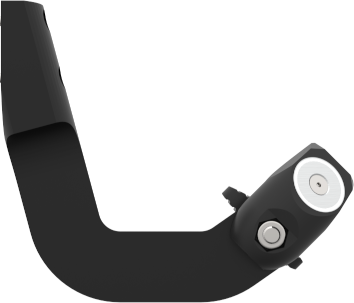
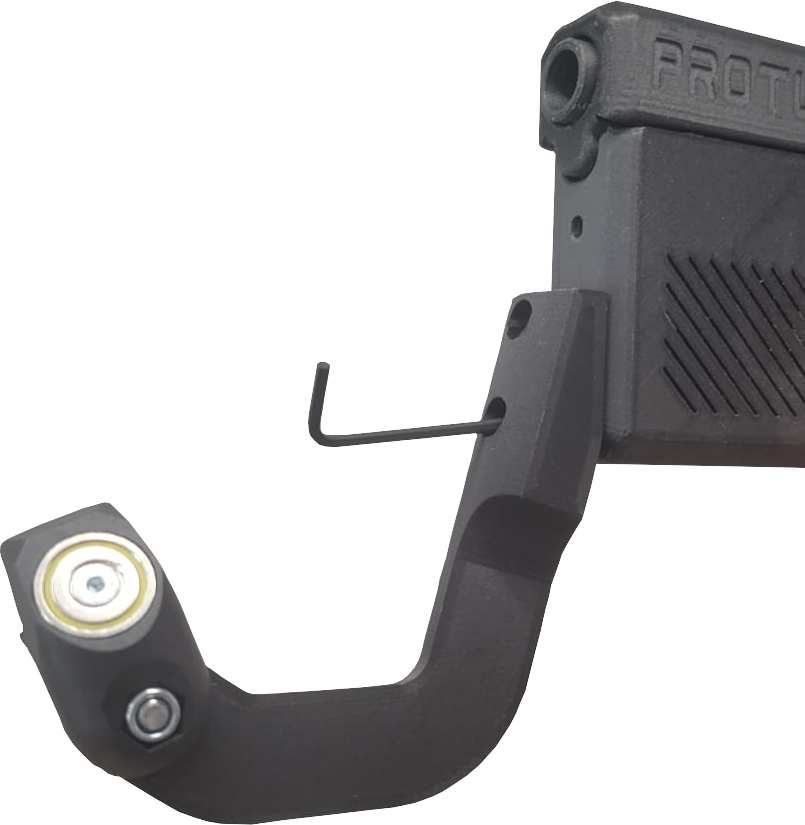
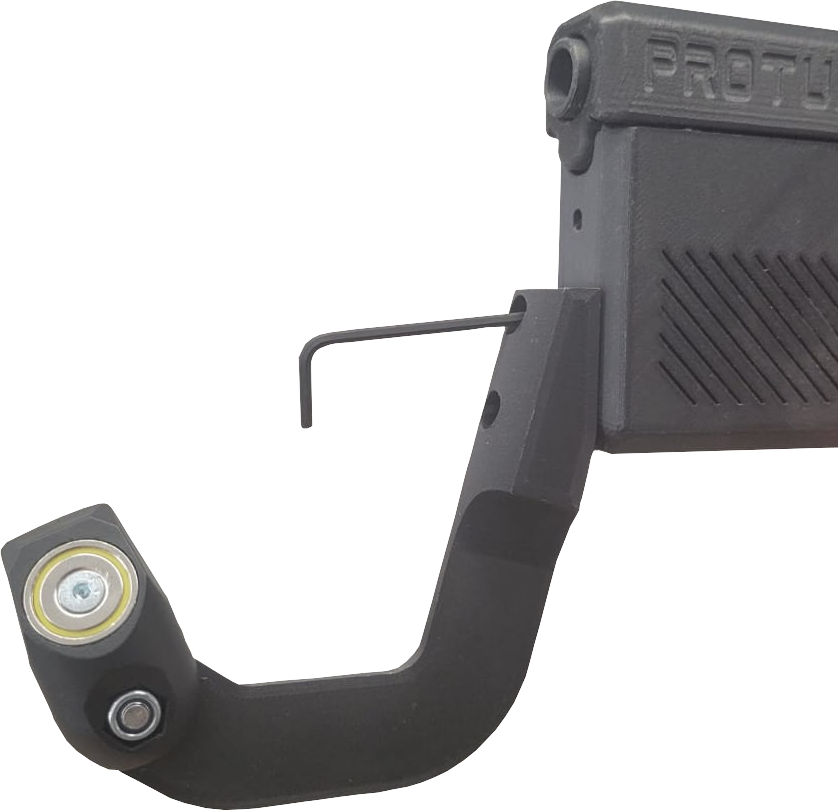
|  | Detach the strap’s string from the controller and put the cup into the controller’s handle, like shown in the picture above. |
|  | Just clip the controller in the cup and put back the strap’s string through the cup and controller. |
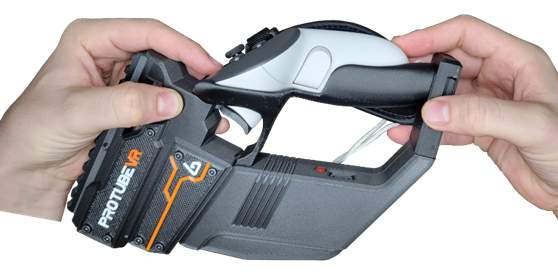
|  | 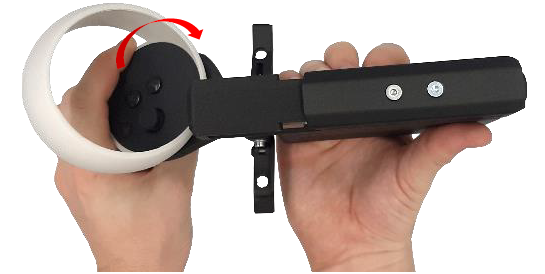 |
| Make sure the clamps are loosened (see picture above). Place one side of the female rail on the male rail. | Then clip the other side of the female rail (it can be a little tricky at first since the piece is not shaped yet). |
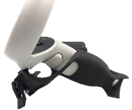
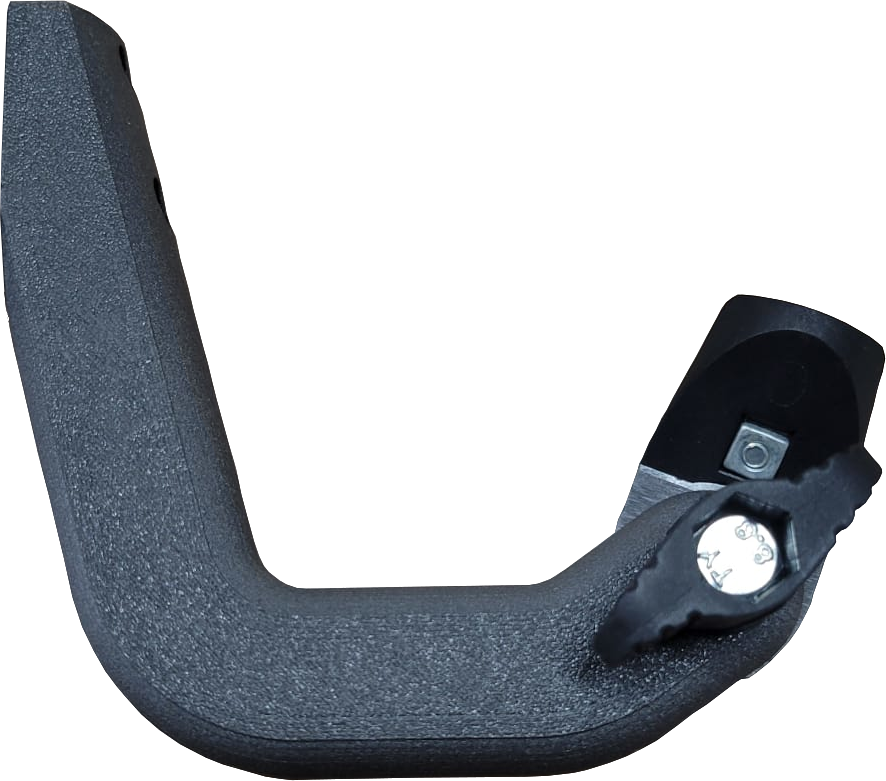
| 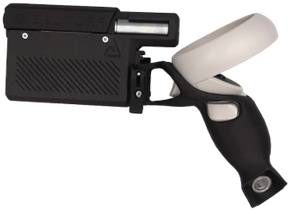 | ##### **Congratulations!** Your ProVolver is now ready to use. |
|  | For this last step, you will need the front magnetic bracket and both M4x12 screws. |
| 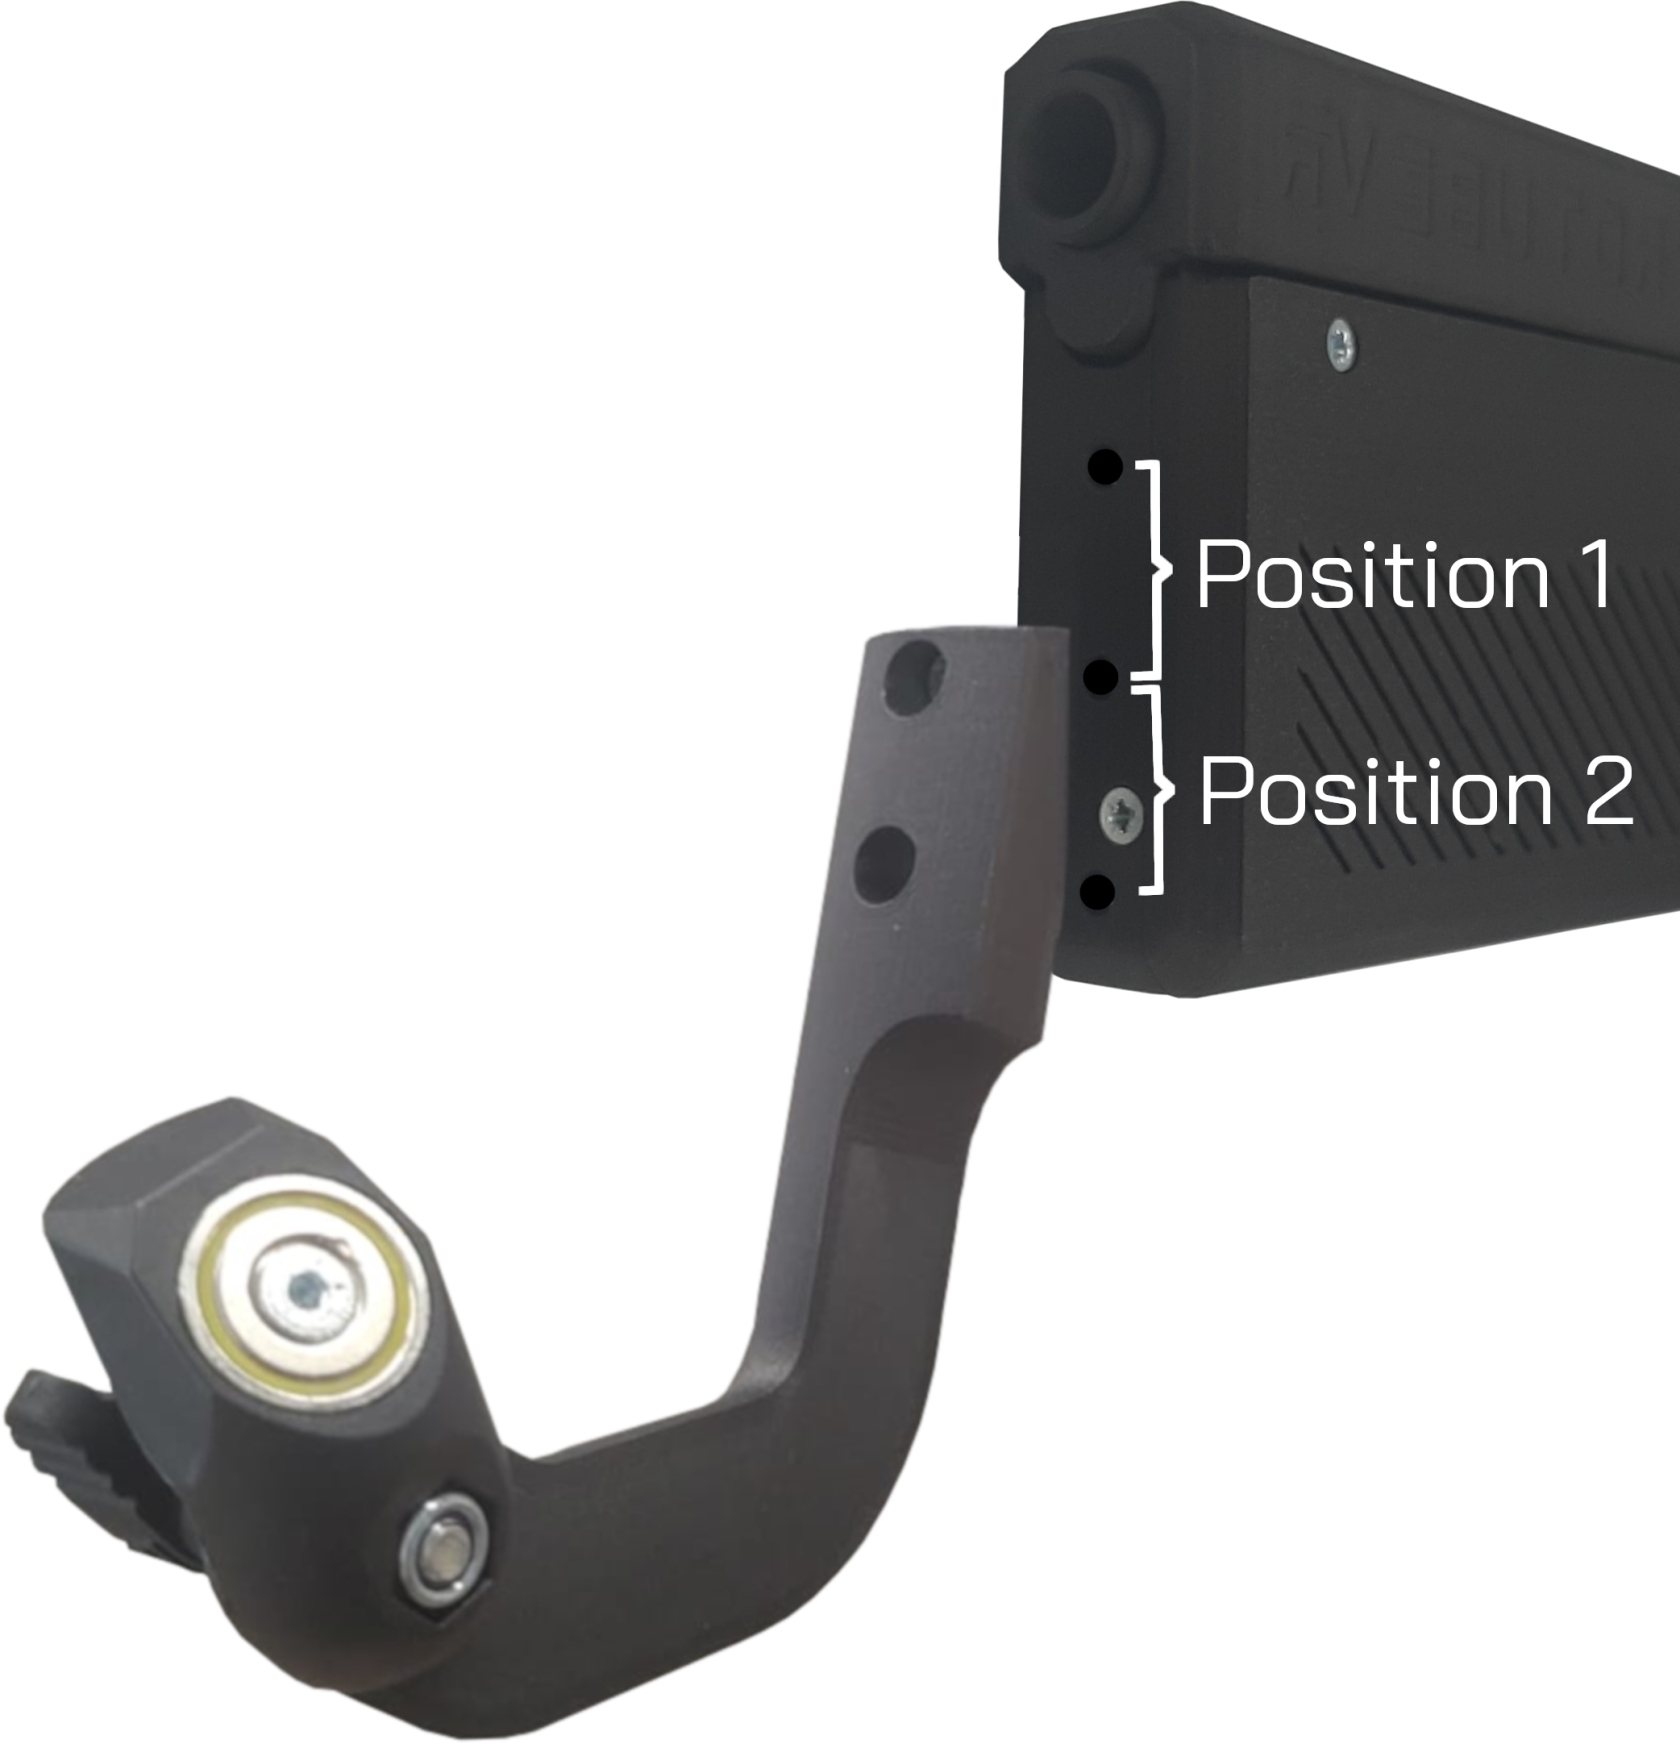 |  |
| You can place the bracket on either position 1 (higher) or position 2 (lower) as shown above depending on your appreciation. | Screw it in place using the smaller Allen key and both screws. |
|  |  |
| Put the front cup on the Magnetic support. | Loosen the thumbscrew to adjust it. Slot the controller in the cup. Adjust your front hand in game and tighten the screw back. |
| 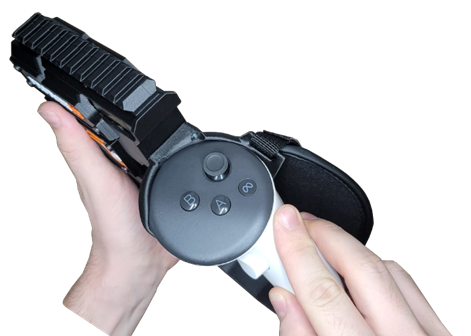 |  |
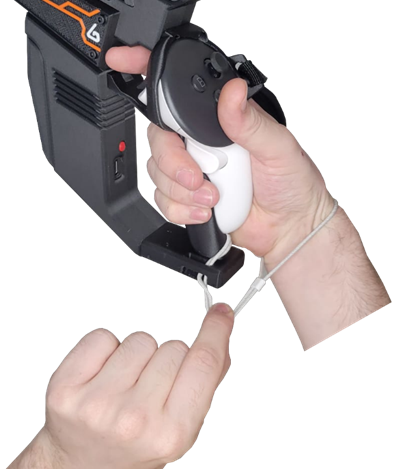
| Place the top of the controller inside the mount and hold it in place with one or two finger. | Line up the wrist strap with the hollow. |
| [](https://help.protubevr.com/uploads/images/gallery/2025-10/NpHimage.png) | [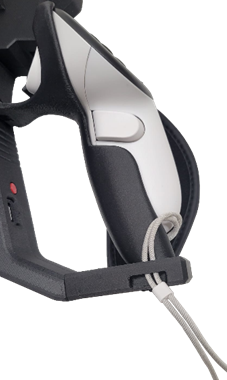](https://help.protubevr.com/uploads/images/gallery/2025-10/Nu7image.png) |
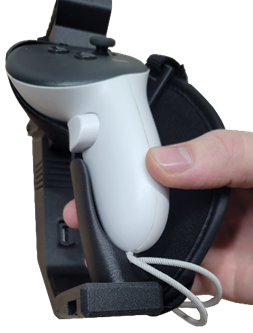
| Press the bottom of the controller while still holding and aligning the top. | Slot the wrist strap through the whole on the bottom of the mount. |
| [](https://help.protubevr.com/uploads/images/gallery/2025-10/S5Wimage.png) | |
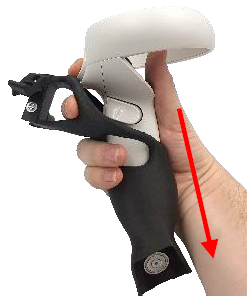
| Make sure to use your wrist strap at all time. ##### **You’re all set. You can now enjoy your ProVolver Elite!** | |
| N° of quick-press | Weapon | Firing mode | Firing rate | |
| 1 | Pistol |  | Semi-automatic | N/A |
| 2 | M16 |  | Three-round burst | 800 rounds/m |
| 3 | PKM |  | Fully automatic Strong | 650 rounds/m |
| 4 | P90 |  | Fully automatic Fast | 920 rounds/m |