Tutorials
All the tutorials traditionally found on our website, pertaining to the ForceTube haptic gunstock in alphabetical order
Companion App Guide
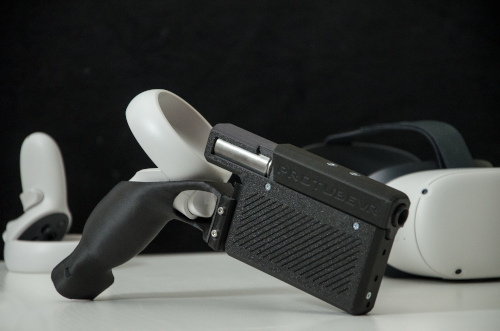  |
The Companion App creates a backwards compatibility for SteamVR games to have haptic with our devices, such as the ForceTube or the ProVolver.
What does it mean?1) This little software will detect when your avatar presses the trigger of your in-game weapon(s).
2) It will understand what kind of weapon(s) you are using and do some wizardry (quite a lot of maths and electrical conversion, tbh).
3) The Companion App sends a signal to your haptic device(s).
4) The device(s) will activate, replicating the recoil and rumble of what's happening on your in-game weapon(s). |
What do i need?You only need the Companion App if you are using SteamVR on PC.
If you are playing games directly on your standalone HMD (such as Meta Quest or Pico without PCVR link), our haptic devices are natively compatible with an extensive and ever growing list of VR games.
If you use a Meta HMD with PCVR, you need to changes the runtime. More info in the FAQ below. |
Compatible games and modsThrough our collaboration with VR game studios, the compatibility and calibration of our haptic devices are directly integrated into games.
This native compatibility does not require the use of the SteamVR compatibility feature and is present in over 60 titles across multiple platforms including PC, Quest & Pico headsets. This list of native titles is growing continuously.
In addition to these titles, wonderful modders from the community are adding mods to enable native integration into popular games that do not. For games with such a mod, usage of the Companion App SteamVR compatibility feature is not required, just like with native titles. Those mods are only available for SteamVR games (PC).
For PCVR games that are neither native nor have a mod, you need to use the Companion App SteamVR compatibility feature.
For PCVR games that are native, you can use the Companion App to finetune your experience.
Check the native compatiblilities page for more details. |
 |
Install the Companion App
|
|
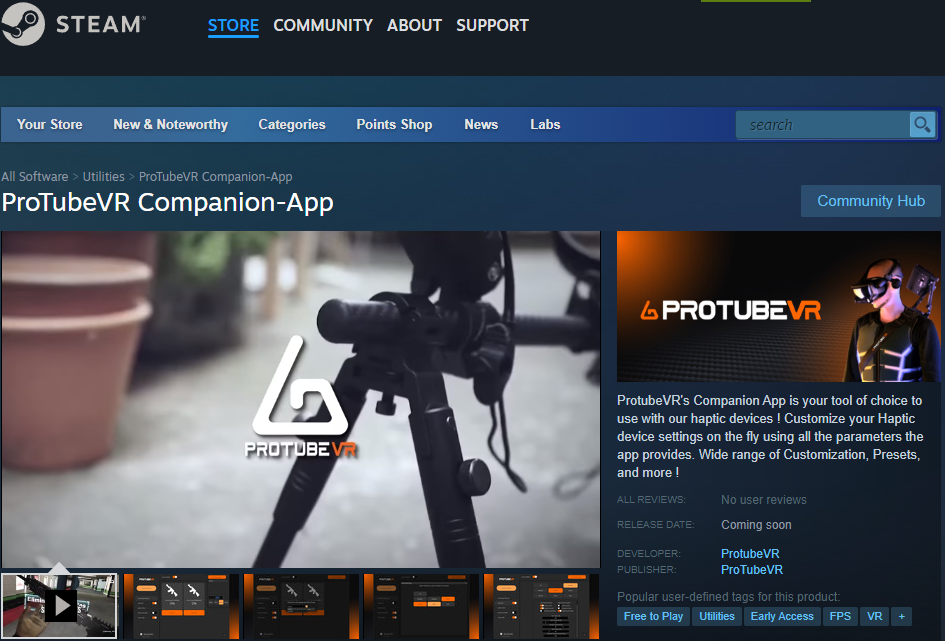
1. Go on the Companion App Steam page. 3. Install the Companion App from your Steam library, like any other game.
4. Use the created shortcut to start the Companion App. |
Companion App instruction manual
General preview |
|
Vocabulary |
 |
Left Side panel |
|
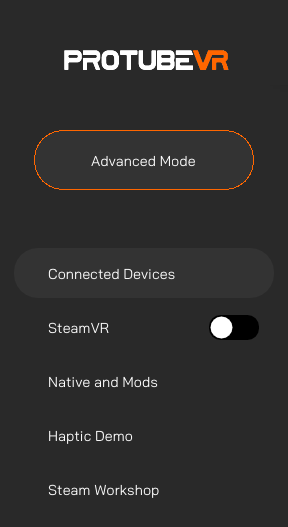
Default modeYou have some tabs available by default:
|
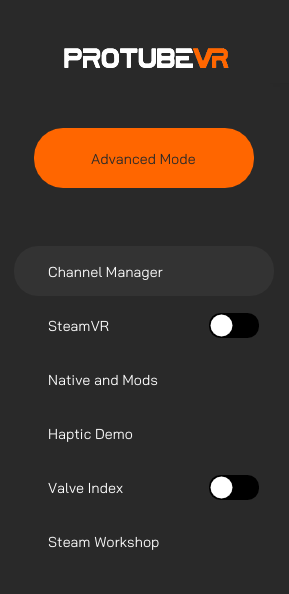
Advanced modeSwitching between modes enable/disable advanced features, like assignng custom channels to your device.
|
 |
 |
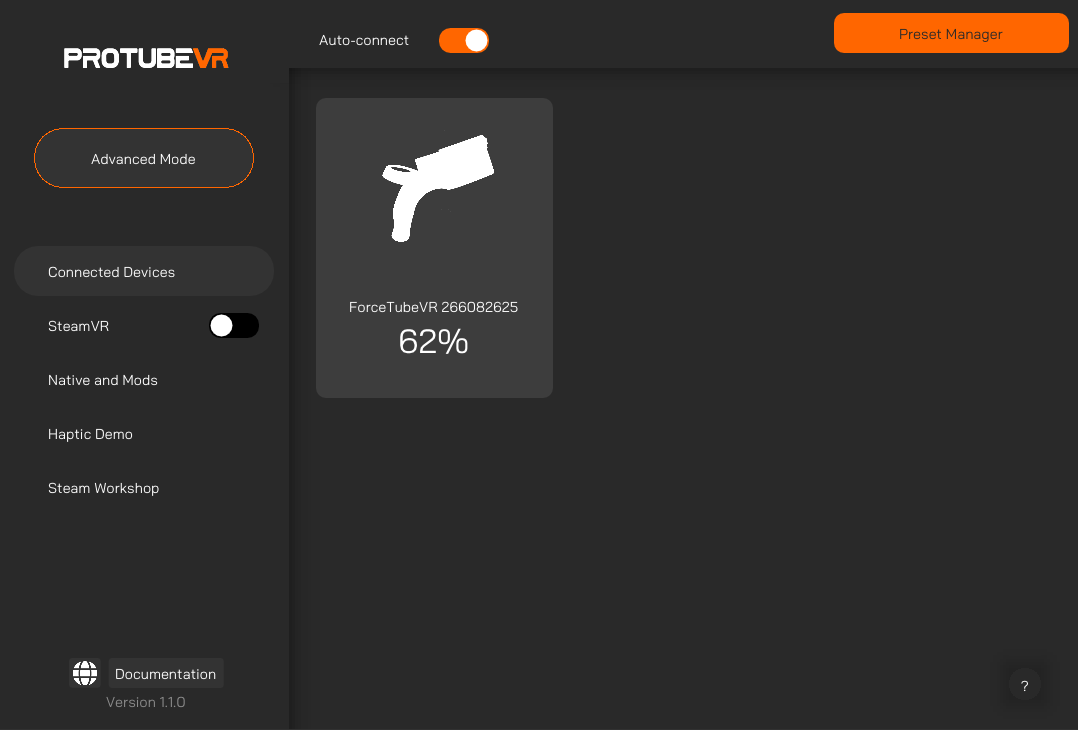
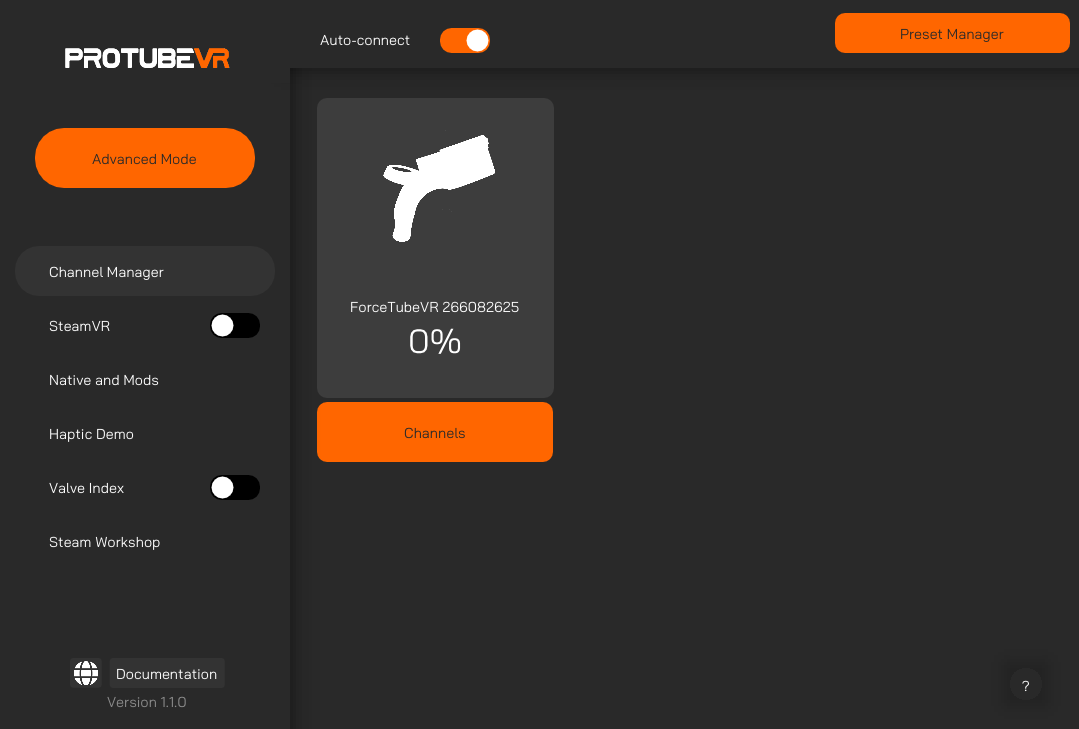
Top bar Widget |
|
Auto-connectThe Companion application will automatically try to connect to the devices remembered by your PC.
Disable this option if you want only some devices to connect.
In advanced mode, the Stream Plugin button appears. |
 |
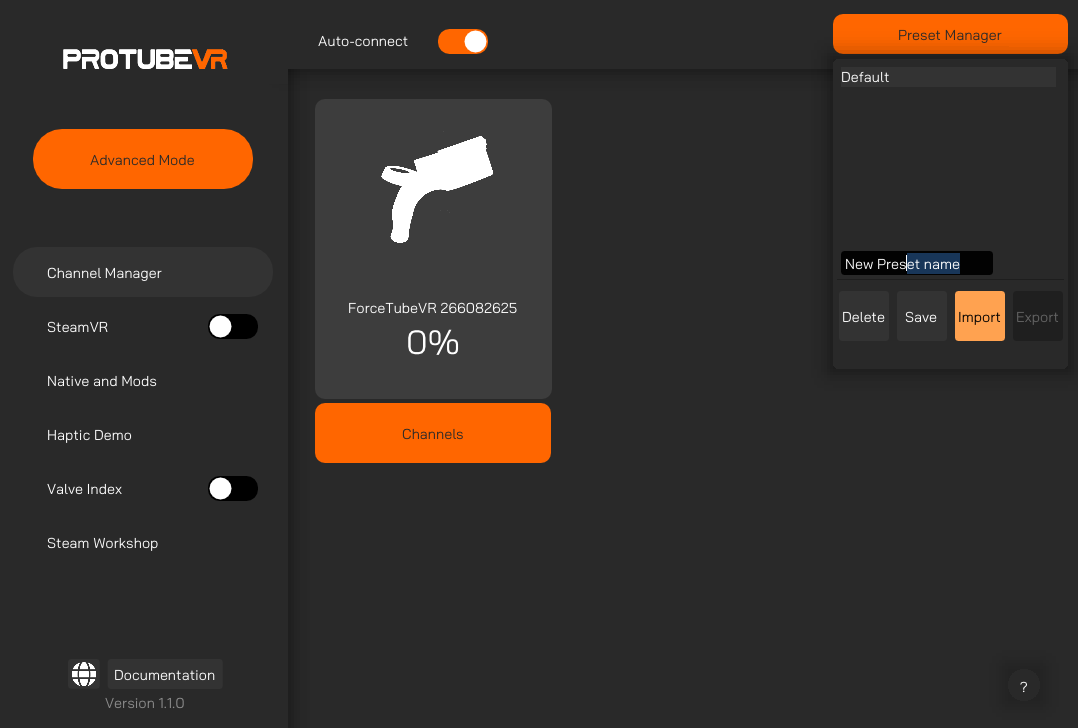
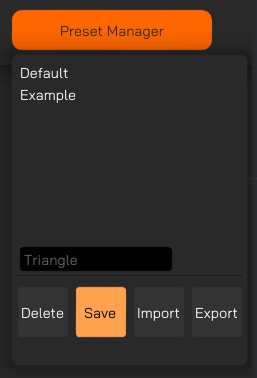
Preset ManagerWhen launched, the Companion App always loads on the default parameters. If you want to keep your modified settings, you must save it in a preset. Double-clicking on a preset will load its settings.
Save: Create a new preset with the name in the black text box and saves current configs including: Saving a setting to an existing preset overwrites it. If you want the retrieve the default preset, close the Companion App, reopen it, and save the parameters loaded by default in a new preset. Import: Import a configuration file. You can find shared presets from our Discord community.
Export: Export all saved configurations as a file. You can share it with our Discord community.
Delete: Delete the selected preset.
|
 |
Connected devices and Channels |
|
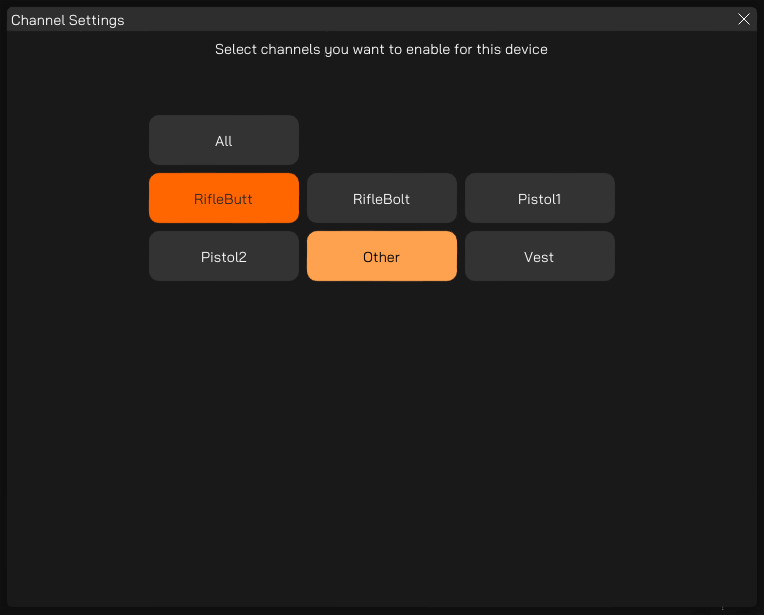
What are channels?To operate, the Companion App catches in-game controllers' vibration signals, converts them and sends them to your devices, making them kick and rumble.
These signals go through Channels.
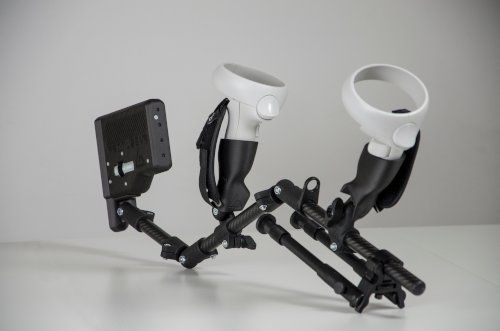
There are 6 of them. By default, the signal will go through all 6 channels and your device will react. Why are channels important?If you have 2 distinct haptic devices, channels allow them to kick separately.
If you'd prefer your haptic devices to kick separately, you need to set each device to a different channel.
Doing so, you would avoid the ProVolver to kicking when you use your ForceTube Rifle, for example.
Or if you have a pair of ProVolvers, and you only want to feel the recoil on the hand holding the gun that's firing it, it's possible by using the channels. Special channels for some gamesA natively compatible game only sends signals to a channel if its developers have set up that specific channel.
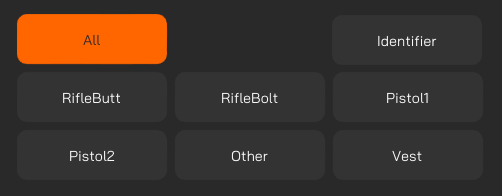
Some developers have only set up 1 or 2 channels for their game. If you use custom Channels setup instead of the Default one for these games, you have to select the configured channel. Automatically assigned channelsConnecting your new device will assign it to a signal channel automatically in this order:
RifleButt - RifleBolt - Pistol1 - Pistol2 - Other - Vest
If you connect more devices than the total channel number available, auto-assign will loop back to RifleButt and so on.
|
|
|
|
|
Default modeThis is the page you land on when you start the application. By default, you will see each connected device here. You can click on any device card to change its type, and the application will remember which device is what. |
Advanced modeIn advanced mode, you have a Channels button appearing under each device. Clicking on this button will bring-up a menu where you can manually assign channels to your device. It is important for some games and/or if you have several haptic devices. |
 |
|
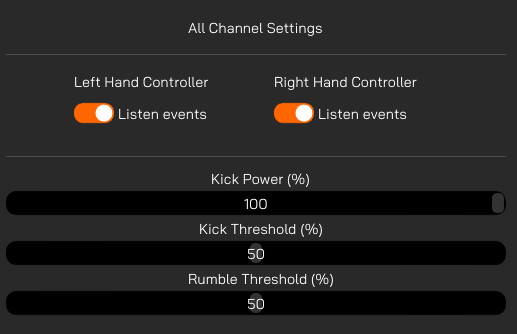
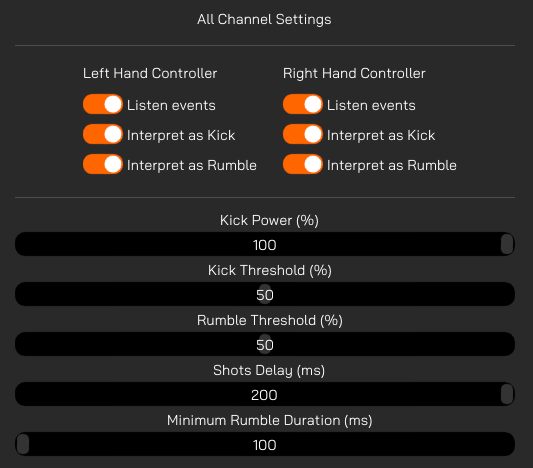
SteamVR |
|
|
Customize the SteamVR Compatibility Feature.
If you use a Meta HMD with PCVR, you need to change the runtime. Every step in the FAQ. |
|
Default modeListen Events: Whether you want your channel to react when your left/right hand triggers an haptic event. Kick Power: Controls the kick power of your devices. Kick Threshold: Adjust this variable to control required power for SteamVR events to trigger you device kick response. Each game has different values defined by the developers, you will have to do some testing to get a good result. Rumble Threshold: Adjust this variable to control required power for SteamVR to trigger your device rumbe response.
|
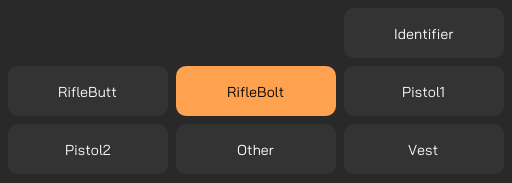
Advanced modeStart by selecting a channel and tweak your settings from here. Make sure your device is in the right channel by checking in your channel manager. You can also use the "Identifier" command below. Identifier: Sends a kick command to the selected channel. Tips: If identifying a channel does not result in any connected device kicking, it probably means that no device has that current channel assigned. A device is considered connected if its battery displays a percentage superior to 0.
Interpret as kick / Interpret as rumble: If you want your right or left controller events being interpreted as a kick, rumble or both. Shots Delay: Limits the reaction rate of your devices. Avoids triggering event bursts on each in-game interaction. Minimum Rumble Duration: Controls the duration between each vibration.
|

Haptic demo |
|
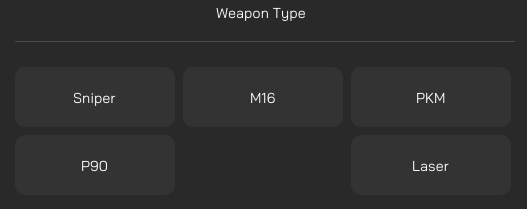
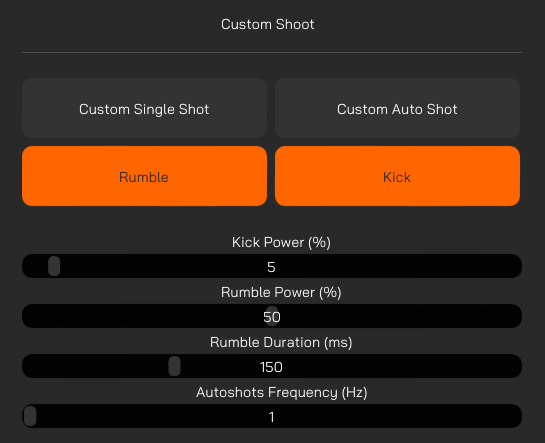
Default modeMainly used to simulate different types of weapons.
|
Advanced modeStart by selecting a channel and tweak your settings from here. Make sure your device is in the right channel by checking in your channel manager. Identifier: Sends a kick command to the selected channel. Tips: If identifying a channel does not result in any connected device kicking, it probably means that no device has that current channel assigned. A device is considered connected if its battery displays a percentage superior to 0.
Custom Single Shot: Shoots once using specified parameters in brlow sliders. Custom Auto Shot: Shoots using specified parameters and loops based on frequency slider. Kick Power: Controls the kick power for demo mode. Rumble Power: Controls the rumble power for demo mode. Rumble duration: Controls the rumble duration on each shot. Max is 500 ms. Autoshots Frequency: How many times per second you want to shoot with Custom Auto Shot for the demo mode.
|
Native and Mods |
|||||||||||||||||||||||||||||
|
On PCVR, if you are playing a native game or a game with integration enable by a mod, you can customize your inputs.
These games do not need the Companion application to work, but it will allow you to finetune some settings if you have the need to.
Make sure to connect any desired device to the app first, and then start your game. |
|||||||||||||||||||||||||||||
Default modeBy default, your device will listen to all channels at once ensuring most of the compatibility. For each of the below parameters, refer to this chart: Kick Power: Controls the kick power percentage. Rumble Power: Controls the rumble power percentage. Rumble duration: Controls the rumble duration percentage for each shot.
|
Advanced modeStart by selecting a channel and tweak your settings from here. This allow your devices to kick separately. Make sure your device is in the right channel by checking in your channel manager. Identifier: Sends a kick command to the selected channel. Tips: If identifying a channel does not result in any connected device kicking, it probably means that no device has that current channel assigned. A device is considered connected if its battery displays a percentage superior to 0.
|
||||||||||||||||||||||||||||
Special Channel SettingsYour devices need to use the correct channels set by the developers for customization to take effect. For the following games, make sure your Haptic devices are set in the right channels when enabling Native Customization. If a game on this list doesn't work, search and enable ForceTube settings in your game menu. If your native or mod-compatible game doesn't appear on this list, you will have to find the used channels via trial and error. Any game that is not native or mod-compatible will work with SteamVR compatibility. |
|||||||||||||||||||||||||||||
|
|
|
||||||||||||||||||||||||||||


Valve Index with Knuckles |
|
|
A few players using a Valve Index HMD and its Knuckles have reported us their in-game hands fly away while shooting in long burst. We have developed a driver to fix this. The driver does not work with other headsets; only Valve Index might need it. If you don't own a Valve Index headset or your in-game hands don't fly away while using the Knuckles controllers with your Index HMD, you can skip this section. |
|
Install the driver |
Finetune your Knuckles settingsAdditional help : Accelero Max: Limits max acceleration of your in-game hand. Freeze Duration: How much time your hand gets frozen after a kick if it hits max acceleration. |
Uninstall the driver |
|

Steam Workshop |
|
|
You can download and share presets with the community with the Companion App's Steam Workshop. This page lists all items you’ve previously subscribed to for the Companion-app. You can search for a specific item in your list using the search bar. |
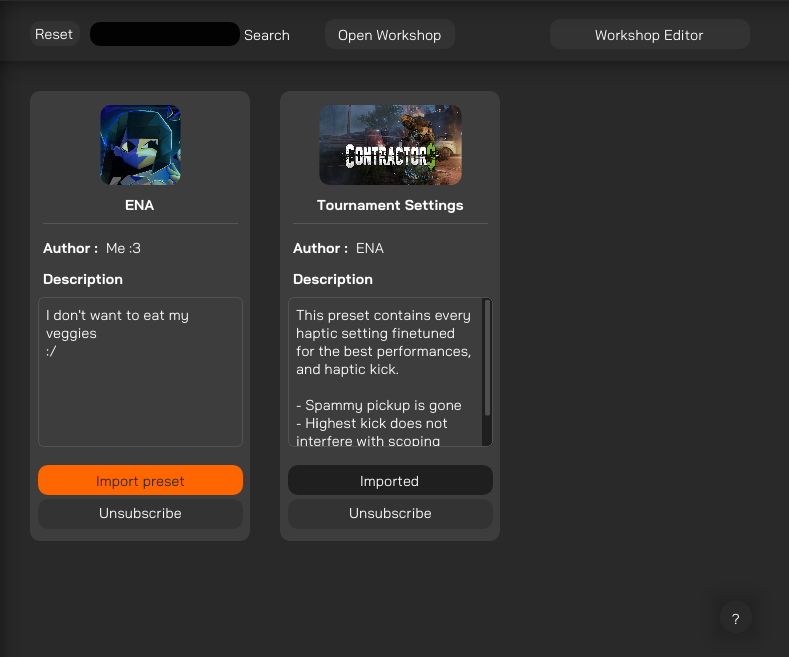 |
Importing presetsIf you don’t have any items yet or want to open the application workshop in a single click, you can press the “Open Workshop” button. After subscribing to an item from the steam application, you might have to restart the Companion-application to see newly added items. To import a subscribed item into the preset manager, click the “Import Preset” button. Your preset will be imported, and the button will change its status to “Imported”. To unsubscribe and delete the item from your computer, click the “Unsubscribe” button. |
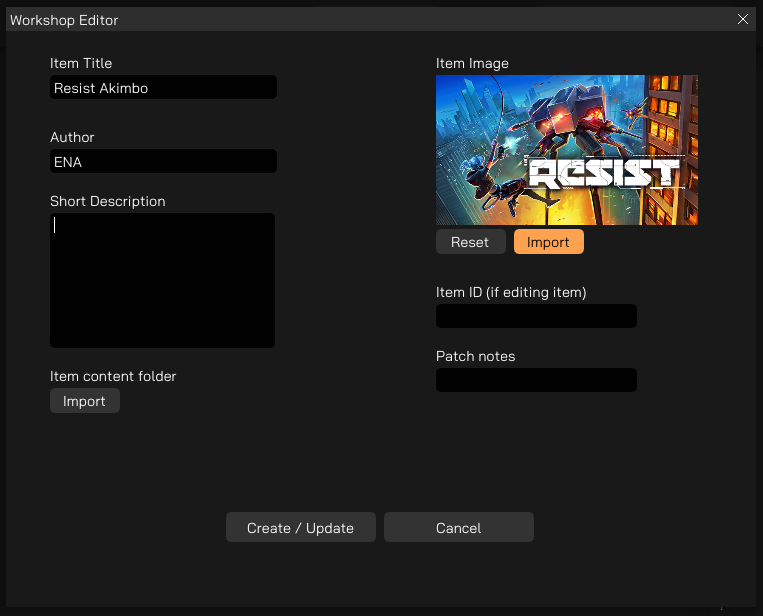
Steam Workshop EditorIn advanced mode, you can upload your own items after clicking on the “Workshop Editor” button. You can upload a new item every 15 minutes but if you need to modify an existing one the delay is shorter (no delay on lightweight items). Your item can be reported and will be removed from the Workshop if it doesn’t respect Steam guidelines. |
Exporting your presetsTo export your presets and upload an item:
|
Edit existing itemIf you want to edit an existing item belonging to you, you will have to specify its ID. Your Item ID is the last numbers in the URL bar of the Steam app workshop, either web or desktop. Example: “https://steamcommunity.com/workshop/filedetails/?id=3104917878” Patch notes: Not required but can provide useful information to users on item updates. When you’re done, click the “Create/Update” button to upload your item on steam. |
Streamers Addon |
|
|
In advanced mode, the top bar contains a “Stream Plugin” button. This feature is destined for content creators and streamers. It is similar to input overlay for gaming controllers. With it, you show an icon of your haptic devices on your stream overlay. This icon will blink each time you use it. |
|
|
You can import that browser source inside your favorite streaming software. Then, follow the written instructions on the source. You can change the device type by clicking on the image logo multiple times, and the channel by clicking on the button right under each device. Once set-up, the tracked devices will be highlighted when a kick is detected. By confirming changes, you save the current settings for your next broadcast sessions. When you erase all, your saved configuration will be cleared.
|
|

FAQ and Troubleshooting |
I want to set up my 2 devices for SteamVR
I want my 2 devices to kick separately in Steamvr mode
If your left device shoots on right events:
If your devices still don't kick, although they display percentages:
How can I reduce the kick or rumble of natively compatible games or mods using the companion-app?
Pistol1 is not always Left handPistol1 may not always be set as the left hand, and which gets assigned to it depends on which device paired first to the game.
Games that have Pistol1 + Pistol2 usually have an "invert channel" or "swap hands" option in the settings allowing you to change which hand your 2 ProVolvers are assigned to. More than 2 devices kicking at the same time impossibleIt is only possible to use a maximum of 2 devices at a time.
If one tries to pair 3 devices or more, only the first 2 devices paired to a game will receive informations. The remaining will receive nothing even if they pair to the game.
In some games, paring more than 2 devices will result in interrupting the pairing process of the "additional device". More than 2 devices and game crashes with Companion appSome native or modded games simply don't work with the Companion App at all when using 2 devices.
If the Companion App is already running, affected games may crash or won't launch properly.
If one launches the Companion App after a game is running, it may still crash, or haptic device constantly pair over and over.
Even if none of these occur, any changes made to the game's haptic events will not apply no matter what. Device history with modded gamesTo use any mod on PC, you must have a maximum of 2 devices paired for a game to transmit haptic signals to a devices properly.
The game cannot know if your paired devices are on or off. So there is a risk that a signal is sent to an off device. bHaptics & ProTubeVR haptics on PC
The ForceTube and ProVolver only work with Bluetooth 4. They are not compatible with Bluetooth 5 dongles. They can work, according to some customers, on Intel chipset WiFi+BT (specifically AX200, AX210, AX220) which can be found directly on some motherboards, or bought as PCIE adapter cards. Also, they do not work well with Realtek chipset in any capacity.
The Bluetooth 4.2 dongle we provide runs a Qualcomm chipset. It does not have the capability to let you run both a ForceTube or ProVolver & a bHaptics product simultaneously.
Newest bHaptics products come with a Bluetooth 5 dongle that runs on a Realtek chipset. They used to come with a Bluetooth 4 dongle that let users run both ProTubeVR and bHaptics devices simultaneously.
bHaptics products still work with BT4.0 (according to their website).
The solution is to find a Bluetooth dongle that can let both ForceTube/ProVolver & bHaptics work at same time. DISCLAIMER:
1 - Get which Bluetooth 4 dongle bHaptics used to provide with their products and aquire it.
2 - Find a Bluetooth 4 dongle that is not Realtek. It may take tries and errors to find one that works well with both ProTubeVR and bHaptics devices. Asus USB-BT400 and TP-Link UB400 dongle has been reported to work!
3 - For users with onboard Bluetooth from motherboard or PCIE Card that is Intel Chipset AX200, AX210, or AX220. Make sure to install WiFi antenna even if you don't use WiFi, because it boosts BT signal strength.
Note: Bluetooth transmitters have a limit on how many devices can be actively paired simultaneously. This means it is not possible to use every single bHaptics product while also using 2 of our haptic devices (ForceTube+ProVolver, or 2X ProVolver). |
Haptic Setup EN
INTRODUCTION
________________________________________________________________________________________________________________________________________________
The ForceTube and the ProVolver use the same Haptic technology, so all the following instructions are similar for both. If there are any differences, we will let you know.
As the ForceTube is the original product, all the haptic devices are called “ForceTube” on the Bluetooth pairing and on the Companion app.
1 - HAPTIC DEVICES
________________________________________________________________________________________________________________________________________________
ForceTube |
||
|
|
|
|
| ForceTube Gen2 Discontinued |
ForceTube Explorer | ForceTube Storm |


2 - BATTERY AND LED
________________________________________________________________________________________________________________________________________________
There are 2 LEDs inside the haptic device:
- The first little one is always red and means the module’s microcontroller is on.
- The second one is the battery level LED, it changes accordingly:
- White: 80 to 100%
- Green: 30 to 80%
- Red: <30%
- Orange: Haptic device is plugged and charging.
It blinks red very quickly (3 Hz) if you have a battery cell with a too low charge level to work. In this state, the module will not work and needs to be charged. - Blue: Haptic device overheat. The module will lock itself and won’t work for a while, until it has cooled down. Once the blue LED is off, you can use the module again.
The bigger LED blinks when the haptic device is not connected to an application (not to be confused with not paired) and is steady when connected.
After unboxing, the first thing you will need to do is charge your device. It arrives on low charge and takes about 6-8 hours to full charge*. You will know it is charging by the yellow/orange LED when plugged in. To charge it, use the provided cable on a PC USB port, or 500mA USB charger. Again, if you do not see a yellow/orange LED when plugged in, it is not charging, and you will need to try a different power source.
*After full charge, unplug the module without too much delay. Overcharging is the best way to damage batteries and shorten their lifespan.
Important: trying to use a USB-C-to-USB-C or an electrical outlet instead of your PC can result in the module not receiving any charge or damaging the battery cell. You should use it as instructed above for it to charge!
The battery level LED turns orange when the module is charging. After 6 to 8 hours of charging, your Haptic device will be fully charged. You can check it by unplugging it (restart it if it shuts down when unplugging) and check that the battery level LED is white.
We also recommend that you charge your device every 5-6 months if it is not actively in use.
Also, charge it only when the battery is low (battery level LED becomes red), avoiding the battery cell to be damaged.
Important notice: It is best to keep the battery level between 20 and 80% to assure a longer battery life.
So only green battery level.
Also, it is recommended to store the module with a battery over 80% when not used for over a month. Avoiding the battery to be damaged.
3 - BLUETOOTH PAIRING
________________________________________________________________________________________________________________________________________________
To use the Haptic device, you first need to power it on and pair it with Bluetooth on your OS (Android for Meta Quest and Windows for PC HMDs).
3.1 - On Windows
.........................................................................................................................................................................................................................
If your computer does not have Bluetooth 4, plug in the provided Bluetooth dongle, and enable Bluetooth.
(If you have BT5, you will need to disable it on the device manager first, then plug the provided dongle)
To pair it to Windows 10, power your module on and make sure it is not connected to another computer/phone/Meta Quest before (the batteries level LED should blink).
Windows 11 user, please check those settings first:
- In "Bluetooth & other devices > Devices" (Bluetooth & other devices>view more devices) change the option "Bluetooth devices discovery" to "Advanced".
- Click on the "More Bluetooth settings" and check the "Allow Bluetooth devices to find this PC" box.
Windows 10 user, you can skip to those following steps directly:
- Open the Windows settings.
- Click "Devices".
- Click "Bluetooth and other devices".
- Turn on Bluetooth if it isn't done.
- Click "Add Bluetooth or other device".
- Click "Bluetooth".

-
All the haptic devices are called “ForceTube” on the Bluetooth pairing and on the Companion app.
Your module should appear with numbers aside. It’s your module’s unique ID.
-
Click on your ForceTube.
-
Wait a few seconds while your module is pairing to Windows. It may ask to check a code, just skip and proceed.
Troubleshooting:
If your Haptic device is paired on Windows but cannot connect to games or the Companion Application, it may be due to a pairing with the bad Bluetooth transmitter (mainly Windows problem).
Windows OS can only allow one Bluetooth transmitter, but all devices ever paired to one transmitter cannot be paired to another from the same computer at the same time.
This problem can occur if you have different Bluetooth transmitters installed or even if you moved your Bluetooth dongle to a new USB port and Windows had difficulties recognizing it, assuming it is a new Bluetooth dongle even if it isn't.
So, you should try to remove the ForceTube from your Bluetooth devices to pair it again.If you have difficulties to remove it:
- Go to your Device Manager.
- Click on "View".
- Click on "Show Hidden Devices".
- Open the "Bluetooth" tab.
- In this "Bluetooth" tab, uninstall all unconnected devices (they have lighter icons) by right-clicking them and selecting "Uninstall device" and restart your computer.
- Once done, try to pair again your module on Windows.
If you accidentally remove a device, you should not, try to unplug it, restart your computer, and plug it again.
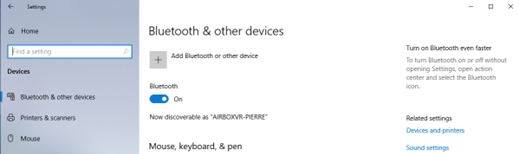
The picture shows 2 important things:
- There are two Bluetooth transmitters. Here, "Generic Bluetooth Radio", is the one provided with your product. The other one needs to be disabled.
- The elements in light blue (transparent) are paired devices but are not connected.

Additional Connection Troubleshooting:
If after the troubleshooting steps you still cannot get the haptic device to connect to the companion app or games, or perhaps to be seen by Bluetooth to pair, here are some more steps to try:
- If you have an Android phone:
- Download the APK on our GitHub.
- Install the ForceTube’s Android application APK on your phone.
- Try to pair the haptic device to your phone (like a normal Bluetooth device) with the application.
- If you see it and the module is pairing, then the problem is somewhere on your computer.
- If it still does not connect, contact our Customer service on our website.
- If the problem is on your computer, the first thing to check is the Bluetooth dongle.
- If you were using one you already had, try uninstalling it and using the provided one.
- If you were using the provided dongle, try uninstalling it, unplug it, restart your computer, and plug it on different USB ports (on the front of the PC is best).
- If after trying various USB ports it still does not work, then the issue is likely the Bluetooth dongle. Contact our Customer service on our website to have your Bluetooth dongle replaced.
- Alternatively, simply acquire another Bluetooth dongle to test. It must be 4.2 Bluetooth compatible or less.
3.2 - On Meta Quest
.........................................................................................................................................................................................................................
To pair a haptic device on Meta Quest:
- Power on the module and the Meta Quest. The haptic module’s battery LED should blink.
- On the Meta Quest, access the Bluetooth settings.
- Start the process of pairing a new device and look for the device named “ForceTubeVR #######”.
- Click on the device and wait until the “Pair” button shows, then click on it.
- Your module is now paired to your Meta Quest standalone HMD.
- At this point, the module’s LED will continue blinking, showing that it is not connected.
- The module will only “connect” and have a stable LED once a compatible game is launched (refer to part 4.1 below).
4 - PLAY
________________________________________________________________________________________________________________________________________________
4.1 - Native integration in games
.........................................................................................................................................................................................................................
Some games integrate the haptic device to be natively compatible.
List of compatible games (Reddit post)
You can refer to this Reddit post to see the list of all natively compatible games.
This list show which games can be played with our haptic devices without needed an external app.
It also explains which game has which feature (rifle, handgun, both-handed handguns or multi device supports).
It also tells on which platform the compatibility is supported (represented by a link to the related platform’s store).
You are invited to read everything from this post, as every information is crucial.
For PCVR users (Steam), some games have mods that allow native compatibility.
Some manipulation is required, so please refer to the list of native mods (Reddit post).
These natively compatible games only need you to keep a paired module when you launch them, and it will automatically connect.
You can adjust the power and duration of haptic feedback using the Companion Application, but this application is not mandatory for those games.
For more details, go to section 5.
4.2a - Backward compatibility with SteamVR
.........................................................................................................................................................................................................................
Other (non-natively compatible) games will work with the haptic devices if you launch them via SteamVR and use the Companion Application.
For more details, go to section 5.
4.2b - Playing with an Oculus/Meta Quest standalone Headset
.........................................................................................................................................................................................................................
When playing with Meta Quest headset using the Quest link/Air link/Virtual Desktop/Steam Link, if the Steam game has an OculusVR Mode, Steam may start it with this mode by default, so you need to make sure Steam uses SteamVR (OpenVR):
- Find the game’s .exe file.
- Right click -> Properties -> Compatibility.
- Check “run compatibility mode” option and select windows 7.
- Check “run this program as administrator”.
- Apply the changes.
- Go to your steam library.
- Right Click -> Properties -> General.
- Write “-openvr” in the launch options.
Be sure to launch your games from SteamVR, especially if using Virtual Desktop (do not launch games directly from it).
5 - STEAM COMPANION APPLICATION (FOR WINDOWS)
________________________________________________________________________________________________________________________________________________
The companion application allows our haptic devices to work with any games launched through SteamVR to have haptic feedback. Even those that are not natively compatible.
For more information, and how to use it, please refer to the Companion App documentation.
You can download the Companion App (Steam) here.
Have fun!
ProVolver Explorer Setup EN
You got your hand on a ProVolver. With this, you will increase your immersion while playing.
The ProVolver allows you to feel the handguns in your games. You can use it with one hand or with two hands with the front extension.
 Setting up your ProVolver should take 10 to 20 minutes.
First, make sure you work in a clear area and be very careful. Some parts can get lost easily.
Parts list
....................................................................................................................................................................................................................................................................................
| Content of the box |
||||
 |
 |
 |
 |
|
| x1 | x1 | x1 | x1 | x1 |
| ProVolver haptic Module | ProVolver rear controller mount (cup) | ProStrap | Charging cable USB to USB-C | USB Bluetooth dongle |
....................................................................................................................................................................................................................................................................................
| If you took the front extension |
|||
 |
 |
||
| x1 | x2 | x1 | x1 |
| Front magnetic bracket | M4x12 screw | Controller mount (cup) | ProStrap |
....................................................................................................................................................................................................................................................................................
| Tool bag |
|||
 |
|
||
| x1 | x1 | ||
| Hex Key 0,4cm | Hex Key 0,25cm | ||

Step 1: Slot the controller into the rear cup
________________________________________________________________________________________________________________________________________________
| For Quest | |
 |
Slide the controller into the Cup. If you chose the right-handed version, put the right controller in and vice versa. |
|
|
For Rift S, Quest 1, 2, 3, 3S & Pro, you need to press the trigger to introduce and remove the controller from the cup. |

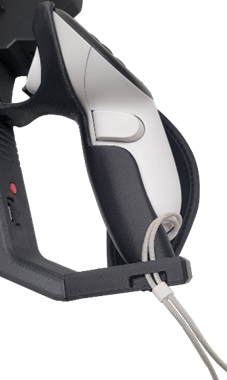
| For Valve Index | |
 |
Detach the strap’s string from the controller and put the cup into the controller’s handle, like shown in the picture above. |
 |
Just clip the controller in the cup and put back the strap’s string through the cup and controller. |
Step 2: Attach the Main cup to the ProVolver
________________________________________________________________________________________________________________________________________________
 |
|
| Make sure the clamps are loosened (see picture above). Place one side of the female rail on the male rail. | Then clip the other side of the female rail (it can be a little tricky at first since the piece is not shaped yet). |


Clip the first clamp. Use the provided Allen key to loosen the screw and adjust the tightness.
Do the same on the other side to lock the module.

If you got the ProVolver for Valve Index, there will be a magnetic add-on provided. You will need it only if you choose to use it with a gunstock or with a stock extension. You can fix it forward or backward or in the middle, as you prefer.
Note: if you install it before trying to fit the controller in, you will not be able to. Neither will you be able to remove it.
You will need to remove the magnetic part beforehand.
 |
Congratulations! Your ProVolver is now ready to use. |
If you use your ProVolver single-handedly, you can refer to the Haptic documentation to connect it to your wireless Headset or PC.
If you took the front magnetic bracket in option to use the ProVolver as a two-handed weapon, keep following this tutorial.
(note to Tao: pay attention to each image in this section, none of the red indicators are present)
Step 3: Attach the front extension
________________________________________________________________________________________________________________________________________________
 ________________________________________________________________________________________________________________________________________________
  |
For this last step, you will need the front magnetic bracket and both M4x12 screws. |
|
|
|
|
|
|
| You can place the bracket on either position 1 (higher) or position 2 (lower) as shown above depending on your appreciation. | Screw it in place using the smaller Allen key and both screws. |
 |
 |
| Put the front cup on the Magnetic support. | Loosen the thumbscrew to adjust it. Slot the controller in the cup. Adjust your front hand in game and tighten the screw back. |


Congratulations! Your ProVolver is now ready to be paired.
You can now follow the Haptic documentation to connect it to your gear and enjoy the recoil in your favorite shooters!
________________________________________________________________________________________________________________________________________________
ProVolver Elite Setup Guide
Hello, fellow gamer!
If you are reading this, it means that you laid your hand on a ProVolver. You will increase your immersion while playing. We will help you set it up!
The ProVolver Elite allows you to feel the handgun in your games.
We invite you to join our Discord community for any question or directly contact us through our support service on our website.
This tutorial is also available in video on our YouTube channel.
![]() Setting up your ProVolver should take 1 or 2 minutes.
Setting up your ProVolver should take 1 or 2 minutes.

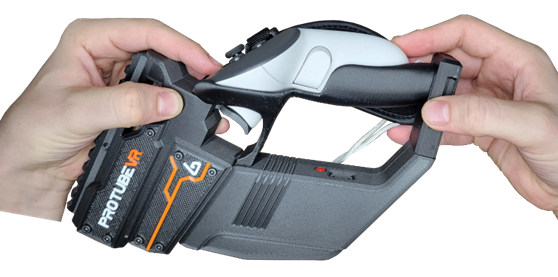
INSTALLING THE CONTROLLER IN THE MOUNT
________________________________________________________________________________________________________________________________________________
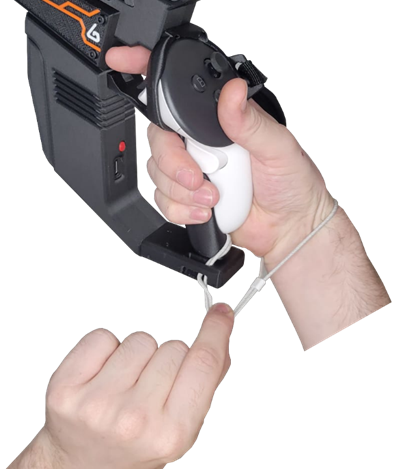
 |
 |
| Place the top of the controller inside the mount and hold it in place with one or two finger. | Line up the wrist strap with the hollow. |
 |
 |
| Press the bottom of the controller while still holding and aligning the top. | Slot the wrist strap through the whole on the bottom of the mount. |
 |
|
|
Make sure to use your wrist strap at all time.
You’re all set. You can now enjoy your ProVolver Elite! |
|
Standalone mode
________________________________________________________________________________________________________________________________________________
When the ProVolver Elite is not connected to a game or the companion app, you’re able to use it in Standalone mode.
This allows you to feel the game, even if you’re not playing a compatible game.
Fire will not be synchronized with in-game shots, but with your trigger finger. This lets you have haptic feedback with all and every game you play.
|
N° of quick-press |
Weapon |
Firing mode |
Firing rate |
|
|
1 |
Pistol |
|
Semi-automatic |
N/A |
|
2 |
M16 |
|
Three-round burst |
800 rounds/m |
|
3 |
PKM |
|
Fully automatic Strong |
650 rounds/m |
|
4 |
P90 |
|
Fully automatic Fast |
920 rounds/m |


/m: per minute
Bluetooth mode
________________________________________________________________________________________________________________________________________________
When the ProVolver Elite is connected to a compatible game or the companion app, the Standalone mode (trigger) will be disabled, and you will be able to use the game’s native feature.
You can refer to the Haptic setup documentation available on our website to learn about this mode.