Tutorials
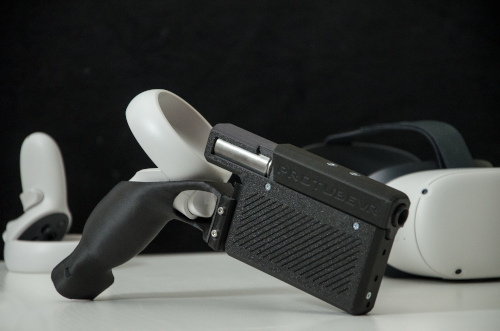
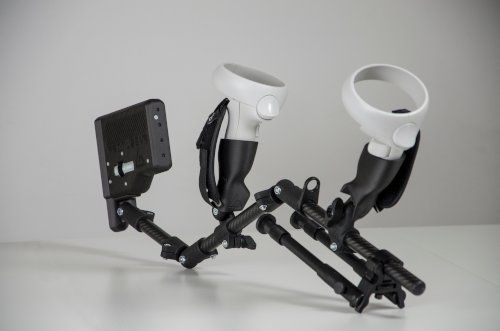
All the tutorials traditionally found on our website, pertaining to the ForceTube haptic gunstock in alphabetical order
Haptic Setup EN FR
Haptic Documentation
v.2024.08.09
Haptic Documentation
4.1 – Native integration in games 8
4.2 – Backward Compatibility with SteamVR 9
5 – Steam Companion Application (for Windows) 9
6 – Wi-fi updater Error! Bookmark not defined.
The ForceTube and the ProVolver use the same Haptic technology, so all the following instructions are similar for both. If there are any differences, we will let you know.
As the ForceTube is the original product, all the haptic devices are called “ForceTube” on the Bluetooth pairing and on the Companion app.
Be sure to know what model you have before doing any software update. The device will not work if you do it wrong. This will not be taken under warranty.
Charging slot
ForceTube
Explorer
ForceTube
Storm
Charging slot
Charging slot
ProVolver
Explorer
ForceTube
Gen2
Charging slot
There are 2 LEDs inside the haptic device:
- The first little one is always red and means the module’s microcontroller is on.
- The second one is the battery level LED, it changes accordingly:
- 80 to 100%: White.
- 30 to 80%: Green.
- <30%: Red.
- It blinks red very quickly (3 Hz) if you have a battery cell with a too low charge level to work. In this state, the module will not work and needs to be charged.
The second LED blinks (near 1 Hz) when the Haptic device is not connected to an application (not to be confused with not paired to PC/Quest/phone) and is steady when connected.
After unboxing, the first thing you will need to do is charge your device. It arrives on low charge and takes about 7-8 hours to full charge*. You will know it is charging by the yellow/orange LED when plugged in. To charge it, use the provided cable on a PC USB port, or 500mA USB charger. Again, if you do not see a yellow/orange LED when plugged in, it is not charging, and you will need to try a different power source.
Important: trying to use a USB-C-to-USB-C or an electrical outlet instead of your PC can result in the module not receiving any charge or damaging the battery cell. You should use it as instructed above for it to charge!
The battery level LED turns orange when the module is charging. After 6 to 8 hours of charging, your Haptic device will be fully charged. You can check it by unplugging it (restart it if it shuts down when unplugging) and check the battery level LED is white.
We also recommend that you charge your device every 5-6 months if it is not actively in use.
Basically, charge it only when the battery is low (battery level LED is red), avoiding the battery cell to be damaged.
*After full charge, unplug the module without too much delay. Overcharging is the best way to damage batteries and shorten their lifespan.
To use the Haptic device, you first need to power it on and pair it with Bluetooth on your OS (Android for Meta Quest and Windows for PC HMDs).
3.1 – On Windows
If your computer does not have Bluetooth, plug in the provided Bluetooth dongle, and enable Bluetooth. To pair it to Windows 10, power your module on and make sure it is not connected to another computer/phone/Meta Quest before (the batteries level LED should blink).
Windows 11 user, please check those settings first:
- In "Bluetooth & other devices > Devices" (Bluetooth & other devices>view more devices) change the option "Bluetooth devices discovery" to "Advanced".
- Click on the "More Bluetooth settings" and check the "Allow Bluetooth devices to find this PC" box.
Windows 10 user, you can skip to those following steps directely:
- Open the Windows settings.
- Click "Devices".
- Click "Bluetooth and other devices".
- Turn on Bluetooth if it isn't done.
- Click "Add Bluetooth or other device".
- Click "Bluetooth".
4
5
- (as mentioned above, all the haptic devices are called “ForceTube” on the Bluetooth pairing and on the Companion app.)
Your module should appear with numbers aside. It’s your module’s ID.
- Click on your ForceTube.
- Wait a few seconds while your module is pairing to Windows.
If your Haptic device is paired on Windows but cannot connect in games or the Companion Application, it may be due to a pairing to the bad Bluetooth transmitter (mainly Windows problem). Windows OS usually works with one Bluetooth transmitter, but all devices ever paired to one transmitter cannot be paired to another from the same computer. This problem can occur if you have different Bluetooth transmitters installed or even if you moved your Bluetooth dongle to a new USB port and Windows had difficulties recognizing it, assuming it is a new Bluetooth dongle even if it isn't. So, you should try to remove the ForceTube from your Bluetooth devices to pair it again. If you have difficulties to remove it:
If you accidentally remove a device, you should not, try to unplug it, restart your computer, and plug it again. If you have the bug just described, uninstall all lighter icons devices from the Bluetooth tab. |
Additional Connection Troubleshooting: If after the troubleshooting steps you still cannot get the haptic device to connect to the companion app or games, or perhaps to be seen by Bluetooth to pair, here are some more steps to try:
|
3.2 – On Meta Quest
To pair a haptic device on Meta Quest:
- Power on the module and the Meta Quest.
- In the Meta Quest home, open the "Quick Settings".
- Click on "Settings" in the top right corner.
- Click on "Devices".
- Next, in the "Bluetooth" tab, click on "Pair".
- Slide down the list of devices and when you find your module’s serial number, click on it.
- After a few seconds, click on "Pair".
- Your module is now paired to your Meta Quest / Quest 2.
- The module will only “connect” once a compatible game is launched (refer to part 4.1 below).
4.1 – Native integration in games
Some games integrate the haptic device to be natively compatible.
List of compatible games (Reddit post)
You can refer to this Reddit post to see the list of all natively compatible games.
This list show which games can be played with our haptic devices without needed an external app.
It also explain which game has which feature (rifle, handgun, both-handed handguns or multi device supports).
It also tells on which platform the compatibility is supported (represented by a link to the related platform’s store).
You are invited to read everything from this post, as every information is crucial.
For PC VR users (Steam), some games have mods that allow native compatibility.
Some manipulation is required, so please refer the list of native mods (Reddit post).
These natively compatible games only need you to keep a paired module when you launch them, and it will automatically connect.
You can adjust the power and duration of haptic feedback using the Companion Application.
For more details, go to section 5.
Troubleshooting: If you cannot get a game to connect, you might have to update the library file, with a .dll extension. It is located in our Companion Application install folder. You can download it with the following link: Download the Companion App’s Git Hub If you can’t download the .rar file from the previous link:
To update the .dll:
If it still doesn’t connect, contact our Support on our website. |
4.2 – Backward compatibility with SteamVR
Other (non-natively compatible) games will work with the haptic devices if you launch them via SteamVR and use the Companion Application.
For more details, go to section 5.
4.3 – Playing with an Oculus/Meta Quest Headset
When playing with Meta Quest headset using the Quest link/Air link/Virtual Desktop, if the Steam game has an OculusVR Mode, Steam may start it by default, so you need to make sure Steam uses SteamVR:
- Find the game’s .exe file.
- Right click -> Properties -> Compatibility.
- Check “run compatibility mode” option and select windows 7.
- Check “run this program as administrator”.
- Apply the changes.
- Go to your steam library.
- Right Click -> Properties -> General.
- Write “-openvr” in the launch options.
Be sure to launch your games from SteamVR, especially if using Virtual Desktop (do not launch games directly from it).
5 – Steam Companion Application (for Windows)
The companion application allows our haptic devices to work with any games launched through SteamVR to have haptic feedback. Even those that are not natively compatible.
For more information, and how to use it, please refer to the Companion Application documentation.
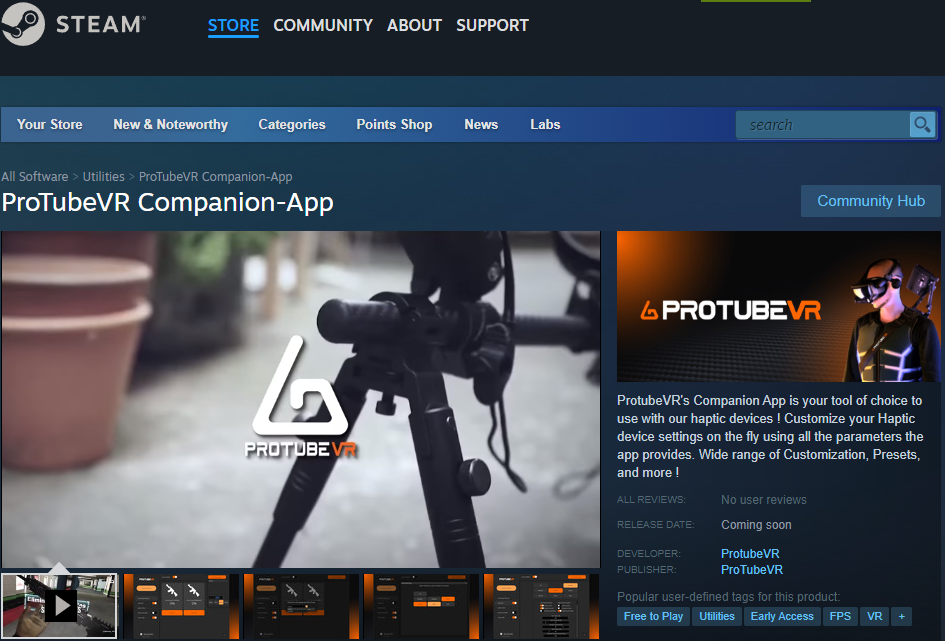
You can download the Companion Application (Steam) here.
Have fun!
Documentation Haptique
1 – Les differents périphériques Haptiques 11
4.1 – Integration Native en Jeu 16
4.2 – Retrocompatibilité pour SteamVR 17
5 – Application compagnon Steam (pour Windows) 17
6 – Mise à jour par Wi-Fi Error! Bookmark not defined.
Le ForceTube et le ProVolver utilisent la même technologie haptique, les instructions suivantes s’appliquent donc aux deux produits.
Comme le ForceTube est le produit original, tous les modules haptiques sont appelés "ForceTube" lors du couplage Bluetooth et dans l'application Compagnon.
1 – Les differents périphériques Haptiques
Assure-toi de savoir quel périphérique haptique tu possèdes avant de faire une mise à jour du logiciel. L’appareil ne fonctionnera plus si tu le fais pour le mauvais périphérique. Cela ne sera pas pris sous la garantie.
ForceTube
Explorer
ForceTube
Storm
Bouton de marche-arrêt
Port de charge
Port de charge
Bouton de marche-arrêt
ProVolver
Explorer
ForceTube
Gen2
Port de charge
Port de charge / Bouton de marche-arrêt
Il y a 2 LED dans le module haptique :
- La première, petite, est toujours rouge et signifie que le microcontrôleur du module est allumé.
- La seconde est la LED du niveau de batterie et change de la façon suivante :
- 100 à 80% : Blanche.
- 80 à 30% : Verte.
- <30% : Rouge.
- Elle clignote très rapidement (3 fois par seconde) si l’une des batteries à un niveau de charge trop bas pour alimenter le module haptique. Dans cet état, le module haptique ne fonctionnera pas et aura besoin d’être chargé.
La seconde LED clignote plus lentement (1 fois par seconde) lorsque le périphérique haptique n’est pas connecté à une application (à ne pas confondre avec lorsque qu’il n’est pas appairé à un PC/Quest/téléphone) et est stable une fois connecté.
A l’ouverture de la boite, la première chose à faire est de charger l’appareil. Il arrive avec une charge faible et il lui faut environ 7 à 8 heures pour le charger complètement*. Tu sauras qu'il est en train de charger grâce au voyant jaune/orange lorsqu'il est branché. Pour le charger, utilise le câble fourni sur le port USB d'un PC ou sur un chargeur USB de 500 mA. Encore une fois, si tu ne vois pas de LED jaune/orange lorsqu’il est branché, c'est qu'il n'est pas en train de charger et tu devras essayer une autre source d'alimentation.
Important : Tenter d’utiliser un câble USB-C à USB-C ou un adaptateur à prise mural à la place d’un PC peut résulter à la non-charge du module. Tu devrais l’utiliser comme instruit au-dessus pour que la charge fonctionne correctement !
La LED du niveau de batterie devient orange quand le module haptique est en charge. Après 6 à 8 heures de charge, ton module sera complètement chargé. Tu peux le vérifier en le débranchant (redémarre-le s’il s’éteint lors du débranchement) et vérifie si la lumière de la LED est blanche.
Nous recommandons également de recharger l’appareil tous les 5 à 6 mois s'il n'est pas utilisé activement.
En gros, ne le charge que lorsque la batterie est faible (le voyant de niveau de la batterie est rouge), afin d'éviter d'endommager la batterie.
*Une fois le modulé chargé à 100%, il est préférable de le débrancher sans trop de délai. La surcharge est le meilleur moyen d'endommager les batteries et de raccourcir leur durée de vie.
Pour utiliser le module haptique, tu auras premièrement besoin de l’allumer et de l’appairer à un système d’exploitation (Android pour Meta Quest et Windows pour PC) grâce au Bluetooth.
3.1 – Sur Windows
Si ton ordinateur n’a pas de Bluetooth, branche la clef Bluetooth fournie. Pour appairer sur Windows 10, allume ton module et assure-toi, avant tout, qu’il ne soit pas déjà connecté à un autre appareil (PC/téléphone/Meta Quest). La LED de batterie devrait clignoter.
Utilisateur sous Windows 11, merci de vérifier ses paramètres avant tout :
- Dans "Bluetooth et appareils > appareils" (Bluetooth et autres appareils>afficher d’autres périphériques) change l’option "Découverte des appareils Bluetooth" en "Avancé".
- Clique sur "Plus de paramètres Bluetooth" Et coche la case "Autoriser les périphériques Bluetooth à détecter de PC".
Utilisateur Windows 10, tu peux passer directement aux étapes suivantes :
- Ouvre les paramètres Windows.
- Clique sur "Périphérique".
- Clique sur "Appareils Bluetooth et autres".
- Allume le Bluetooth si cela n’est pas déjà fait.
- Clique sure “Ajouter un appareil Bluetooth ou un autre appareil".
- Clique sur "Bluetooth".
5
4
- (Comme mentionné ci-dessus, tous les modules haptiques sont appelés "ForceTube" sur le jumelage Bluetooth et sur l'application Compagnon).
Ton module haptique devrait apparaitre avec un numéro à côté (c’est la référence de ton module haptique).
7
- Clique sur ton module haptique.
- Attends quelques secondes le temps que ton module haptique se paire à Windows.
Dépannage : Si ton Module haptique est appairé à Windows mais n’arrive pas à se connecter en jeu ou dans l’application compagnon, cela peut être dû à un appairage du transmetteur Bluetooth du Module haptique se pairant au mauvais transmetteur Bluetooth de l’appareil (principalement un problème Windows). Le système d’exploitation Windows fonctionne en général avec un seul transmetteur Bluetooth, mais tout appareil appairé à un transmetteur et ne peut pas s’appairer à un autre transmetteur du même ordinateur. Ce problème peut arriver si tu as plusieurs transmetteurs Bluetooth ou si tu déplaces la clé Bluetooth sur un autre port USB. Windows peut rencontrer des difficultés, pensant que c’est une nouvelle clé Bluetooth même si ce n’est pas le cas. Dans ce cas, tu devrais enlever le module haptique de tes appareils appairés en Bluetooth et le réappairer. Si tu ne sais pas comment faire, voici comment :
Si tu as désinstallé un appareil que tu n’aurais pas dû, débranche-le, redémarre ton ordinateur, et rebranche l’appareil. Si tu as le bug qui vient d’être décrit, désinstalle tous les appareils avec une icône plus claire. |
Dépannage des problèmes de connexion supplémentaires : Si après le dépannage précédent tu n’arrives toujours pas à faire que le module haptique se connecte à l’application compagnon ou aux jeux, ou bien n’est pas vu par le Bluetooth afin d’être appairé, voici quelques autres étapes à essayer :
|
3.2 – Sur Meta Quest
Pour appairer le module haptique sur le Quest :
- Allume le module haptique et le Meta Quest.
- Dans le menu principal, clique sur "Paramètres rapides".
- Clique sur "Paramètres" dans le coin en haut à droite.
- Clique sur "Appareils".
- Puis dans la partie "Bluetooth", clique sur "Appairer".
- Fais défiler la liste des appareils et lorsque tu trouves le numéro de série de ton module haptique, clique dessus.
- Après un court instant, une fenêtre s’ouvre, il faut cliquer sur "associer".
- Ton module est maintenant appairer à ton casque Meta Quest.
- Le module ne se “connecte” que quand un jeu compatible est lancé (réfère toi à la partie 4.1 dessous).
4.1 – Intégration native en jeu
Certains jeux intègrent le module haptique afin qu’il soit nativement compatible.
Liste de jeux compatibles (poste Reddit)
Tu peux te référer à ce poste Reddit pour voir la liste des jeux nativement compatibles.
Celle liste montre quels jeux peuvent êtres utilisez avec nos périphériques haptiques sans avoir besoin d’application externe.
Elle explique aussi quel jeu à quelles fonctions (fusil à deux main, pistolet, double pistolets, multi périphérique…).
Ainsi que sur quelle plateforme la compatibilité est supportés (représenté par un lien vers la boutique de la plateforme en question).
Nous t’invitons à lire tout le poste, car chaque information est importante.
Pour les utilisateurs PC VR (Steam), certains jeux ont un mod qui permet de créer une compatibilité native.
Quelques manipulations sont nécessaire, tu peux donc te référer à la liste des mods natifs (poste Reddit).
Ces jeux nativement compatibles ont seulement besoin que le module haptique soit appairé au system d’exploitation lorsqu’ils sont lancés, et s’y connecteront automatiquement.
Tu peux ajuster la puissance et la longueur du retour de force du Module haptique en utilisant l’Application compagnon.
Pour plus de détails, va à la section 5.3.
Dépannage : Si la connexion entre le module et le jeu ne se fait pas, il faut peut-être mettre à jour le fichier de librairie avec l’extension .dll. Il se situe dans le fichier d’installation de l’application compagnon. Tu peux le télécharger sur le lien suivant : Télécharge l’Application Compagnon sur le Git Hub Si tu ne peux pas télécharger le fichier .rar depuis le lien précèdent :
Pour mettre à jour le fichier .dll :
Si tu n’arrives toujours pas à te connecter, contacte le Service de support sur notre site. |
4.2 – Rétrocompatibilité pour SteamVR
D’autres jeux peuvent fonctionner avec le module haptique à condition qu’ils soient lancés avec SteamVR et d’utiliser l’Application compagnon.
Pour plus de détail, va à la section 5.2
4.3 – Jouer avec un casque Meta
En utilisant un casque Meta avec Steam, si le jeu possède un mode OculusVR, Steam pourrait lancer le jeu avec ce mode par défaut. Pour utiliser l’application compagnon, il faut s’assurer que Steam utilise le mode SteamVR :
- Trouve l’exécutable du jeu (.exe).
- Clic droit -> Propriétés -> Compatibilité.
- Coche la case « Exécuter ce programme en mode compatibilité pour » et sélectionne Windows 7.
- Coche la case « Exécuter ce programme en tant qu’administrateur ».
- Retourne dans la librairie Steam.
- Clic droit sur le jeu -> Propriétés -> Général.
- Écris « -openvr » dans les options de lancement.
Sois sûr de lancer tes jeux depuis l’environnement SteamVR, surtout si tu utilises un Quest avec Virtual Desktop.
5 –Application compagnon Steam (pour Windows)
L’application compagnon permet à nos périphériques haptiques de fonctionner avec n’importe quel jeu lancé sur SteamVR d’avoir des réactions haptiques. Même si ce jeu n’est pas nativement compatible.
Pour plus d’information, et pour savoir comment l’utiliser, merci de te référer à la documentation de l’Application Compagnon.
Tu peux télécharger l’Application compagnon (Steam) ici.
Amuse-toi bien !
Companion App Guide EN
Companion App guide
for Haptic VR accessories
The Companion App creates a backwards compatibility for SteamVR and OpenVR games to our haptic devices, such as the ForceTube gunstock and the ProVolver pistol.
We call this SteamVR compatibility.
What does it mean?
1) This little software will detect when your avatar presses the trigger of your in-game weapon(s).
2) It will understand what kind of weapon(s) you are using and do some wizardry (quite a lot of maths and electrical conversion, tbh).
3) The Companion App sends a signal to your haptic device(s).
4) The device(s) will activate, replicating the recoil and rumble of what's happening on your in-game weapon(s).
What do i need?
You only need the Companion App if you are using PCVR.
If you are playing games directly on your standalone HMD (such as Meta Quest 2 and Quest 3 without PCVR link), our haptic devices are natively compatible with an extensive and ever growing list of VR games.
If you use a Meta HMD with PCVR, you need to changes the runtime. More info in the FAQ below.
Compatible games and mods
Through our collaboration with VR studios, the compatibility and calibration of our haptic devices are directly integrated into games.
This native integration does not require the use of the SteamVR compatibility feature and is present in over 60 titles across multiple platforms including PC, Quest, & Pico headsets. This list of native titles is growing continuously.
In addition to these titles, wonderful modders from the community are adding mods to enable native integration into popular games that do not. For games with such a mod, usage of the Companion App SteamVR compatibility feature is not required, just like with native titles.
For PCVR games that are neither native nor have a mod, you need to use the Companion App SteamVR compatibility feature.
For PCVR games that are native, you can use the Companion App to finetune your experience.
Check the haptic compatibilities page for more details.
Install the Companion App
1. Go on the Companion App Steam page.
2. Add the Companion App to your Steam library.
3. Install the Companion App from your Steam library, like any other game.
4. Use the created shortcut to start the Companion App.
Companion App instruction Manual
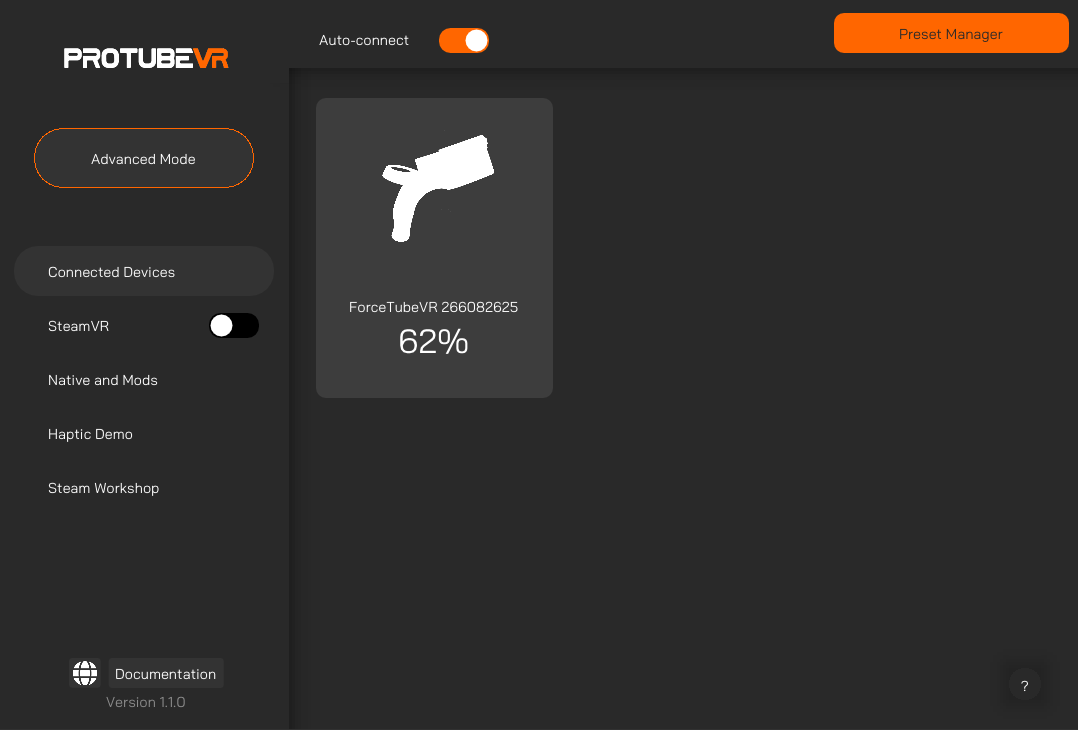
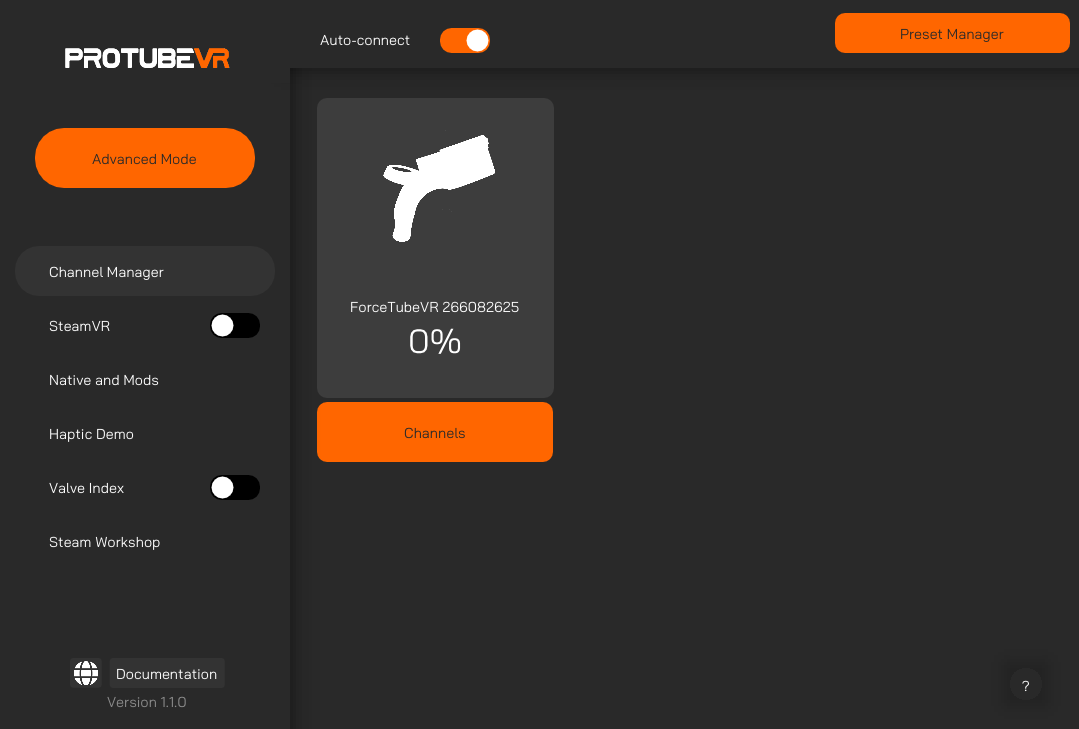
General preview
Definitions
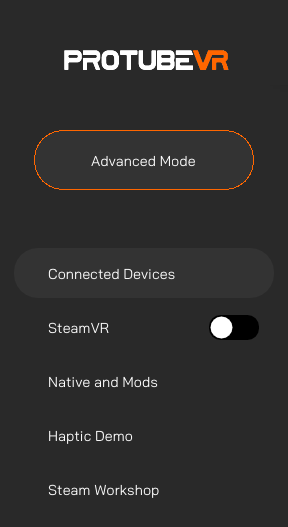
Left Side panel
Default mode
You have some tabs available by default:
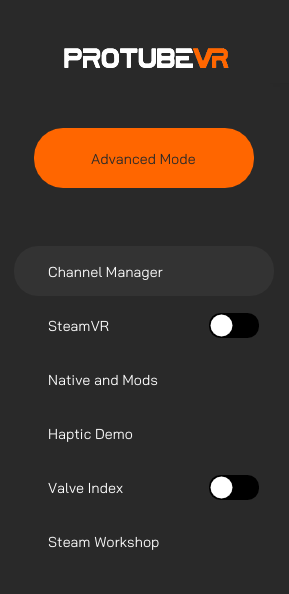
Advanced mode
Switching between modes enable/disable advanced features, like assignng custom channels to your device.
Top bar Widget
Auto-connect
The Companion application will automatically try to connect to the devices remembered by your PC.
Disable this option if you want only some devices to connect.
In advanced mode, the Stream Plugin button appears.
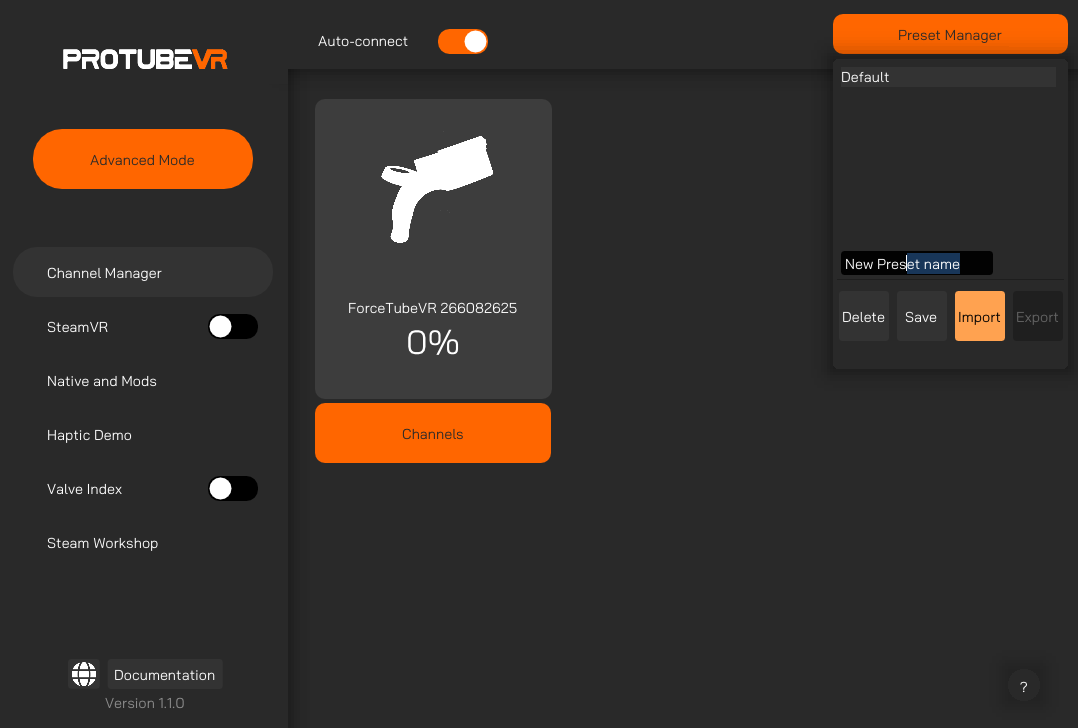
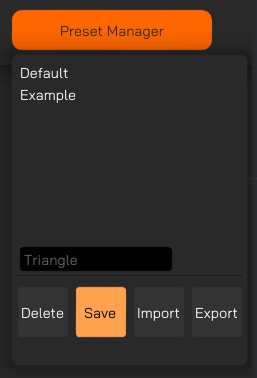
Preset Manager
When launched, the Companion App always loads on the default parameters. If you want to keep your modified settings, you must save it in a preset.
Double-clicking on a preset will load its settings.
Save: Create a new preset with the name in the black text box and saves current configs including:
Saving a setting to an existing preset overwrites it.
If you want the retrieve the default preset, close the Companion App, reopen it, and save the parameters loaded by default in a new preset.
Import: Import a configuration file. You can find shared presets from our Discord community.
Export: Export all saved configurations as a file. You can share it with our Discord community.
Delete: Delete the selected preset.
Connected devices and Channels
Default mode
This is the page you land on when you start the application. By default, you will see each connected device here.
You can click on any device card to change its type, and the application will remember which device is what.
Advanced mode
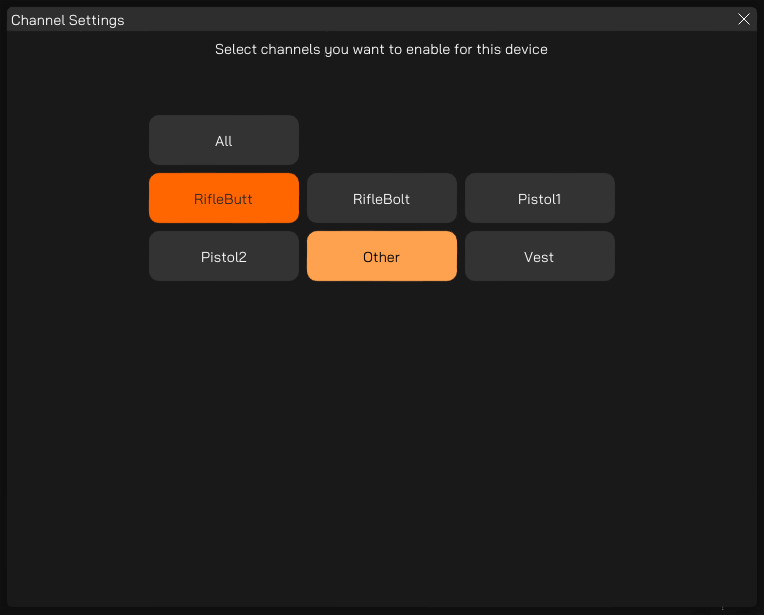
In advanced mode, you have a Channels button appearing under each device.
Clicking on this button will bring-up a menu where you can manually assign channels to your device.
It is important for some games and/or if you have several haptic devices.
SteamVR
Customize the SteamVR Compatibility Feature.
If you use a Meta HMD with PCVR, you need to change the runtime. Every step in the FAQ.
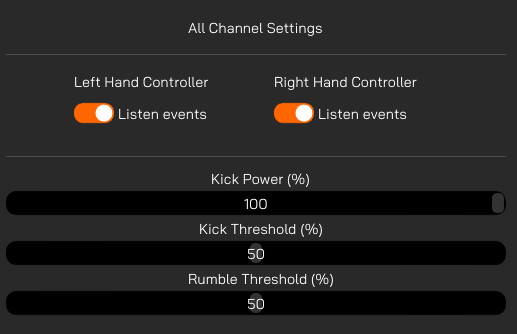
Default mode
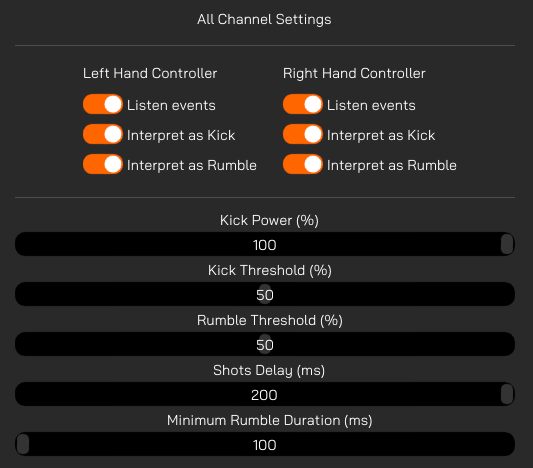
Listen Events: Whether you want your channel to react when your left/right hand triggers an haptic event.
Kick Power: Controls the kick power of your devices.
Kick Threshold: Adjust this variable to control required power for SteamVR events to trigger you device kick response. Each game has different values defined by the developers, you will have to do some testing to get a good result.
Rumble Threshold: Adjust this variable to control required power for SteamVR to trigger your device rumbe response.
Advanced mode
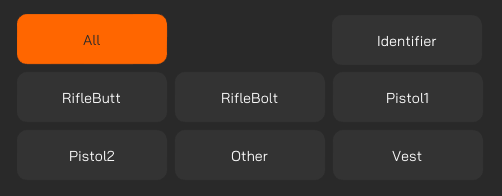
Start by selecting a channel and tweak your settings from here.
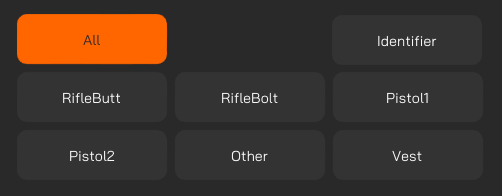
Make sure your device is in the right channel by checking in your channel manager. You can also use the "Identifier" command below.
Identifier: Sends a kick command to the selected channel.
Tips: If identifying a channel does not result in any connected device kicking, it probably means that no device has that current channel assigned. A device is considered connected if its battery displays a percentage superior to 0.
Interpret as kick / Interpret as rumble: If you want your right or left controller events being interpreted as a kick, rumble or both.
Shots Delay: Limits the reaction rate of your devices. Avoids triggering event bursts on each in-game interaction.
Minimum Rumble Duration: Controls the duration between each vibration.
Haptic demo
Default mode
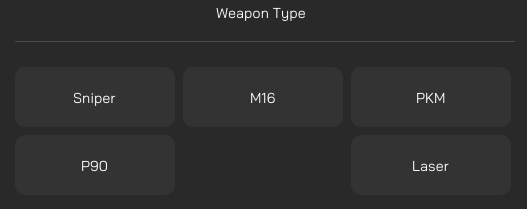
Mainly used to simulate different types of weapons.
Advanced mode
Start by selecting a channel and tweak your settings from here.
Make sure your device is in the right channel by checking in your channel manager.
Identifier: Sends a kick command to the selected channel.
Tips: If identifying a channel does not result in any connected device kicking, it probably means that no device has that current channel assigned. A device is considered connected if its battery displays a percentage superior to 0.
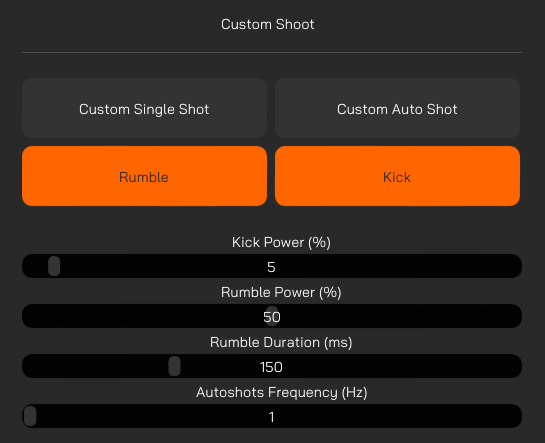
Custom Single Shot: Shoots once using specified parameters in brlow sliders.
Custom Auto Shot: Shoots using specified parameters and loops based on frequency slider.
Kick Power: Controls the kick power for demo mode.
Rumble Power: Controls the rumble power for demo mode.
Rumble duration: Controls the rumble duration on each shot. Max is 500 ms.
Autoshots Frequency: How many times per second you want to shoot with Custom Auto Shot for the demo mode.
Native and Mods
On PCVR, if you are playing a native game or a game with integration enable by a mod, you can customize your inputs.
These games do not need the Companion application to work, but it will allow you to finetune some settings if you have the need to.
Make sure to connect any desired device to the app first, and then start your game.
Default mode
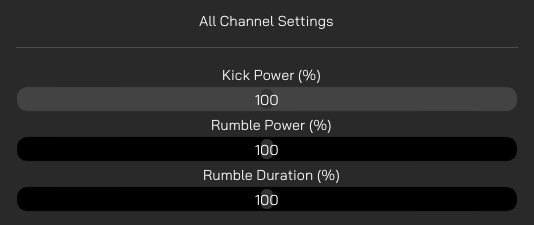
By default, your device will listen to all channels at once ensuring most of the compatibility.
For each of the below parameters, refer to this chart:
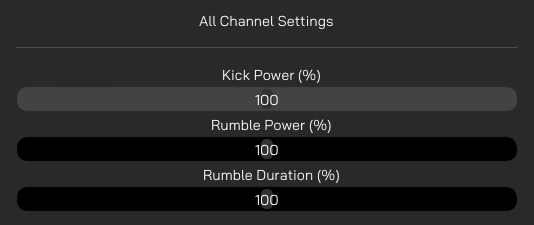
Kick Power: Controls the kick power percentage.
Rumble Power: Controls the rumble power percentage.
Rumble duration: Controls the rumble duration percentage for each shot.
Advanced mode
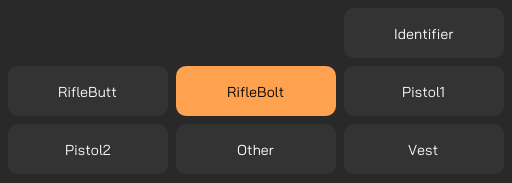
Start by selecting a channel and tweak your settings from here. This allow your devices to kick separately.
Make sure your device is in the right channel by checking in your channel manager.
Identifier: Sends a kick command to the selected channel.
Tips: If identifying a channel does not result in any connected device kicking, it probably means that no device has that current channel assigned. A device is considered connected if its battery displays a percentage superior to 0.
Special Channel Settings
Your devices need to use the correct channels set by the developers for customization to take effect.
For the following games, make sure your Haptic devices are set in the right channels when enabling Native Customization.
If a game on this list doesn't work, search and enable ForceTube settings in your game menu.
If your native or mod-compatible game doesn't appear on this list, you will have to find the used channels via trial and error.
Any game that is not native or mod-compatible will work with SteamVR compatibility.
Valve Index with Knuckles
A few players using a Valve Index HMD and their Knuckles have reported us their in-game hands fly away while shooting in long burst.
We have developed a driver to fix this.
The driver does not work with other headsets; only Valve Index might need it. If you don't own a Valve Index headset or your in-game hands don't fly away while using the Knuckles controllers with your Index HMD, you can skip this section.
Install the driver
Uninstall the driver
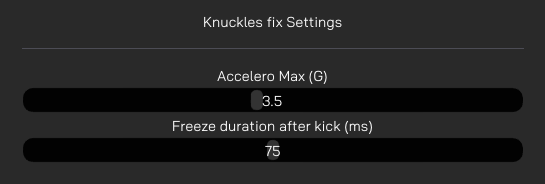
Finetune your Knuckles settings
Additional help :
Accelero Max: Limits max acceleration of your in-game hand.
Freeze Duration: How much time your hand gets frozen after a kick if it hits max acceleration.
Steam Workshop
You can download and share presets with the community with the Companion App' Steam Workshop.
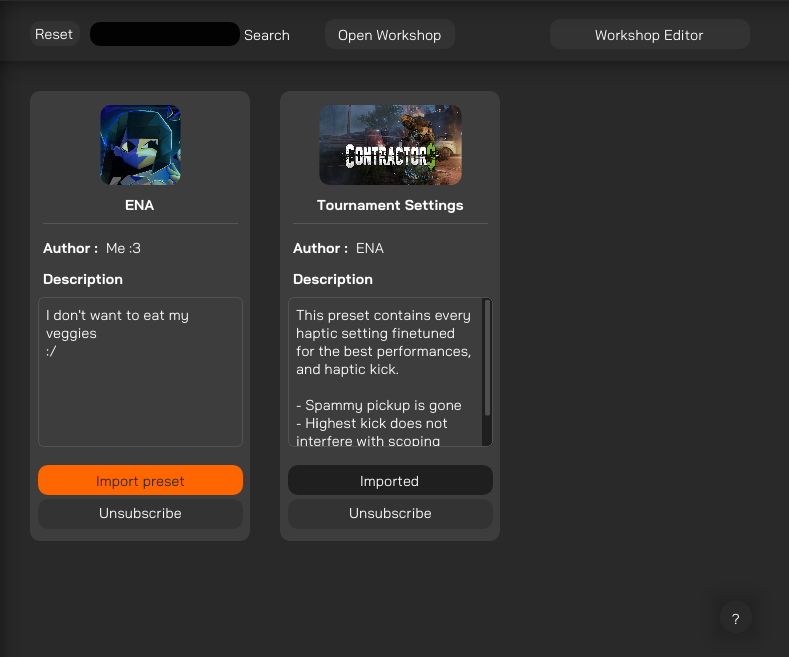
This page lists all items you’ve previously subscribed to for the Companion-app.
You can search for a specific item in your list using the search bar.
Importing presets
If you don’t have any items yet or want to open the application workshop in a single click, you can press the “Open Workshop” button.
After subscribing to an item from the steam application, you might have to restart the Companion-application to see newly added items.
To import a subscribed item into the preset manager, click the “Import Preset” button.
Your preset will be imported, and the button will change its status to “Imported”.
To unsubscribe and delete the item from your computer, click the “Unsubscribe” button.
Steam Workshop Editor
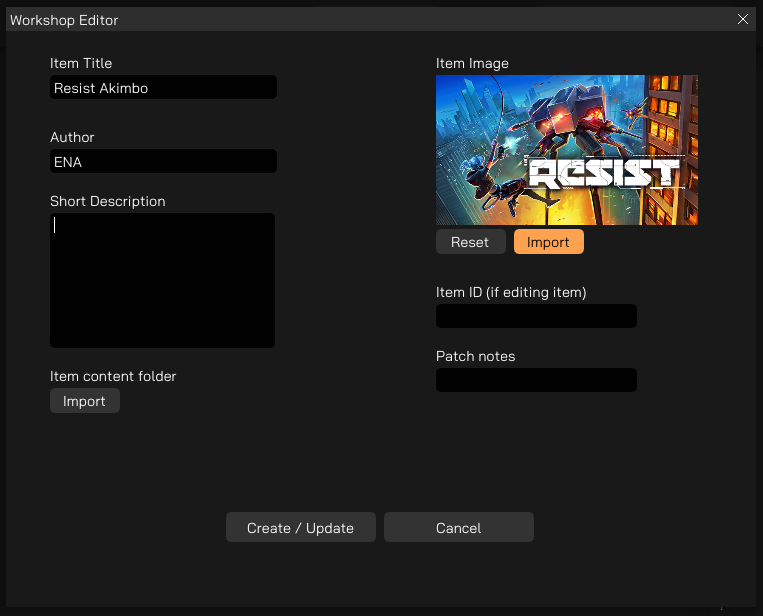
In advanced mode, you can upload your own items after clicking on the “Workshop Editor” button.
You can upload a new item every 15 minutes but if you need to modify an existing one the delay is shorter (no delay on lightweight items).
Your item can be reported and will be removed from the Workshop if it doesn’t respect Steam guidelines.
Exporting your presets
To export your presets and upload an item:
Edit existing item
If you want to edit an existing item belonging to you, you will have to specify its ID.
Your Item ID is the last numbers in the URL bar of the Steam app workshop, either web or desktop. Example: “https://steamcommunity.com/workshop/filedetails/?id=3104917878”
Patch notes: Not required but can provide useful information to users on item updates.
When you’re done, click the “Create/Update” button to upload your item on steam.
Streamers Addon
In advanced mode, the top bar contains a “Stream Plugin” button.
This feature is destined for content creators and streamers. It is similar to input overlay for gaming controllers.
With it, you show an icon of your haptic devices on your stream overlay. This icon will blink each time you use it.
You can import that browser source inside your favorite streaming software.
Then, follow the written instructions on the source.
You can change the device type by clicking on the image logo multiple times, and the channel by clicking on the button right under each device.
Once set-up, the tracked devices will be highlighted when a kick is detected.
By confirming changes, you save the current settings for your next broadcast sessions.
When you erase all, your saved configuration will be cleared.
FAQ and Troubleshooting
Guide Companion App FR
Guide de la Companion App
pour les accessoires VR haptiques
La Companion App crée une rétrocompatibilité pour les jeux SteamVR et OpenVR avec nos dispositifs haptiques, tels que la crosse ForceTube et le pistolet ProVolver.
C'est ce que nous appelons la compatibilité SteamVR.
Qu'est-ce que cela signifie?
1) Ce petit logiciel détectera lorsque ton avatar appuie sur la gâchette de tes armes virtuelles.
2) Il comprendra quel type d'armes tu utilises. C'est là où la magie opère (beaucoup de maths et de conversion électrique, pour être honnête).
3) La Companion App envoie un signal à tes dispositifs haptiques.
4) Les dispositifs s'activeront, reproduisant le recul et les vibrations de ce qui se passe sur tes armes en jeu.
De quoi ai-je besoin?
Tu n'as besoin de l'application Compagnon que si tu es en PCVR.
Si tu joues à des jeux directement sur ton casque autonome (comme le Meta Quest 2 et le Quest 3 sans lien PCVR), nos dispositifs haptiques sont nativement compatibles avec une liste étendue et en constante évolution de jeux VR.
A noter : Si tu utilises un casque Meta avec PCVR, tu dois changer le runtime. Plus d'infos dans la FAQ ci-dessous.
Jeux compatibles ou moddés
Grâce à notre collaboration avec les studios VR, la compatibilité et la calibration de nos dispositifs haptiques sont directement intégrées dans les jeux.
Cette intégration native ne nécessite pas l'utilisation de la fonctionnalité de compatibilité SteamVR et est présente dans plus de 60 titres sur plusieurs plateformes, y compris les casques PC, Quest et Pico. Cette liste de titres natifs ne cesse de s'allonger.
En plus de ces titres, des moddeurs talentueux de la communauté ajoutent des mods pour permettre l'intégration native dans des jeux populaires qui ne l'ont pas. Pour les jeux avec un tel mod, l'utilisation de la compatibilité SteamVR de la Companion App n'est pas nécessaire, tout comme pour les titres natifs.
Pour les jeux PCVR qui ne sont ni natifs ni moddés, tu dois utiliser la fonctionnalité de compatibilité SteamVR de la Companion App.
Pour les jeux PCVR avec intégration, tu peux utiliser la Companion App pour affiner ton expérience.
Installation de la Companion App
1. Va sur la page Steam de la Companion App.
2. Ajoute la Companion App à ta bibliothèque Steam.
3. Installe la Companion App depuis ta bibliothèque Steam, comme n'importe quel jeu.
4. Utilise le raccourci créé pour lancer la Companion App.
Manuel d'utilisation de la Companion App
Aperçu général
Définitions
Panneau de gauche
Mode par défaut
Par défaut, voici les options disponibles :
Mode Avancé
Le passage d'un mode à l'autre permet d'activer ou de désactiver des fonctions avancées, comme l'attribution de canaux personnalisés à ton appareil.
Barre supérieure
Auto-connexion
La Companion app essaie de se connecter aux appareils qui sont connus par ton PC.
Désactive cette option après avoir connecté les appareils pour que les suivants ne se connectent pas.
En mode avancé, le bouton Stream Plugin apparait.
Gestionnaire de Preset
Au lancement, l'application compagnon se charge toujours avec les paramètres par défaut. Si tu souhaites conserver tes paramètres modifiés, tu dois les enregistrer dans un preset.
Double-cliquer sur un preset chargera la configuration associée.
Enreg: Créer un nouveau preset à partir du nom dans la zone de texte noire et sauvegarde les configurations actuelles en incluant:
L'enregistrement d'un paramètre dans un preset existant écrase ce dernier.
Pour récupérer les réglages par défaut si tu as supprimé ou ecrasé le preset "Default", redémarres l'application et enregistre un nouveau preset avec le gestionnaire.
Import: Importe un fichier preset existant. Tu peux trouver des presets partagés sur notre communauté Discord.
Export: Exporte tous les presets dans un fichier. Tu peux les partager avec le reste de notre communauté Discord.
Suppr: Supprime le preset actuellement en surbrillance.
Appareils connectés et canaux
Mode par défaut
C'est la page sur laquelle tu arrives lorsque tu démarres l'application. Par défaut, tu verras chaque dispositif connecté ici.
Tu peux cliquer sur n'importe quelle carte d'appareil pour changer son type, et l'application s'en souviendra jusqu'à nouvel ordre.
Mode Avancé
En mode avancé, un bouton Canaux apparaît sous chaque appareil.
Cliquer sur ce bouton fait apparaître un menu où tu peux assigner manuellement des canaux à ton appareil haptique.
C'est important pour certains jeux et/ou si tu as plusieurs dispositifs haptiques.
SteamVR
Personnalise les signaux venant de la compatibilité SteamVR.
Si tu utilises un casque Meta en PCVR, tu dois changer le runtime. Chaque étape est détaillée dans la FAQ.
Mode par défaut
Ecouter événements : Si tu veux que le canal actuel fasse réagir les appareils quand ta main droite ou gauche déclenche un évènement haptique en jeu.
Puissance du kick : Contrôle la puissance de tir de tes appareils.
Seuil du kick : Ajuste cette variable pour contrôler la puissance requise par les évènements SteamVR pour déclencher un tir. Chaque jeu a des valeurs différentes définies par les développeurs, tu devras faire quelques essais pour obtenir un bon résultat.
Seuil de vibrations : Ajuste cette variable pour contrôler la puissance requise par les évènements SteamVR pour déclencher des vibrations.
Mode Avancé
Commence par sélectionner un canal et modifie tes paramètres à partir de là.
Assure-toi que ton appareil se trouve dans le bon canal en consultant le gestionnaire de canaux. Tu peux aussi utiliser la commande "Identifier".
Identifier : Envoie une commande de recul/kick dans le canal sélectionné
Astuces : Si identifier un canal n'entraîne pas de kick sur un appareil, cela veut probablement dire qu’aucun appareil n’a ce canal d’assigné. Un appareil est considéré comme connecté si sa batterie affiche un pourcentage supérieur à 0.
Interpréter comme kick ou vibrations : Si tu veux que les évènements de ta manette droite ou gauche soient interprétés en tant que Kick, Vibrations, ou les deux.
Délai des tirs : Limite le temps de réaction de tes appareils. Il évite de déclencher des salves d'évènements à chaque interaction en jeu.
Durée minimum des vibrations : Contrôle la durée de chaque vibration.
Démo haptique
Mode par défaut
Utilisé pour simuler différents types d’armes.
Mode Avancé
Tu peux accéder à la personnalisation des canaux pour la démo en mode avancé.
Assure-toi que ton appareil se trouve dans le bon canal en consultant le gestionnaire de canaux. Tu peux aussi utiliser la commande "Identifier".
Identifier : Envoie une commande de recul/kick dans le canal sélectionné.
Astuces : Si identifier un canal n'entraîne pas de kick sur un appareil, cela veut probablement dire qu’aucun appareil n’a ce canal d’assigné. Un appareil est considéré comme connecté si sa batterie affiche un pourcentage supérieur à 0.
Tir simple : Tire une seule fois en utilisant les paramètres des sliders ci-dessous.
Tir auto : Tire en continu en utilisant les paramètres des sliders ci-dessous.
Puissance des kicks : Contrôle la puissance de kick pour le mode démo.
Puissance des vibrations : Contrôle la puissance des vibrations pour le mode démo.
Durée de vibration : Contrôle la durée des vibrations à chaque tir pour le mode démo. 500ms maximum.
Fréquence des tirs auto : Combien de fois par secondes tu veux tirer avec le mode de Tir Auto pour la démo.
Natives et Mods
Sur PCVR, si tu joues à un jeu natif ou à un jeu dont l'intégration est permise par un mod, tu peux personnaliser les signaux.
Ces jeux n'ont pas besoin de la Companion App pour fonctionner, mais elle te permettra d'affiner certains paramètres si tu en as besoin.
Tu dois d'abord connecter l'appareil désiré à la Companion App, puis lancer ton jeu.
Mode par défaut
Par défaut, ton appareil écoute tous les canaux à la fois, ce qui garantit la plupart des compatibilités.
Pour chacun des paramètres, réfère-toi à ces valeurs :
Puissance de kick : Contrôle le pourcentage de puissance du kick.
Puissance des vibrations : Contrôle le pourcentage de puissance des vibrations.
Durée de vibration : Contrôle le pourcentage de durée de vibration pour chaque tir
Mode Avancé
Accède à la personnalisation des canaux pour tes jeux natifs et moddés en mode avancé. Cela permet à tes appareils de fonctionner séparément.
Assure-toi que ton appareil se trouve dans le bon canal en consultant le gestionnaire de canaux. Tu peux aussi utiliser la commande "Identifier".
Identifier : Envoie une commande de recul/kick dans le canal sélectionné.
Astuces : Si identifier un canal n'entraîne pas de kick sur un appareil, cela veut probablement dire qu’aucun appareil n’a ce canal d’assigné. Un appareil est considéré comme connecté si sa batterie affiche un pourcentage supérieur à 0.
Réglages des canaux spéciaux
Tes appareils doivent utiliser les canaux corrects définis par les développeurs pour que la personnalisation prenne effet.
Pour les jeux suivants, lorsque tu actives la personnalisation des jeux natifs et moddés, assure-toi que tes dispositifs haptiques sont réglés sur les bons canaux.
Si un jeu de cette liste ne fonctionne pas, recherche et active les paramètres ForceTube dans le menu de ton jeu.
Si ton jeu natif ou compatible avec un mod n'apparait pas dans cette liste, tu devras trouver les canaux utilisés par tâtonnement.
Tout jeu qui n'est pas intégré nativement ou par un mod fonctionnera avec la compatibilité SteamVR.
Valve Index avec Knuckles
Quelques joueurs utilisant un HMD Valve Index et leurs Knuckles nous ont signalé que leurs mains virtuelles s'envolaient lorsqu'ils tiraient en rafale.
Nous avons développé un pilote pour résoudre ce problème.
Le pilote ne fonctionne pas pour les autres casques : seul le Valve Index en a besoin. Si tu ne possèdes pas de casque Valve Index ou si tu ne rencontres pas ce problème avec les Knuckles, tu peux sauter cette section.
Installer le pilote
Désinstaller le pilote
Affiner les réglages des Knuckles
Aides supplémentaires :
Acceleration max : Limite l'accélération maximum de ta main en jeu.
Durée de gel après kick : Combien de temps ta main est gelée après un kick si elle atteint l'accélération max.
Steam Workshop
Tu peux télécharger et partager des pré-réglages avec la communauté, grâce au Steam Workshop de la Companion App.
Cette page liste tous les items auxquels tu t’es précédemment abonné pour la Companion-App.
Tu peux rechercher un item en particulier dans la liste en utilisant la barre de recherche.
Importer un preset
Si tu n’as pas encore d’item ou si tu veux ouvrir le Workshop de l’application en un clic, appuis sur le bouton « Ouvrir Workshop ».
Après t’être abonné à un item depuis l’application Steam, tu devras redémarrer la Companion App pour afficher les items fraichement ajoutés.
Pour importer un item auquel tu t’es abonné dans ton gestionnaire de presets, clique sur le bouton "Importer preset".
Ton preset sera importé, et le bouton se changera en "Importé".
Pour te désabonner et supprimer un item de ton ordinateur, clique sur le bouton "Se désabonner".
Éditeur Steam Workshop
En mode avancé, tu peux uploader tes propres items après avoir cliqué sur le bouton "Editeur du Workshop".
Tu peux uploader un nouvel item toutes les 15 minutes mais si tu modifies un item existant, le délai est plus court (aucun délai pour les items très légers).
Ton item peut être signalé et sera retiré du Workshop s’il ne respecte pas les règles Steam.
Exporter les presets
Pour exporter tes presets et téléverser un item :
Éditer un item existant
Si tu veux modifier un item publié qui t’appartient déjà, tu devras spécifier son ID.
Ce sont les derniers chiffres dans la barre URL de l’application Steam sur la page de ton item, sur la version bureau ou web. Exemple : “https://steamcommunity.com/workshop/filedetails/?id=3104917878”
Notes de Patch : Non requis, mais permet de partager des informations utiles aux autres utilisateurs quand tu mets ton item à jour.
Quand tu as terminé de tout remplir, clique sur le bouton "Créer/Modifier" pour uploader ton item sur Steam.
Streamers Addon
En mode avancé, la bar du haut contient le bouton "Stream Plugin".
Cette fonctionnalité est destinée aux créateurs de contenus et aux streameurs. Elle est similaire à l'input overlay des manettes de jeu.
Avec elle, tu affiches une icône de tes appareils haptiques sur ton interface de stream. Cette icône clignotte à chaque fois que tu utilises ton accessoire.
Cliquer sur le bouton ouvre une fenêtre dans ton navigateur.
Tu peux importer la source du navigateur dans ton logiciel de streaming préféré.
Ensuite, suis les instructions écrites sur la source.
Tu peux interagir avec le widget dans ta scène avec un clic droit et en sélectionnant l’option "Interagir".
Une fois configuré, clique sur "Confirm Changes" pour verrouiller l’interface et permettre à ta source de sauvegarder la configuration pour ta prochaine session.
Les appareils traqués seront mis en surbrillance quand un kick dans le canal associé est détecté.
Tu peux supprimer la configuration en cliquant sur le bouton "Erase All".
FAQ et Dépannage
Haptic Setup EN Test
INTRODUCTION
________________________________________________________________________________________________________________________________________________
The ForceTube and the ProVolver use the same Haptic technology, so all the following instructions are similar for both. If there are any differences, we will let you know.
Since the ForceTube was the original product, all the haptic devices are called “ForceTubeVR” on the Bluetooth menu and on the Companion app.
1 - HAPTIC DEVICES
________________________________________________________________________________________________________________________________________________
|
|
ForceTube Explorer | ForceTube Storm |
|
|
ForceTube Gen2 | ProVolver Explorer |
2 - BATTERY AND LED
________________________________________________________________________________________________________________________________________________
There are 2 LEDs inside the haptic device:
- The first little one is always red and means the module’s microcontroller is on.
- The second one is the battery level LED, it changes accordingly:
- White: 80 to 100%
- Green: 30 to 80%
- Red: <30%
- Orange: In charge
It blinks red very quickly (3 Hz) if you have a battery cell with a too low charge level to work. In this state, the module will not work and needs to be charged. - Blue: Haptic device overheat. The module will lock itself and won’t work for a while, until it has cooled down. Once the blue LED is off, you can use the module again.
The bigger LED blinks when the haptic device is not connected to an application (not to be confused with not paired to a PC/Quest/Android device) and is steady when connected.
After unboxing, the first thing you will need to do is charge your device. It is shipped with a 30% charge and takes about 7-8 hours to full charge*. You will know it is charging by the yellow/orange LED when plugged in. To charge it, use the provided cable on a PC USB port, or 500mA USB charger. Again, if you do not see a yellow/orange LED when plugged in, it is not charging, and you will need to try a different power source.
*After full charge, unplug the module without too much delay. Overcharging is the best way to damage batteries and shorten their lifespan.
Important: trying to use a USB-C-to-USB-C or an electrical outlet instead of your PC can result in the module not receiving any charge or damaging the battery cell. You should use it as instructed above for it to charge!
The battery level LED turns orange when the module is charging. After 6 to 8 hours of charging, your Haptic device will be fully charged. You can check it by unplugging it (restart it if it shuts down when unplugging) and check that the battery level LED is white.
We also recommend that you charge your device every 5-6 months if it is not actively in use.
Basically, charge it only when the battery is low (battery level LED is red), avoiding the battery cell to be damaged.
Important notice: It is best to keep the battery level between 20 and 80% to assure a longer battery lifespan. So only green battery level.
Also, it is recommended to store the module with a battery over 80% when not used for over a month. Avoiding the battery to be damaged.
3 - BLUETOOTH PAIRING
________________________________________________________________________________________________________________________________________________
To use the Haptic device, you first need to power it on and pair it with Bluetooth on your OS (Android for Meta Quest and Windows for PC HMDs).
3.1 - On Windows
.........................................................................................................................................................................................................................
If your computer does not have Bluetooth, plug in the provided Bluetooth dongle, and enable Bluetooth. To pair it to Windows 10, power your module on and make sure it is not connected to another computer/phone/Meta Quest before (the batteries level LED should blink).
Windows 11 user, please check those settings first:
- In "Bluetooth & other devices > Devices" (Bluetooth & other devices>view more devices) change the option "Bluetooth devices discovery" to "Advanced".
- Click on the "More Bluetooth settings" and check the "Allow Bluetooth devices to find this PC" box.
Windows 10 user, you can skip to those following steps directly:
- Open the Windows settings.
- Click "Devices".
- Click "Bluetooth and other devices".
- Turn on Bluetooth if it isn't done.
- Click "Add Bluetooth or other device".
- Click "Bluetooth".
- (as mentioned above all the haptic devices are called "ForceTube" on the Bluetooth pairing and on the Companion app.) Your module should appear with numbers aside. It's your module's ID.
- Click on your ForceTube.
- Wait a few seconds while your module is pairing to Windows.
Troubleshooting:
If your Haptic device is paired on Windows but cannot connect in games or the Companion Application, it may be due to a pairing to the bad Bluetooth transmitter (mainly Windows problem).
Windows OS usually works with one Bluetooth transmitter, but all devices ever paired to one transmitter cannot be paired to another from the same computer.
This problem can occur if you have different Bluetooth transmitters installed or even if you moved your Bluetooth dongle to a new USB port and Windows had difficulties recognizing it, assuming it is a new Bluetooth dongle even if it isn't.
So, you should try to remove the ForceTube from your Bluetooth devices to pair it again.
If you have difficulties to remove it:
- Go to your Device Manager.
- Click on "View".
- Click on "Show Hidden Devices".
- Open the "Bluetooth" tab.
- In this "Bluetooth" tab, uninstall all unconnected devices (they have lighter icons) by right-clicking them and selecting "Uninstall device" and restart your computer.
- Once done, try to pair again your module on Windows.
If you accidentally remove a device, you should not, try to unplug it, restart your computer, and plug it again.
If you have the bug just described, uninstall all lighter icons devices from the Bluetooth tab.
Additional Connection Troubleshooting:
If after the troubleshooting steps you still cannot get the haptic device to connect to the companion app or games, or perhaps to be seen by Bluetooth to pair, here are some more steps to try:
- If you have an Android phone:
- Download the APK on our GitHub.
- Install the ForceTube’s Android application APK on your phone.
- Try to pair the haptic device to your phone (like a normal Bluetooth device) with the application.
- If you see it and the module is pairing, then the problem is somewhere on your computer.
- If it still does not connect, contact our Customer service on our website.
- If the problem is on your computer, the first thing to check is the Bluetooth dongle.
- If you were using one you already had, try uninstalling it and using the provided one.
- If you were using the provided dongle, try uninstalling it, restart your computer, and reinstalling it on different USB ports.
- If after trying various USB ports it still does not work, then the issue is likely the Bluetooth dongle. Contact our Customer service on our website to have your Bluetooth dongle replaced.
- Alternatively, simply acquire another Bluetooth dongle to test. It must be 4.2 Bluetooth compatible or less.
3.2 - On Meta Quest
.........................................................................................................................................................................................................................
To pair a haptic device on Meta Quest:
- Power on the module and the Meta Quest. The haptic module’s battery LED should blink.
- On the Meta Quest, access the Bluetooth settings.
- Start the process of pairing a new device and look for the device named “ForceTubeVR #######”.
- Your module is now paired to your Meta Quest standalone HMD.
- At this point, the module’s LED will continue blinking, showing that it is not connected.
- The module will only “connect” and have a stable LED once a compatible game is launched (refer to part 4.1 below).
4 - PLAY
________________________________________________________________________________________________________________________________________________
4.1 - Native integration in games
.........................................................................................................................................................................................................................
Some games integrate the haptic device to be natively compatible.
List of compatible games (Reddit post)
You can refer to this Reddit post to see the list of all natively compatible games.
This list show which games can be played with our haptic devices without needed an external app.
It also explain which game has which feature (rifle, handgun, both-handed handguns or multi device supports).
It also tells on which platform the compatibility is supported (represented by a link to the related platform’s store).
You are invited to read everything from this post, as every information is crucial.
For PC VR users (Steam), some games have mods that allow native compatibility.
Some manipulation is required, so please refer the list of native mods (Reddit post).
These natively compatible games only need you to keep a paired module when you launch them, and it will automatically connect.
You can adjust the power and duration of haptic feedback using the Companion Application.
For more details, go to section 5.
4.2a - Backward compatibility with SteamVR
.........................................................................................................................................................................................................................
Other (non-natively compatible) games will work with the haptic devices if you launch them via SteamVR and use the Companion Application.
For more details, go to section 5.
4.2b - Playing with an Oculus/Meta Quest standalone Headset
.........................................................................................................................................................................................................................
When playing with Meta Quest headset using the Quest link/Air link/Virtual Desktop/Steam Link, if the Steam game has an OculusVR Mode, Steam may start it with this mode by default, so you need to make sure Steam uses SteamVR (OpenVR):
- Find the game’s .exe file.
- Right click -> Properties -> Compatibility.
- Check “run compatibility mode” option and select windows 7.
- Check “run this program as administrator”.
- Apply the changes.
- Go to your steam library.
- Right Click -> Properties -> General.
- Write “-openvr” in the launch options.
Be sure to launch your games from SteamVR, especially if using Virtual Desktop (do not launch games directly from it).
5 - STEAM COMPANION APPLICATION (FOR WINDOWS)
________________________________________________________________________________________________________________________________________________
The companion application allows our haptic devices to work with any games launched through SteamVR to have haptic feedback. Even those that are not natively compatible.
For more information, and how to use it, please refer to the Companion App documentation.
You can download the Companion App (Steam) here.
Have fun!